

can you tell what it is?
it's my three most recent quilt top finishes fully sam'iched (backed and basted), ready for quilting.

they've been added to the last pile of backed and basted quilts i put together not too long ago, bringing my total of "needs to be quilted" projects to eight.
to some quilters, this might seem like a tower of pressure and a lot of behind-ness. but not to me. i've discovered in the last few years (here and here) that i rather like batch processing quilts through the post-piecing-a-flimsy stage along to a finish. it works really well for my "start all the quilts" mentality. piece a whole bunch with abandon for a while, then finish them off all together.
this time around, i've realized that it is actually helpful to my quilting skills to do more than one quilt in a row. when i only bust out the walking foot or fmq for one quilt at a time, i feel like i'm just getting in the groove of it again when i'm suddenly done. then i don't do it again for several months and i'm back to relearning as i go again.
not this time.
let's see what i got done in one week. not only did i complete most of that stack, i had several learning moments and realizations along the way. it's a lot of quilting and a lot of information! maybe you just want to scroll the photos and get a general idea.
first up, was my original treehouse crossroads quilt. i looked at several of these online to see how others quilted them. i was partially inclined to figure out how to do a citrus peel (aka dogwood) pattern on the rectangles, but i couldn't decide how that would work with the roads and squares. i was also partial to handquilting this, which looks so great. but i am already a few years behind on those projects and didn't want this quilt to have to wait forever to be finished.
so i went with easy.
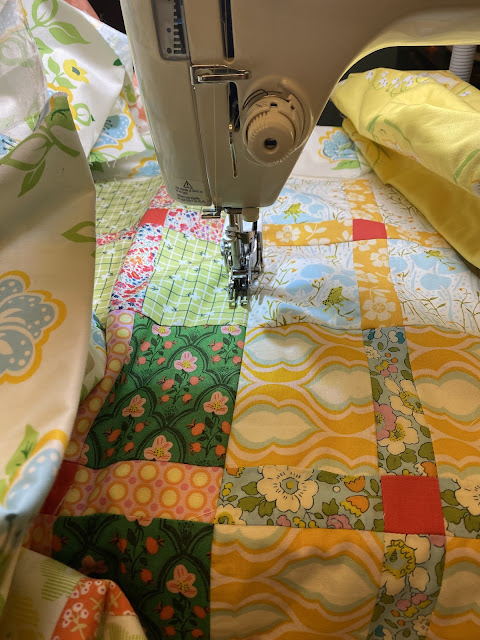
i echo quilted along the block-joining seams and outside the road strips. it's a medium density choice, which leaves the quilt pretty sturdy, but also soft and drapey.
and even though the walking foot requires me to sew on the turtle, it was really fast!
except when this happened ...

the walking foot (or, as juki calls it, even feed foot) broke.
well, that was unexpected.
and completely inexplicable. nothing happened to signal a problem. earlier on i did have one of those moments where the bobbin case isn't fully inserted correctly and the needle won't go down, but i quickly readjusted and moved on. well into the quilting, i look up and see that the bottom prong on guide fork part of the foot is completely bent down. it literally looks like it was made this way. it's not thinned at all, nor was it hot. it doesn't look warped. it's just pointed down now instead of being parallel with the upper prong like it should be.
how could this happen without making a noise or parts exploding everywhere? i spray basted this quilt, so it's not like i hit a pin or anything, which my machine has always taken in stride, anyway.
it's a complete mystery!
i've contacted juki and we're in talks because this was a very new walking foot, purchased less than a year ago, and has only been used twice before.
it's a good thing i had a spare since our household now owns three juki quilting machines. i was able to walk my way through to a finish of the first crossroads and move on to the low-volume crossroads quilt right away.

i zipped right through the quilting and had it finished in a day.
shortly after completing these two, i came across the ideal quilting pattern for a crossroads quilt! it's handquilting and it's perfection. see it here on instagram. i love it so much! i still have one more treehouse crossroads quilt in the works, so maybe i'll try this on the next one.
but as for the quilts i'm quilting right now, here's what was next:

this was my original idea when i quilted my first liberty + crossweave quilt, but after putting the first few lines of machine stitches in, i decided i didn't like it.
this is also where i started to have needle issues. (honestly, it might have happened once with the 1st quilt, but i can't remember for sure. this is definitely when i started taking photos.) i know i don't change my needles as frequently as is probably prudent, but i don't usually have problems. one snapped completely out of nowhere. coincidentally, the bobbin was empty. i changed it and moved on.
now i've changed my mind again because of practicality and wanting to increase the stability of our beloved sunday church lap quilts.
but back to my quilting marathon.
i was done with the walking foot and moved on to fmq, which was a little scary since i haven't done it in a while.

i started with "aunt bet's mother's day quilt."
and here i came to terms with something about myself as a quilter: when it comes to the multitude of skills involved in making a quilt, the quilting part is not my strong suit (wheelhouse? i keep hearing that term lately).
i still think it's so confusing that we call the collective process of making a quilt "quilting," and call the part where we stitch the layers together "quilting," as well.
but here's what i realized about myself;
i heartily admire people who can do intense, varied, fantastic quilting. i think it can add so much to the beauty and style of a quilt. i own a few books on the topic, about both walking foot and fmq methods. i like quilting my own quilts and have no desire to outsource this part of the process.
all that said, i'm also not very skilled or creative when it comes to the quilting part. right now, i don't want to put the time in to improve. currently, i'm competent at about three patterns. i have zero desire to up my game here.
and i'm totally okay with that.
i'm owning this about myself and my quilting.
at first i was feeling a little embarrassed about this, then realized it's completely fine. i can be myself, which means basic & mediocre at quilting, and still make quilts i love. i don't have to do it all and be amazing at all the parts. my quilts won't be known for their lovely feathers or fantastic curves or fancy script.
alright.
i've made my peace with myself about where i stand on quilting and can get back to it.
i also recalled that on previous projects, once washed and crinkled, a lot of the minor flaws disappear.
thank goodness.

this is when i decided to do simple modern loops on "aunt bet's." i'v done them before and the quilt had a lot of existing horizontal lines, so marking would be minimal. although i decided later i should have marked more. i now know i like my loops to be between 1" - 2" high and should take the time to mark accordingly. there are a few rows on this quilt that are too high for my preference. they get lanky and strange looking, lose their pleasant proportions. so from now on, i mark!
i learned before that i definitely like to have the center line marked, and now i know about my personal height preferences, too. marking a quilt for quilting is one of those time-consuming, used-to-feel-wasteful parts of the process that i now accept and just do. (like trimming hsts and, occasionally, pinning.)
i did the non-interlocking/non-overlapping loops in rows horizontally across the quilt, and i'm happy with the results. it looks pretty good on the back all together in a photo. nothing to see here when passing on a galloping horse, as my aunties say, so we're good. denser would have been more crinkly, but i wanted to maintain drape. this is a happy medium loop.


this is also when i got to try out a super-cool (really, it's the best thing ever) method i'd just seen on IG for burying thread ends. you use a contrasting thread to pull the ends into the quilt for burying. pure genius! see the demo here. jackie gillies is pretty brilliant. for added security, since there is no knot, i like to reinsert the tails at a new angle at least once, preferably twice. and when i start sewing the new thread again, i sew over the last few stitches where the other thread ended.
i now keep a needle loaded with red thread permanently in my pin cushion for this purpose. i've reused the same thread over several quilts and it's going strong.

i got nearly done with these loops before i sewed the corner of the backing to the quilt. haha. i haven't done that in a long time, but i've done it plenty. it's one of my more common "home ec moments."

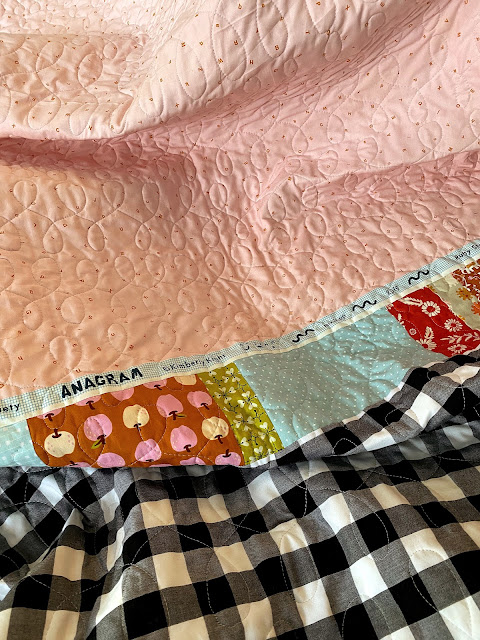
for the record, i used a light silvery blue thread for this quilt, aurifil 2846, solely because it was already on the machine from when i quilted "liberty holly hobbie quilt" together. fortunately, it also coordinates well with the palette. i like to keep track of my thread choices in case i need to know in future, and since i can never remember without recording it.
i started "aunt bet's" around 7:30 in the morning and, even with stopping for all the things all day, was done by dinner time. modern loops are wonderfully fast. (note: denyse schmidt calls this quilting pattern "modern loops" in her book "modern quilts, traditional inspiration" and you can see a beautiful example of them on the cover. i've also seen this pattern referred to as "wishbone" or "figure eights," and "ribbon candy" is also closely related.)
are you still here?
good. i'm still quilting!

it might sound like i just copied my previous choice, but they actually turned out quite differently, as you'll see.


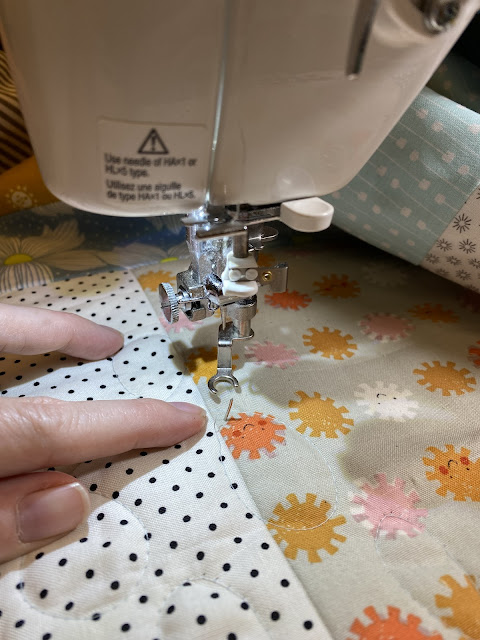
i was moving through quilts fast and not taking time to clean out the machine as well as i normally would. this is bad because fmq make a ton of fluff and fuzz. just look at the needle and foot area. i was getting oil spots on the quilt in a few places because all that fuzz collecting there attracts oil, and then rubs against the quilt when it brushes past.
something about the bobbin running out of thread seemed to be causing the needle breaks, and since this quilt was needing a bobbin replacement after every two rows of the denser quilting, it was getting old fast.

i gave up for the evening - two quilts in one day was a lot anyway.
in the morning, i tackled it again and finished up "melonaide brightside," then moved on to my scrappy strings fall quilt.

and had the same issue. ugh.
at this point, i made two shot-in-the-dark decisions:
- clean the machine & bobbin again whenever i changed bobbins
- be very careful and intentional about replacing the bobbin properly.
it worked. or at least i had no more problems from there on out.

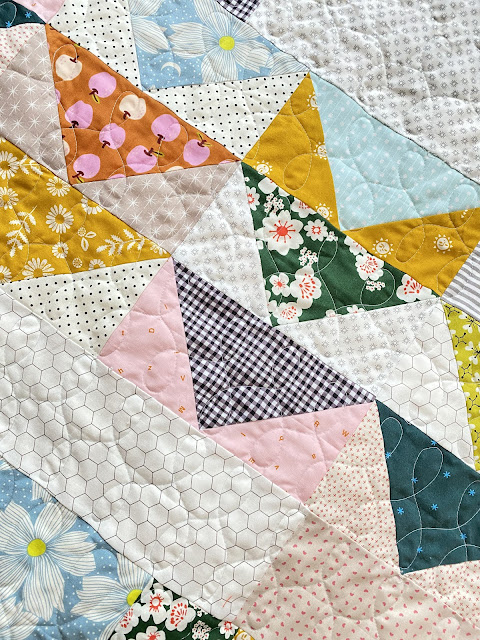
i was feeling like i could do something a bit beyond loops at this point and tried to freehand a sort of leafy vine pattern running in vertical columns like the strips. there is a similar doodle i used to do in school all the time, which is what i had in mind for this.
it sort of worked.

the strips in this quilt aren't of equal widths, so a few times i got off course when trying to guess where my line should be going. when starting a new column, i would just move a handspan over from where i had previously started. it mostly worked, but marking the quilt would have been a lot more accurate. always mark the quilt! it's worth it.

and that's how i quilted five quilts in one week.
binding is one of my favorite parts of the quilt process.
i can't wait to get these trimmed and worked up!
(of course there are still two from that first pile i didn't get to and another one from before that. shh!)
so maybe i need to put my quilting gloves back on for a few more days.
No comments:
Post a Comment
a kind word is always appreciated. thank you for your visit.