Friday, November 13, 2020

my flocks


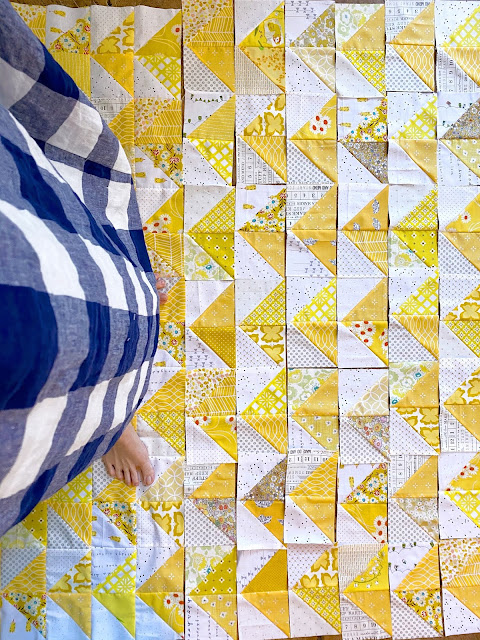
It’s Fall, have you been hearing the geese call? They actually began calling me this summer when I saw a few compelling sunny yellow quilts and decided to make a scrappy yellow quilt of my own with HSTs in a flying geese formation.


My yellows felt very fresh and cheerful, unlike the sunny Summer weather, which was just plain horribly hot. I stuck to buttery, lemony, and very slightly gold tones for my fabric picks. It gave me exactly the impression I was going for. 


I included some really special pieces in just small amounts, mixed in with many blender prints. I finally broke into my Heather Ross stash, which I hardly ever touch! I love her prints and buy them frequently, but I rarely use them  most are novelty prints and I have a hard time mixing them in with my usual picks. However, in this scrappy quilt, they blended perfectly, even the funky ones like the honey bears and those newspaper hats. I’m beginning to get a feel for how to use them, so I think they will be showing up in my work more.


I even splurged on the backing by using a large piece of the Sleeping Beauty print. Unfortunately, I didn’t include the selvage like I meant to. No big loss, but it’s a touch I like to add when I can. I also used up the hats and bears on the back because I wanted to use them in a place I knew they worked and I would like them. I think they make a whimsical surprise on the back that will be fun to discover when using the quilt.

This quilt is all quilted up now. I used the HST squares as a grid for doing an orange peel FMQ pattern. I like how it adds curves to contrast with the angles. I've even got a binding made for this project, but as I have 5 other quilts that need binding completed, I'm thinking these geese won't be in use til after Winter, and that's just fine. The sun will come back out in Spring when it should.


But the geese aren't all hibernating just yet. Early last year I was pondering and lamenting over a lot of my early-on fabric purchases made in the excitement of discovering quilting, and trying to decide what to do with a pile of half-yards I had rashly acquired.  I decided to mix in coordinates from stash, some solids, and make a bunch of geese. These are true flying geese blocks, 4"x8" geese, made with the bloc-loc ruler. I'm using the squares-and-rectangle-trim-and-flip method, so I'm also get loads of HSTs as I go.

I'm getting so many geese out of the yardage I have that I decided to break it into two quilts: one warm, one cool-toned. I made a few early on this year, and the project fell to the wayside. But then my longtime quilty friends Rachel Hauser of Stitched in Color and Lucy Brennan of Charm About You organized a Fall Flying Geese sewalong called "Geesey Geesey" (which my brain misread as "Geesey Geese" for several weeks, haha.)

Rachel has a pattern for her no-waste method and all the info for constructing a flying geese quilt in three different styles. She's a master teacher, so if you'd like to give geese a try, go learn from Rachel. I already had the project underway and was using the ruler, so I'm using the quilt along mainly for motivation to complete these projects. 


I'm calling the cool-toned quilt Olmstead's Geese as I was listening to Genius of Place, a biography of Frederick Law Olmstead when I began the quilt. The greens and blues remind me of his parks and landscape design career. (Such an interesting book, by the way, if you like historical figure biographies. I'm a huge Biltmore and Central Park fan, so it was right up my listening alley.)


the warm-toned quilt has been dubbed Grellow Garden Geese because of the heavy use of "grellow" (greeny-yellows and yellowy-greens) colors in the quilt. I'm using this floral as the inspiration print to guide the additional fabric selections. There are many golden "grellows" in the palette, as well as very light yellows and some spice browns. It's definitely a departure from my usual palette choices: very Fall feeling and with an almost ugly vintage 70's vibe. I imagine you could dig it up out of a chest in someone's attic.


These were some combinations I began with.


I'm currently in the process of adding in the browns from the inspo floral print. I can't say I love any of these on their own, but I'm hoping it all plays nicely when it's done.

So there you have my flocks, flying geese quilts for at least two seasons.

Thursday, November 12, 2020

fall paint lake


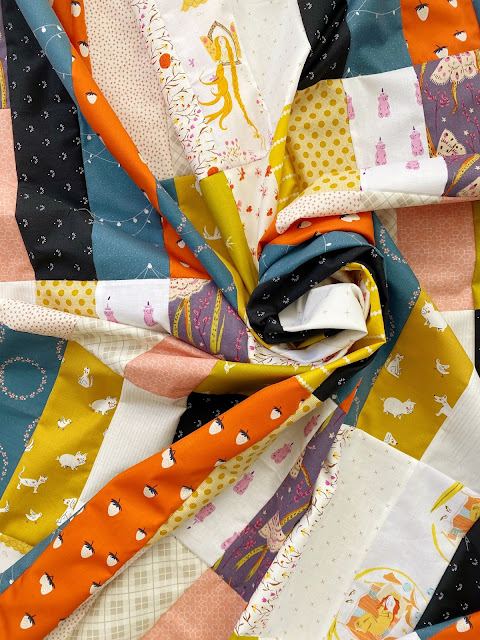
A few months ago I wanted a bit more of the yellow Sleeping Beauty Heather Ross print, which I found on Etsy. While I was ordering, I got a few more half yards to build my stash and help justify the shipping cost.

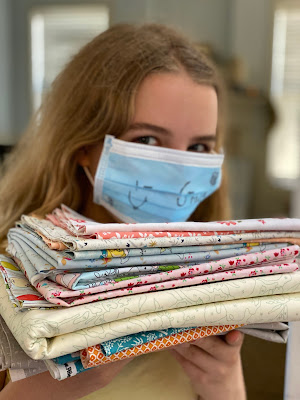
When the package arrived, I was super busy and set it aside, not opening it for a few weeks  (As a fabriholic, that’s pretty busy!) When I did open it up, I’d completely forgotten what I’d ordered and was so surprised to find this beautifully coordinated Fall bundle, accidentally curated by me! I took out the green floral print and light blue Rapunzel, but I thought the rest went together really well. I set it aside until I could decide what to make with it.

Up to this point, I have not been a seasonal quilter in the sense of making quilts with the colors or theme of the current season.  But I find I am leaning that way more all the time. When it’s Summer, I want to use summer colors. By the time we’ve moved into Fall, I don’t want to work on those summery quilts anymore - I want something reminiscent of Autumn. Many of my quilts don’t fall into a seasonal category, and I’ll work on them whenever. But lately I have definitely been feeling the pull of the season in my quilting.

 
Recently, I got a weekend to devote a large amount of time to quilting. I was working on flying geese from that really old stack of Origins fabrics in my stash, playing along beside Rachel Hauser and Lucy Brennan, two longtime quilty friends, in the Geesey Geesey quilt along. I was churning out those geese and the accompanying leftover HSTs for hours on end, making great progress. During that project, I kept passing by that stack of fabric above.

Finally, I couldn’t take it anymore. I needed a break from geese and their color palette. I looked at all my saved posts on IG and decided to make a Paint Lake quilt with my fabric stack. I cut it all out and assembled the majority of it in one evening, finishing up in the morning. It was soooo easy and very satisfying. 

I did have to add in more prints (mostly low-volume) to get the right number needed for the pattern, but I think I managed to keep the feel of the original stack quite well.

Completing the top got the urge out of my system. I have no idea what to back it with, but I’m in no hurry at the moment. That’ll come in time. I’m just really pleased to have made the top so effortlessly and satiated my need to work with that stack of fabric.

Wednesday, September 16, 2020

summer fields in a quilt


back in june, i had this idea brewing in my head about a summery version of the collins quilt. i think it was the navy blue strawberry print from cotton + steel that set me off. in the collins quilt, i'd used the gold version of that print and when i was looking at the navy colorway one day, i began to imagine a different color palette for the same layout. i have a soft spot for strawberry prints, which compels me to collect them, but i rarely use them. so i wanted to pair some of my strawberry prints with coordinating blenders in the "coins and cash" layout, using a green for the background color/cash sections. I chose kona's grass green; it's a nice fresh green color that also has a certain bit of muted softness to it which prevents it from being too loud or bright (although it tends to photograph on the bright side).


I sorted my fabric pulls into 4 color groupings that made putting the coin stacks together in a pattern easy: dark blue, red/strawberry print, low volume, lighter blue.

for some of the prints, I didn't have quite enough pieces to be in each of the 13 coin blocks required for the pattern. in these instances, I substituted another print from the same pile. I like this because it makes the quilt follow a pattern, but also have some surprises in it so it's not completely uniform.

in the end, I had a total of 4 combinations of coins in this pattern, which made placing them in the quilt layout very easy. each row in the quilt has either 6 or 7 coin blocks, so I simply rotated through the piles of the 4 sets, picking up in the next row with where I left off in the rotation from the previous row. when I don't follow a pattern for assembling blocks in a scrappy quilt like this, I end up playing a lot of fabric sudoku when trying to lay the quilt out as I try to spread the prints out somewhat evenly. not having that be an issue this time made putting the quilt together very fast.

except that I chain pieced all the coins with a green cash block before assembling the rows.

this was a problem because I wanted to alternate the dark blue being on top every other coin block and I had pieced them all with the light blue being on top every time. ugh. I had to unpick half the blocks in order to assemble everything the way I wanted.


I did have one other little "home ec moment" - on this one block I accidentally picked up two of the red pieces, which were stuck together back-to-back, when sewing them together, so I had a right side facing out on both sides of this block. nothing a little unpicking and resewing couldn't correct. but it was a first for me doing this particular trick.


 this one is now backed, basted, and sandwiched, waiting for quilting.

it's such a fast, easy make. I did the cutting in short spurts of time throughout the week, pieced all the blocks on Friday evening, and had the full top pieced together by lunch on Saturday. if I hadn't needed to unpick and resew half the pairings, I would have had it done sooner and possibly quilted by Saturday night. this next weekend I should be able to get some modern loops quilted so this one is ready to bind.

i'd like to use this layout again and explore some color play in it a little more.

i'd also like to share the pattern formula at some point. 
it's such a simple, basic layout that i'm sure it's been done before. I can't imagine it's an original idea, although I don't remember seeing it anywhere myself. because it consists of 4 stacked "coins" (4 - 2.5"x4.5" cut coins making a 4.5"x8.5" cut block) paired with a solid block (4.5"x8.5") that reminds me of a paper bill, which i'm dubbing the "cash" block, i'm referring to the layout as "coins and cash." I had thought of something like "fields and pastures" or something that referred to it looking like cultivated rows offset by open pastures, but as the "coins" are actually a thing in quilting, i'm going with "coins and cash."

Friday, July 3, 2020

twin-ish finishes


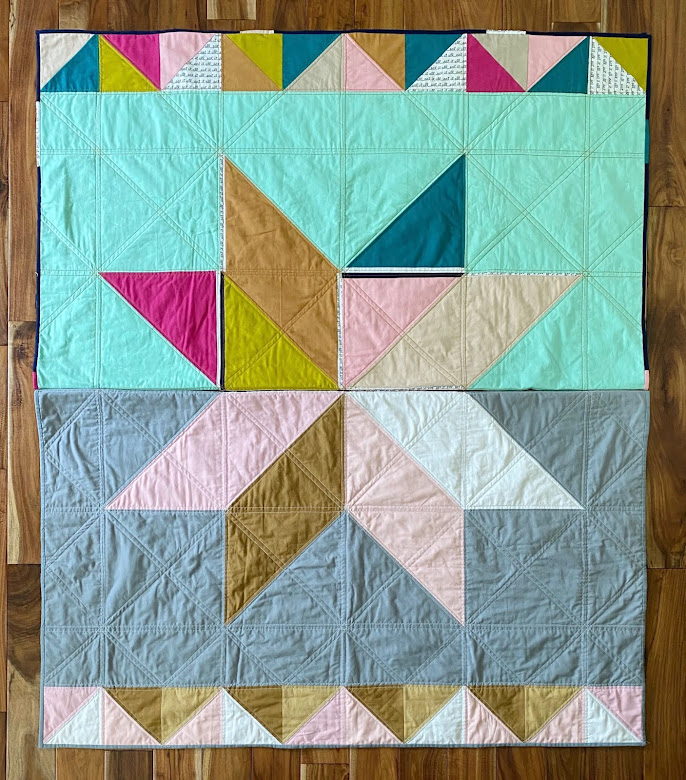
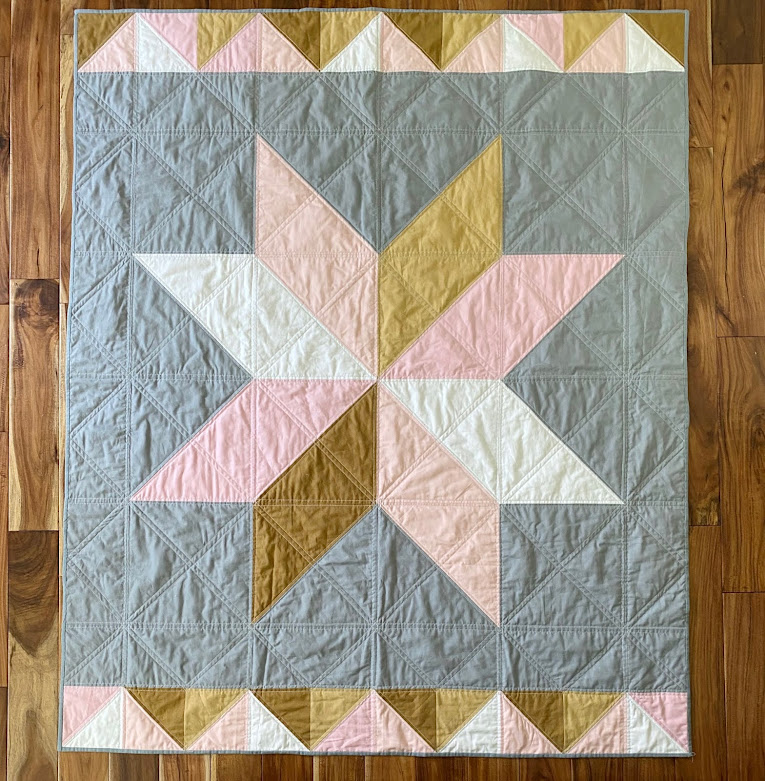
The last two Stella Grande quilts for my children have been officially completed. Why it took soooo long to finish them up is a mystery to me  I love handbinding! It should be easy for me to fit it in even my busy life. Regardless of all that, Étoile de Patisserie and Neapolitan Sundae in Pewter, the two dessert theme named quilts, ces fini.


Baby Girl D5 has her gentle, soothing color palette quilt to snuggle. The sweet, pretty colors in this one make me smile softly whenever I see it.


D2 has her bright and cheery star for lounging with. The candy colors in this one evoke more of a happy grin from me.

At some point I’ll have to fully photograph and post about each. For now, I’m just so happy to have them done and handed over to the girls.

Saturday, June 20, 2020

covid quarantine era quilting


My goodness, the world has certainly turned upside down since I was last in this space. For a lot of people, quarantine in the Covid Era seems to have meant lots of project time and profuse productivity. Not for me. But I have had a few bouts of quilting time over the last few months. Here’s the update on my quilting during Covid so far. 


I finally got myself into gear and unpicked a lot of tension-issue problems on this Étoile de Patisserie quilt for my 2nd daughter. That was a nasty chore that had me avoiding a finish for several months. Once I got the messy stuff removed, I was able to requilt those areas. Soooo much knot burying. Glad that’s behind me!


Then I finally quilted this other Stella Grande quilt called Guys and Dolls. More Aurifil 12wt chunky big stitch machine quilting for this one. 


While my husband spent some time camping with our youngest daughter in early June, I got to spend some quilting time at home with D4. She pieced her first project in a long time - her first baby quilt in a basic 4 square pattern. We enjoyed working in tandem after I rearranged my sewing area to accommodate a second machine.


I was on a quilting roll at this point and got Cheery (Easter) quilt echo quilted around all the boxes. I’d like to add some handquilting to this one, too. 


This Fall Log Cabin quilt also got some quick, zippy straightline quilting In chunky Aurifil 12wt. I chose Brass (top color), of course, because it seems to go with everything. 


My coins quilt, which I’ve named “Collins” after the design inspiration Megan Collins, was a quick and easy quilting finish in modern loops. Oh, I do love this one.


D4 had so much fun working on that baby quilt that we took advantage of a sale at our local shop and got her some more fabric for another baby quilt and a few stash items. I’m happy to see this girl sewing again. She used to be my quilt buddy, always helping me with anything she could do. Her interest waned for a while and her younger sister stepped in as my quilting companion. It’s nice to have her around the sewing room again. 


Once I got quilting, there wasn’t any stopping me. I knocked out a bunch of straightline quilting for my Guys and Dolls Improv quilt, adding my 5th quilt to the Ready To Bind Pile. I used several colors of thread on this quilt, which shows up nicely and makes for interesting effects in person. If you look closely, you can see a thread I laid out on top of the blue and pink squares on the left; same thread, different look depending on the color its with. And on the right you might notice the white thread that shows up clearly on the navy square but basically disappears in the stripes. It worked that way over the whole quilt which adds so much visual interest, I think.


Would you believe that I trimmed all 5 of these quilts in 24 hours? Once I had the cutting mat set on the floor, I just kept at it until these were all trimmed. That was quite satisfying! I think I like batch processing multiple quilts at the same time. 

On to batch binding next. 


I was a very good girl and pushed through all those chores towards several finishes, but that didn’t stop me from starting one more new project. I was inspired by a couple of yellow-and-low-volume-HST projects on IG. I’m making a simple Flying Geese layout for my 4.5” HSTs.

Putting all this together in one place makes it look as if my quarantine time was quite productive after all. That’s not really true when it comes to my quilt life, but I’ll take it. 

Wednesday, February 12, 2020

pretty maids all in a row, sort of a pattern


the above image was recently posted to IG, and got reposted by a nice little liberty fabric shop called ava and neve. ever since then, i have been getting requests for a pattern, which makes me giggle a bit because there isn't one. this is another of my scrap projects begotten by a project. also, maybe i'm missing out on a pattern writing opportunity here, but that's okay. i'm a hobby quilter with no time for making a business out of this stuff. i will describe my process here for anyone interested in making something similar.


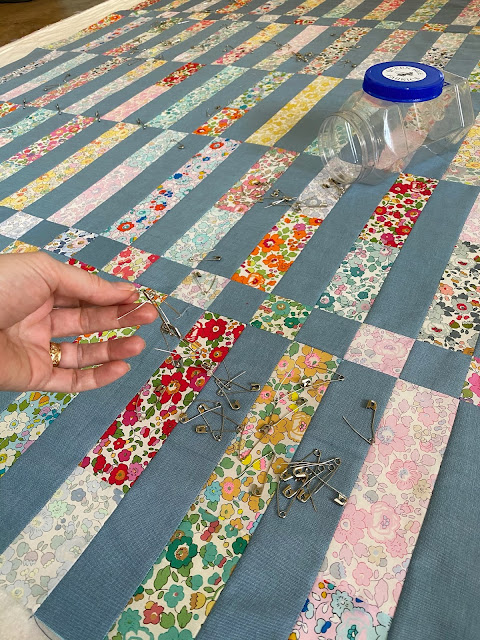
this is a horrible winter afternoon shot of the quilt top, now pinbasted and ready for handquilting. when I have a better one, i'll replace this, but I wanted a full frontal shot of the complete top so interested quilters could see what it looks like.


when i was cutting strips for my betsy scrappy trip quilt, i made quite a few scraps. as usual, i just started cutting without paying attention to amounts i was producing. one wof strip of liberty tana lawn went a lot further than i needed for that original quilt. in some cases, before i realized this, i cut two! also, when i was cutting the chambray fabric, after cutting the correct sizes for the scrappy trip quilt, i was left with pieces 11.5" long from each strip. that's where the size of these longer rows comes from.

this quilt simply evolved from those cuttings.

therefore, i don't have exact measurements for this "pattern." however, it's so very easy that any quilter with a little experience can follow along. if you're one of those people who needs all the details spelled out, i'm so sorry. please remember this is free! and i gave up my quilting time yesterday and today to write this out.


fabric and cutting

this quilt is composed of two kinds of fabric:

- moda cross weave in "chambray"
-liberty of london tana lawn (here, all betsy in various colorways i have collected over the years)

all pieces are cut at 2.5" wide.

chambray

so how much do you need? the chambray is easier to estimate since we can just add the numbers up. assuming 42" wof, you can get 3 - 11.5" pieces out of each 2.5" x wof  strip cut, with leftovers. the layout requires 12 chambray strips per row, so you need 60 - 2.5" x 11.5". you will also need 24 - 2.5" x 2.5" squares, which can be taken out of the leftover pieces from the strips.

or you could cut the first 24 wof x 2.5" strip into 2 pieces at 14" long, and 1 piece at 11.5" long. then, after you have attached the liberty pieces to the chambray, you could cut off the 2.5" and already have your squares made and assembled, too.

or if you don't like the scrap created/waste of the 7.5" at the end, you could cut 4 - 10.5" strips and add some extra rows of squares in the top to make up the few lost inches in length. you will also need to cut 2 more wof strips to make the 2.5" squares.

all of these chambray strips can be gotten out of approximately 1.5 yards of chambray.


betsy 

my betsy pieces were almost all from scrap. i have approximately 20 different colors of betsy that i used for this quilt. some were cut from fat quarters and others were cut from full wof strips (which for liberty tana lawn is more like 56", i think).

strips i still have left after this second quilt 

i would recommend that you cut one wof strip from each betsy you have, see how many strips you get, and then cut more as needed.

how many different betsys you are cutting from will determine how much of each you will need. this is an adventure in betsys! there's no real telling where you are going or where you will end up. i hope you like adventurous, ambiguous quilt top making, because that's what this is. personally, i had a lot of fun with this part of the process.

here's a little bit of quilt math to get you started: one 2.5" x  wof of liberty strip should give you at least 4 - 11.5" strips. to my recollection, width of fabric on liberty tana lawn is about 56".

you can use just one betsy per strip piece, or you can put two or more together like i did. i'll share more about that below in the layout section.

at bare minimum, you will be using 1.5yd of betsy just like the chambray.


quilt layout


this quilt measures 48" wide x 62.5" long.

these measurements can be adjusted by either lengthening strips or adding more rows to the length, or widened by simply adding more pairs of liberty + chambray to the width of the rows. you'll need to do that math yourself, but it's pretty easy to do.

there are 5 rows of strips that are 2.5" wide x 11.5" long, and two rows that are 2.5" x 2.5" squares.


the layout is: 1 row of strips, 1 row of squares, 3 rows of strips, 1 row of squares, 1 row of strips.
if you look at the full quilt top shot above, you should be able to see this.

if we called the top row A, the pattern looks like this:

row A: 24 strips 11.5" long, start with betsy
row B: 24 2.5" squares, start with chambray
row C: 24 strips 11.5" long, start with betsy
row D: 24 strips 11.5" long, start with chambray
row E: 24 strips 11.5" long, start with betsy
row F: 24 2.5" squares, start with chambray
row G: 24 strips 11.5" long, start with betsy


the quilt is composed of pairs of 1 chambray strip to 1 betsy strip, 12 pairs per row. in order to get them to alternate from row to row, simply start each row with whichever type of fabric you didn't start with in the previous row. i indicated that in the above layout description.

when you pair the fabrics, you can use a full strip of betsy per chambray piece, or you can combine different betsys. i just did this at random.

if i had a betsy piece that was shorter than the chambray strip, i selected another betsy and sewed them together to make up the difference. i cut the excess after i sewed the pieces together.


in some cases, i took a bit off of both pieces just to help vary the different lengths. this also gave me another small scrap to work with for another strip.


i didn't want all the pieces to have just 2 betsys, so i did some with 3 or even 4 small scraps.
here's two options for using the small piece and more strips:


to make the squares, i first cut the chambray squares from the chambray scraps and then sewed them to betsy strips. it felt easier to handle that way than 2 small squares, but that's just me.


i love a good chain pieced bunting!


i added the two rows of 2.5" squares to the quilt to increase the length a little. i didn't want it to be 55" long or 66" long, either, which is what rows of just 11.5" strips would have given me. also, i like the way it breaks up the quilt a bit and it nods to the quilt this evolved from - the scrappy trip quilt that is all 2.5" squares.

my seam matching on these rows was not that precise in a lot of places. i tried, but it's true that tana lawn is a little slippery. and pressing can stretch your fabrics when you have a heavy hand, like it do. i put as much care and effort into precision as i want to and live with the results.

other people have great success with pinning (my results are the same regardless, go figure) and starching the liberty.


a few other notes

i did not prewash either fabric. i've made quilts from this combination before and had no problems when washed after completion.

all seams were sewn at 1/4" seam allowance. the measurements so far have all been for cut fabric. of course, when the seams are all sewn, .5" needs to be removed from the cut measurement to know the sewn/final measurement.

because of the lightness of the tana lawn, i chose to always press toward the chambray, except between rows, of course, where that wasn't possible.

i now have the quilt pin basted and ready for handquilting. when that' done, i'll share the complete quilt.

if you're going to make this quilt or one like it, enjoy!
thanks for stopping by and for the interest.

*wof means width of fabric, the distance from selvage to selvage across your fabric.

Tuesday, February 11, 2020

scrappy trip quiltalong in betsy


it's rare i join a quiltalong. unless, maybe, when i start one. my sewing time is too unreliable, so i don't join in even when the schedule is at an easy pace. but alli at woodberry way and her scrappy trip (around the world) got me.


the scrappy trip block method (by quiltville) is such an easy make that i gave in about a week after kickoff and joined the craze. in general, the scrappy trip has rarely appealed to me. melanie at southern charm quilts made a scrumptious pink and gold version that had me changing my mind. however, when i decided to join the quiltalong it was because i needed another quick liberty + crossweave church lap quilt, and this seemed to fit the bill.

i immediately thought it might be fun to make one of these quilts in just one specific liberty print, different colourways. i chose betsy.

i happen to have 17 different betsys in my stash. and found a few more online.


i wanted a medium-sized lap quilt, about 48"x 60", so i opted to make 12" blocks, which requires 6 strips: 3 liberty, 3 crossweave (moda crossweave in "chambray").

sorting through my betsys to find an arrangement, i decided to go with this formula for each block:
- 1 warm (red, coral, orange)
- 1 low-volume (neutral or very light shades)
- 1 blue


the most difficult part (which isn't too bad) of the whole process is getting the strips pressed. the 2.5" strips are hard to get an iron between without smashing down other seams or rows.

because the liberty tana lawn is a lighter fabric than the cotton crossweave, i chose to press toward the crossweave each time. it's finicky work!


after doing about half the quilt, i realized that using the edge of my pressing board (self-made, instructions here) helped me isolate the seam i wanted to work with.


when i get the seam on the edge, i can then manipulate it the direction i want without pressing nearby parts. this might work on a regular ironing board, i don't know. but it's working for me.


i had a lot to say about all of this, but i ran out of time and now i just don't want to complete it any more. sad, but true. short story: this is such a fast, easy quilt! I love it in betsy and so does the IG crowd. it's been very popular.

enjoy some shots of the process and a sneak peek at what i'm doing with the scraps!


first weekend results:


unpicking after some turned blocks and a row. ugh.:


plans for final blocks all laid out:


the quilt top is now complete, pinbasted, and handquilting has commenced.

so many leftovers! i'm just sewing them into strips and joining. I love a good two-for-one quilt: