Showing posts with label cutting. Show all posts

Monday, July 21, 2025

mini crossroads cutting


this is a little process post about how to cut for my mini crossroads blocks (my own modified measurements) and then how i process the rest for scraps.

i've been cutting in sets of three when using fat quarters, but this time happened to be cutting just two since i was using two half yard cuts of these fabrics. the half yards are folded in half, which means i'm cutting through four layers of fabric total and each cut yields twice the pieces of each fabric


each mini crossroads block is composed of:

  • four 2" x 2.5" cut background pieces
  • one 1" center square
  • two 1" x 2.5" vertical "road" strips
  • two 1" x 2" horizontal "road" strips


arranged thusly, sewn with a 1/4" seam allowance, they make a 4" x 5" cut/3.5" x 4.5" finished block.

i am working with mostly half yard cuts of fabric, pressed and folded selvage to selvage, which measures approximately 21" across the wof (width of fabric, from selvage to selvage) in usable fabric, doubled because it has two layers from the folding. if you're using layered cuts of the same width but different length, say quarter yard or a yard, you can cut just like this. 

if you are using fat quarters, you won't have two layers of each fabric, but will have the same width. you would just need to make the initial length cut twice for each width and then cut across the two strips the same way.

this quilt will be laid out 16 blocks x 14 blocks, which equals 224 blocks total. i have 34 green fabrics so am doing sets of six blocks for each green fabric.* that means 3 blocks each of the alternating arrangements per block set. i'll need 12 background pieces, six 2" long road pieces, and six 2.5" long road pieces from each green print. (*if you're doing the maths, 6x34=204, and i need 224 blocks. i'll be making the remaining 20 blocks with the pink "capel" accent pieces i'm adding.)

let's look at how i cut my three sets of each green print for my "lemonade at sixes" mini crossroads blocks.


after pressing both half yard cuts, i lay them out on the cutting table, still folded in half, one on top of the other. i line up the folds at the top, trim the edges square, then make a single wof cut. 

i got a tip from dana knott's book "strip quilt secrets" (one of my recent reads) that when cutting multiple strips of fabric, it helps keep the fabric in alignment and avoid slippage if you overcut the total width for a few strips from the yardage first and then subcut backwards. for this set i wanted one strip 2.5" wide and one 1" wide, so i made my first cut at 3.5" from the yardage.


then i rolled the yardage out of the way to the right (i'm done with it until i put it away) and moved my ruler back an inch to the left to make the subcut to create my 2.5" strip and 1" strip from the larger cut i just made. 

i don't always remember to over cut this way, but i've been trying it and have liked it so far when i remember to do it.


now i'm going to cut the 2" length pieces from both strips. (it's getting confusing with differentiating the widths and lengths of these pieces. i'll try to stick to one name for each measurement. the width is the width of the initial strip i cut, the length will be the next cuts i make.)


i left the wof 1" wide strip and 2.5" wide strip together, so i can cut all pieces of the same lengths together. i first cut 3 sets of background pieces and shorter "road" strips, which will both be 2" long, at the same time. the fabrics are folded in half, so i am getting double the amount of pieces from each cut i make. i need 4 background pieces for each block x 3 blocks, which means i need to make this cut 6 times for the backgrounds. i need half as many for the "road" pieces, so i'll be pulling that fabric away after the first 3 cuts.


after the first 3 cuts at 2" long, i separate the two strips widths because they will now be cut differently. i need 3 pairs of 1" x 2.5" "road" pieces for the blocks, so i cut those from the 1" strip.


i still need 3 more pairs of the 2" x 2.5" background pieces, so i cut them from the 2.5" wide strip. 


now i have all the pieces i need for 3 mini crossroads blocks in each setting for my 6 block set.

i still have fabric left! let's make usable scraps

i always begin cutting from strips at the cut end vs. the folded edge. this way i have one continuous piece of fabric left at the end instead of two identical smaller pieces. i just find the longer piece to be more versatile than two short ones (unless they're going to be exactly a useful size). once i'm done with all the needed cutting, i unfold and press open the leftovers at the end.

i had about 3" left of the 1" wide piece, which went straight into the 1" colored print scrap drawer.

there was approximately 10.5" remaining of the 2.5" wide strip.


from that i cut 2 - 2.5"x4.5" pieces of both fabrics for my scrappy "bonnie lass" project. i opened up what was left at the end, which i trimmed a smidge to a 2.5" square of each fabric.


these are my cuts from the 2.5" and 1" wide wof strips:

  • 3 sets of background pieces for mini crossroads blocks
  • 3 sets of "road" pieces for mini crossroads blocks
  • 1 each ~3"x1" scrap
  • 2 each 2.5"x4.5" bonnie lass pieces


the pieces for the large "bonnie lass" blocks go in that project's basket, conveniently sitting next to my cutting table.


the 2.5" squares go in the 2.5" colored prints scrap drawer, also conveniently next to my cutting table.

that's my cutting wrapped! time to get some blocks pieced now. i already cut several dozen blocks' worth of the pink center squares and the limeade pieces for mini crossroads blocks, so as soon as i cut new printed fabrics, i am able to sit down and get sewing.


i keep all the cut pieces next to the machine with the grey thread on it and if i'm not piecing this project specifically, i use them for leaders-and-enders on my other projects. 

since i like having multiple projects on the go at once, and i like scrap quilts, all this cutting with bonus scraps and pre-prepped pieces for block construction or leaders-and-enders fits right into my preferred mode of operation, which is to have lots of options for whatever whim i get when it's my sewing time. 

one stitch at a time all these pieces will become quilts.

Saturday, July 19, 2025

busy bee


my early morning sewing sessions are becoming a necessary, non-negotiable part of my day. as unpleasant as the summer heat is, being home with my people and my projects is making me happy. i'm enjoying all the sewing immensely, and having multiple projects to pick and choose from each morning is another pleasure in itself.

each day when i walk into the room i have the fun of selecting what to work on. i also take time to declutter, clean, and organize most days. sometimes i just fold fabric for an hour. my decision is made based on what appeals to me at the moment or what will make my space better. there's no slogging through just one project until it's finished. i get to decide what looks fun now or which set of fabrics i want to spend time with today. i realize there are pros and cons to this approach, just as there are pros and cons to sticking to one project, start to finish. but my method appeals to me and fits my personality best.

i have several projects i'm itching to move beyond the piecing phase, some very old and some brand new. my sunny yellow crossroads project is one of them. this morning i noticed a large scrap piece of a low-volume fabric sitting next to my pressing board. i decided to cut it for scraps, starting with my crossroads project. i wasn't sure if i'd already used it for that one or not, so i pulled out my project box to see. nope, not used yet, so i cut the needed pieces and added them to the box. while in there, i took stock of the project. it needs 16 more pairs of blocks for a top. good to know; i'll be getting to that soon.

the leftovers were just the right size for cutting into pieces for my two "bonnie lass" projects, which i did next. thanks to my new scrap system, they got filed away in the right spots immediately. 


the smaller set lives in this clear bin that stays next to my cutting table or sits next to the sewing machine when i want to use it for leaders-and-enders. there's a lot of pieces here already. it could likely be a whole top soon.

that little bit of processing done, i decided my main project for today would be making binding for my liberty courthouse steps quilt that's for my friend. i got that all quilted up this spring and want to finish it off so i can finally gift it.


making the binding roll went smoothly. my normal hour was about up and i was going to leave the room when i decided to go ahead and press the next set of fabrics for "lemonade at sixes." the iron was on and hot, so i'd just quickly press the fabrics and move on with my day.


but i ended up cutting the set once it was pressed. and then i processed the leftovers for scraps. i actually only did two of the fabrics that were both half yard cuts because the third fabric in the set was a long skinny piece from the ds patchwork panel 6 and couldn't be cut with the other two. i made photo notes of my cutting process for the pieces and the scraps, which i'll share in another post.


aaaaand, i also decided to cut the "capel" pieces i want to use for random pink touches in "lemonade at sixes," as well. i was on a bit of a cutting and pressing roll, so i just did it. i had similarly-sized, generously cut quarter yards of these 3 colors, so was able to cut them together.

i still don't know how i'm working them into the project, exactly, but i was thinking of using them as the skinny "road" pieces in a few spots of the mini crossroads blocks. those all measure 1" x 2" or 2.5", and i only need a few pieces of each. it felt wasteful to cut 1" wide strips of each color, so i cut standard 2.5" wide strips and will cut off 1" pieces from there as needed.

each of the fabric pieces was at least 10" x wof, so i went ahead and cut them all into 2.5" strips because i will use that size for other liberty + chambray projects. i filed them away in the liberty scrap drawers once cut. it feels like i've got a head start on whatever future project i use them in.

Monday, June 30, 2025

more pinwheel decisions


i'm still refining my fabric combinations for individual pinwheels in my "groovy liberty" quilt. i had the above combo picked out as one of my paler sets, but i needed to swap that bottom print into another set, so i ended up with this combo instead:


this one works, too. actually, looking at these photos they both seem to be good combinations, but i needed the art deco print from the top set in a different place. i needed it here: 


this swapping around of fabric in sets isn't a problem. what was a problem is i cut some of the chambray pieces too small. yikes. 


i discovered this when i sewed it to a tana lawn piece. every now and then i have pieces that don't match in size and i have to pull out a ruler to determine which is the cultprit, the larger or smaller one.


the ruler says it's the chambray. this probably happened because the under layer of fabric wasn't lined up when i was cutting. i do try to be careful, but these things do happen.


i used all the chambray to cut these pieces, so my only option was to make-do the best i could. i unpicked the set and moved the chambray piece over so that there would be a shortage in both seam allowances. spreading it out like this means there won't be a large discrepancy on one side or the other. if i do have a piece that's short in the seam allowance, i usually add another seam just inside the seam allowance for extra security to guard against unravelling.


i had two pieces that turned out this way. all fixed up. this wasn't such a big deal and was easily dealt with. i was having a good time piecing the pinwheels until . . .


i started joining sets the wrong way. oopsie.

apparently i wasn't paying as close attention as i thought to the direction i was sewing pairs together. i had to fix a couple of those. 


this first half of this set looks great.


then i realized i turned half of them the opposite way. and i did some of my test blocks in the opposite orientation, as well. oh, dear. i sized up how many i have going each direction to determine which way was less unpicking. looks like the top pieces are getting redone.

there was a time when i considered doing the dark chambray pieces one direction and the light the opposite direction. but when i completed more blocks and laid them out together, the bigger picture of the secondary pattern emerged and i changed my mind. but then i didn't pay attention to which way i was turning the pinwheels. it's alright. it can all be corrected pretty easily.


here's the last decision i need to make right now. i was considering sashing and cornerstones so the pinwheels could be separated and stay pinwheels. i was thinking of using the "capel" print in black as the sashing and this red "summer blooms" print for the cornerstones. that's been my plan for days.


but i finally laid it out together (before cutting, thank goodness) and i don't think i like it. the chambray background effect is lost and the color story changes. so now i'm rethinking what i could do instead all over again.


this photo shows the sashing/cornerstone look with the fabrics i was considering and the way the different block orientations looks together. yeah, i don't think this is what i'm going for. thank goodness for unpicking and more ideas.

this is one of the challenges of quilting - getting my vision to come alive in fabric. sure, it's frustrating sometimes, but its also fun and rewarding when it works out. when i know what i'm doing, i'll report back.

Saturday, June 7, 2025

misc. little bits


some chain piecing d5 did for me. these are rows for the 16 patch blocks for our "edna" quilt.


normally, i jump back and forth between projects a lot, working on whatever suits my mood at the moment. i recently started three new projects in one day. i expected to be rotating amongst these as i went along. however, uncharacteristically, i'm actually using a different thread color for each project. so once i had this pink thread on the machine, i was locked in to working on "edna."

i dislike changing threads on my machine with a strong passion, which is why i usually piece with white thread exclusively. i'm not sure why i decided to do different thread colors on these three projects, other than that they have very different colors, but i'm actually going to have to stick with one project until the top is done! this spool is keeping me faithful for the moment. no project infidelity here. who even am i? 


 i spent a while fussy cutting these darling heather ross mice on white to use in the low-volume 16 patch squares for "edna." i'm using the ones that have pink clothed mice in "edna" and setting aside the ones in yellow, green, and blue for another project.

many of the mice are not perfectly centered, but i was able to cut the 2.5" squares i needed pretty well from this print with barely any waste. there are a few odd bits that aren't square that i can still use for scraps, and some sections in the thinner strips (1" - 1.5" i had to cut to get the 2.5" strips to come out right) that were just plain white. i trimmed those down around the printed pieces and discarded the white parts. all-in-all, i'm quite pleased with what i got out of this fat quarter.


while doing all this cutting for so many different projects at once, i've been so good about cutting small leftovers for scraps and filing them away in my scrap drawers (which i recently expanded). all the cutting mistakes or change-of-mind cast-offs have been going straight in the scrap drawers, which makes me feel like they aren't wasted after all. give them a new purpose and it makes me feel a whole lot better about not being able to use them wherever else they were going to go. i should have the precut makings of some scrap quilts on hand pretty soon. this is exciting! i'll need to figure out which patterns to use (hello, jolene's books).

the leftover strip pieces or squares are easy to put in their place. it's the larger pieces i don't want to reshelf but almost could that i'm having trouble making decisions about. for example, this piece that was 6.5" wide. 

because i don't have any specific scrap projects in mind that this fabric would be good for, i'm hesitant to commit it to any certain sizes of strips. i could cut a large variety and combination of sizes from this since i store scraps in increments of 1" to 5" wide. how do i decide what to do with this one?

i finally landed on cutting one 2.5" strip as that's the most versatile width. then i could put the remaining 4" strip away in the 4" drawer. in the future, if needed, i can cut it down to something else smaller. yes, i like this solution.

Friday, May 30, 2025

still edna-ing


my edna strips and star pieces are all cut, after no small amount of trial. the number of mistakes i have made in the process of making this quilt is incredible. it hardly seems possible. but i've taken it all in stride, just kept calm and pressed on. after a certain number of errors, it began to get funny whenever a new one occurred and i could laugh it off. 


i had a fat quarter of that large pink circle fabric, a tilda dot basic, and somehow i ended up with not quite enough fabric to cut all 5 sets of large and small squares i needed for the stars i'm making with it. i was a mere two small squares short. i don't know if i turned the fq the wrong way or what, but i came up short.

what to do, what to do?

at first i decided to just replace it with one more star from another of the four star fabrics. i was cutting the purply berry fabric (pod vine from michael miller) next and made an extra set from that.

then i came across this cute strawberry fabric hiding in my stash and thought that would be a good replacement, so i started to cut that up.


but after consideration, i changed my mind. again. (these are the kinds of problems i cause myself.) i remembered there was a spare large square of the tilda dot and chided myself for not thinking to cut that up for my two squares. but on consideration, i realized i could only get one small square with the needed dimensions out of it, of course, because it was 1/2" too small to get two side-by-side. 

sometimes my brain is sloooow to catch on. this day it was sloooow a whole lot. it was like that old dial-up lagging sound you'd hear while the computer was trying to connect through the modem. eventually, the old brain caught up/connected. but it took a minute. every time.

i really wanted to figure out a way to eek out two star points from the fabric i had (why this was important to me, i can no longer say. either of my first options would have been just fine). fully half the square was going to be trimmed off for the star point anyway. so i pieced two squares together from the leftover bits of fabric.

then i decided that didn't look good enough and went to etsy to order more of the fabric. actually, i think what happened is i noticed the tilda dot while i was looking for a different fabric later in the day and just decided to do it right and get more of the tilda dot, which i would use again elsewhere. goodness, i was silly. i think i'd spent so much time already fixing mistakes and was feeling patient with the whole process so i felt like getting it exactly as i had planned no matter what i had to do to achieve this. that was a little overkill.


once the stars were cut, i moved on to the other strip sets. after making the first two sets of strips with the star blocks, i decided to change the length of the strips to accommodate the 16 patch blocks. i knew what the new length was, but when i cut the next set i made half of them 1/2" too short. ugh. 

do over. file the scraps. move forward.

this pink blender fabric is a different colorway of my favorite neutral blender, which i've used a lot and still have more of. (see it on the back of "collins".) it's by corey yoder for moda. the pink looks a lot different from the white with black sunburst spot thingies. i didn't recognize it as the same fabric at first. it's a good blender print. i'd take it in several colors. i think i might also have it in yellow.


i put together the third set of strips and began attaching the star points to the ends of the strips. while trimming off the hst ends, i accidentally cut one of the other strips that was hiding under the end of the one i was cutting. ouch. sloppy.

the good news on this one is that the nicked end will be trimmed for a star point later and there's enough left of it to do the point correctly. i won't get the little bonus hst from that point, but that's okay. it could have been a bigger loss, for sure.


at this point d5 came into the sewing room and asked if she could help me sew. i put her to work on pairing the strips for me and we began to fly through the job. i wasn't done with making mistakes, but it did get better.


 i don't remember why i took a photo of these mice strips. i don't think anything went wrong with them. just a cute process photo, i suppose. i have been second-guessing this choice because of the strong secondary colors in the mice clothing. but i think it's going to be fine. they're too cute to not include.

the pink rose print (heather ross far, far away 2 collection for windham) is another loud-ish piece that doesn't actually fit perfectly in the color scheme. but i think it's good to have one or two colors that are a tad off to give depth and balance to a scrappy quilt like this. it's not completely clashy, so it adds that little note that an ugly fabric or two can contribute which a lot of quilters like to incorporate. but without using ugly fabric because this one is really cute. 

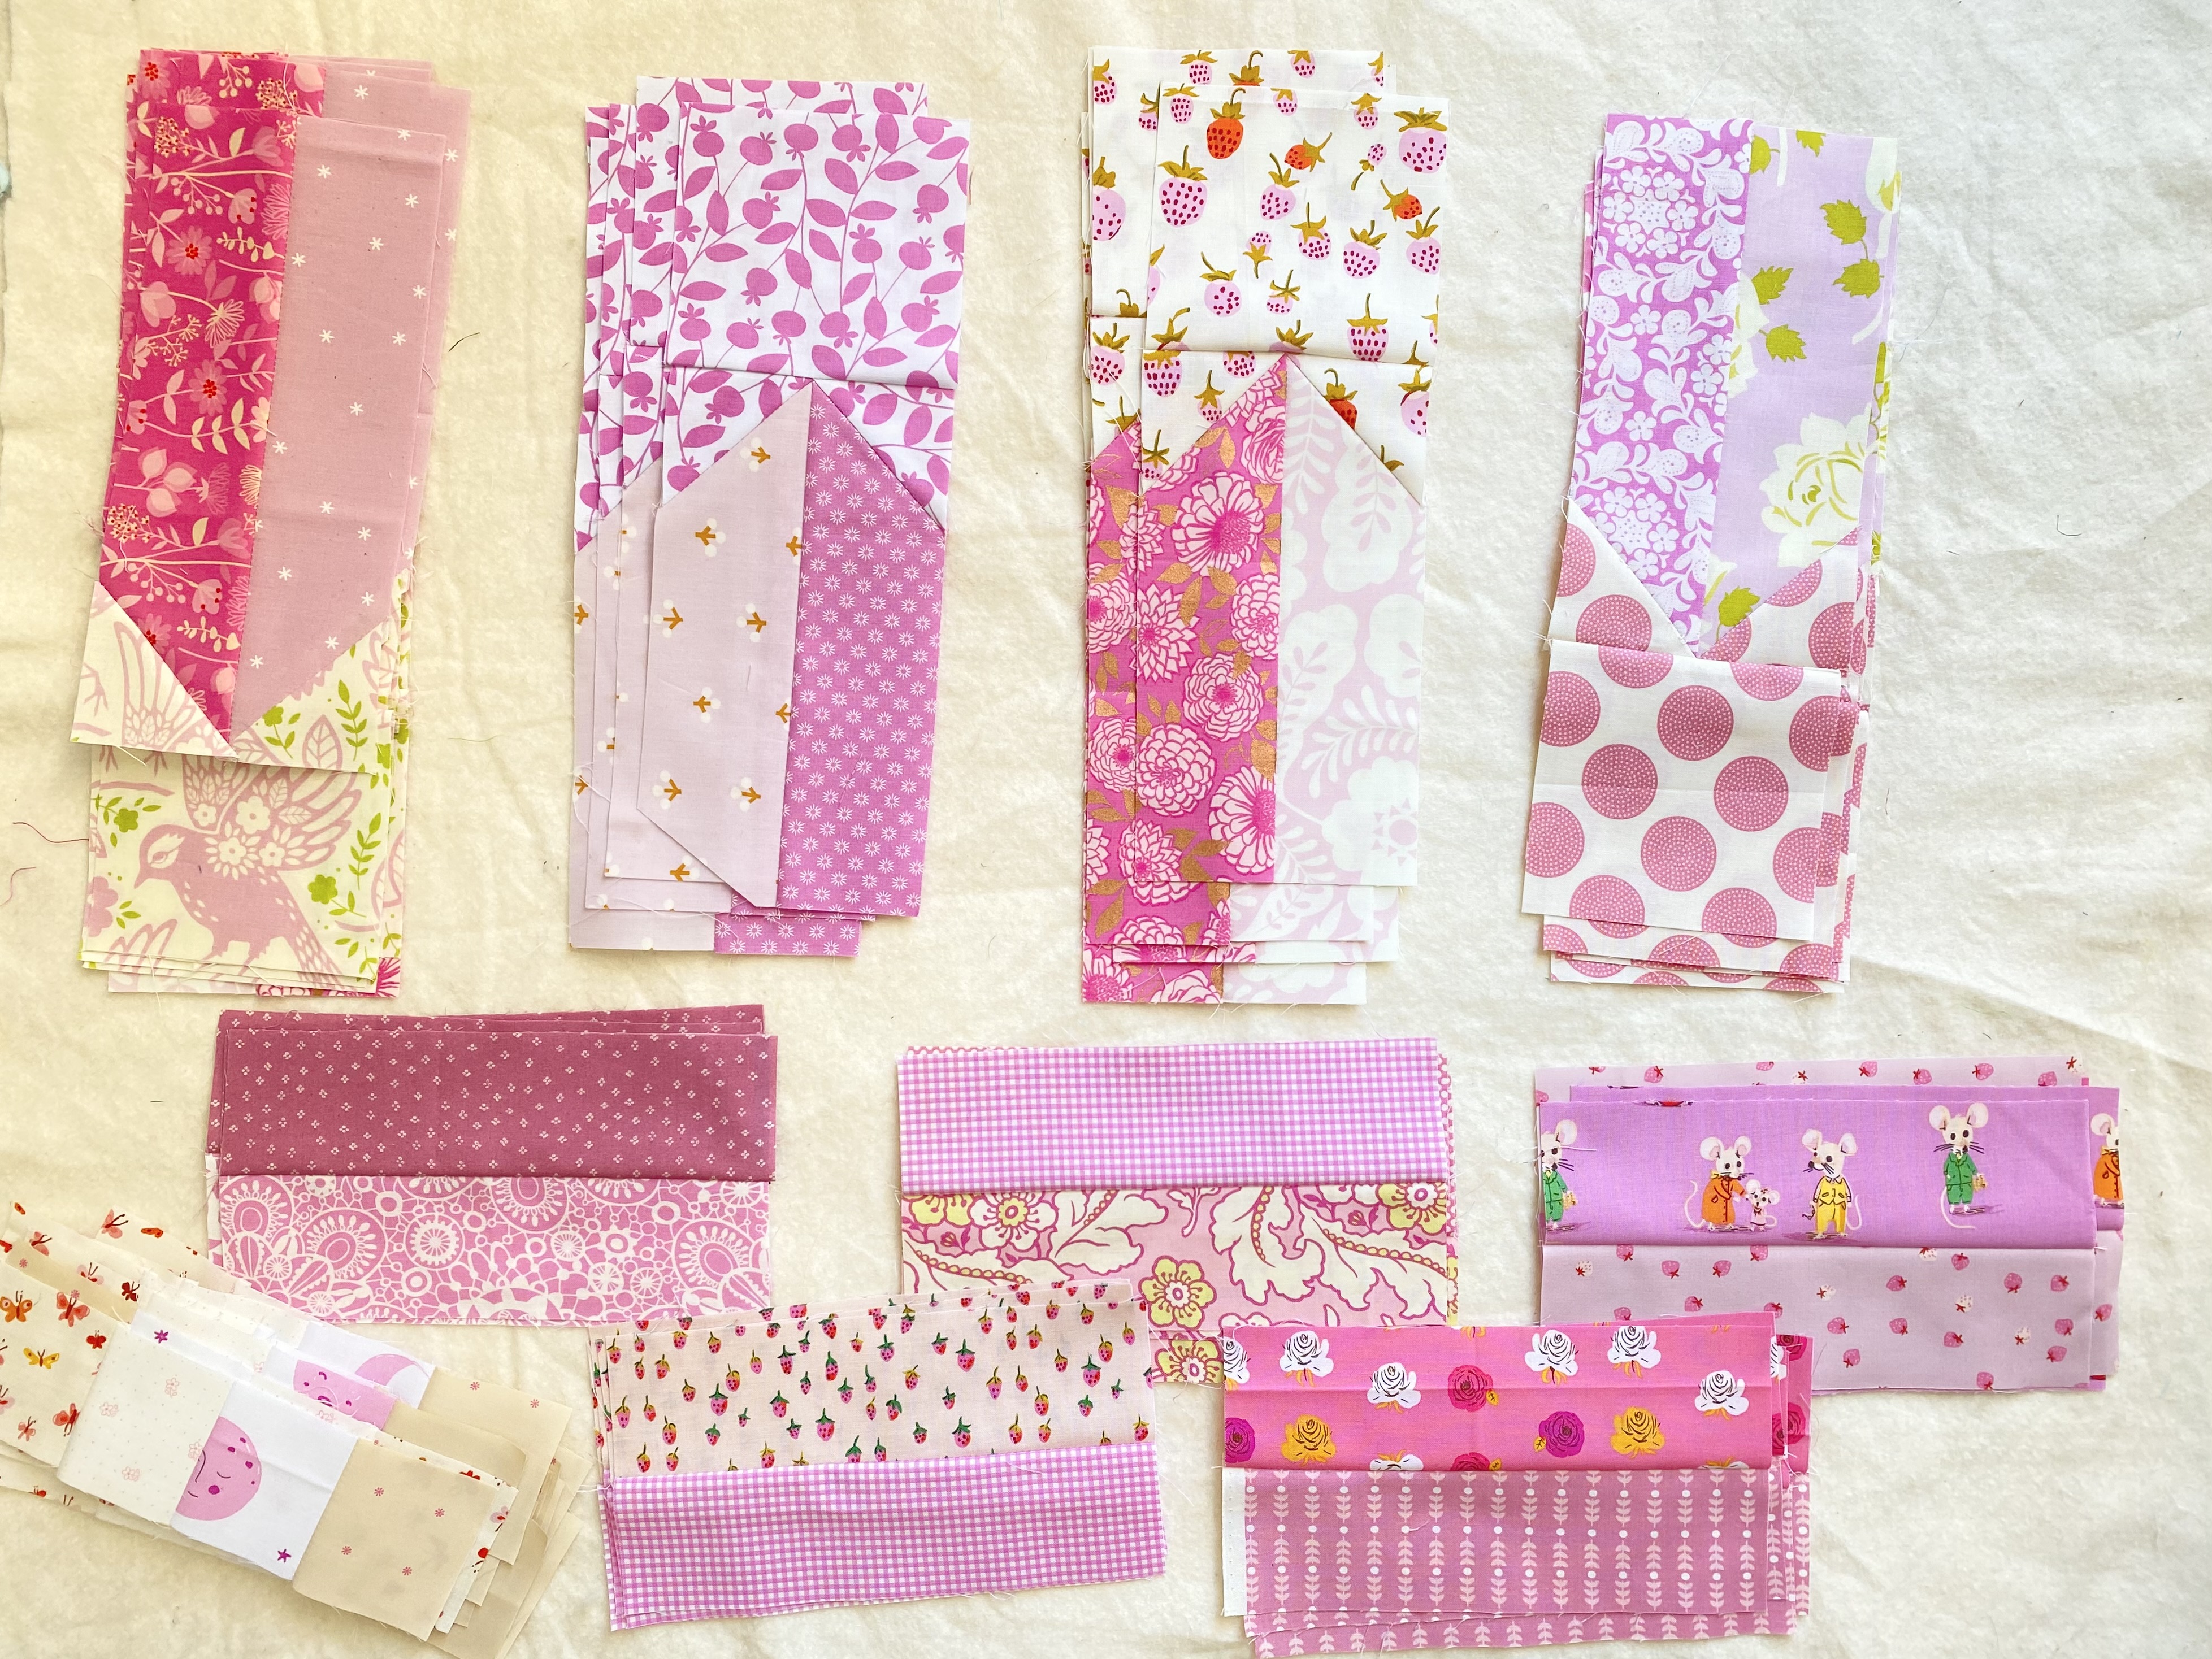
that's all the strips and stars pieces cut now. we've assembled all the strip pairs and i've added the star center block and top points to four of the strip sets. they're all gathered together in that opening photo at the top of the post. (i put that one first because it's the only daylight photo i took and looks the nicest.)
once we get the 16 patch blocks assembled we can begin putting the top together! 

i'm not stopping til we get there, no matter what other mistakes i manage to make along the way.

never give up, never surrender.
make the quilt.

Saturday, March 21, 2015

at the end of a triangle: a trimming technique

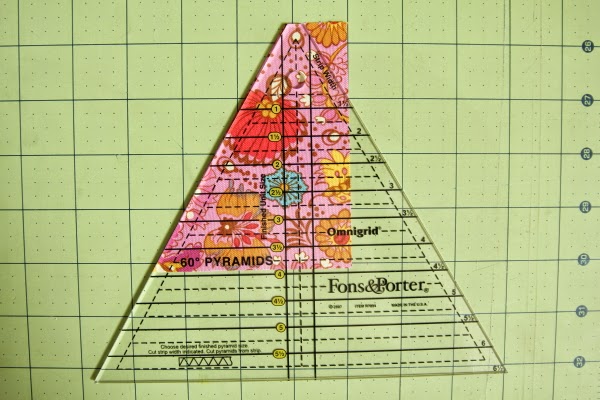
 i've been cutting lots of triangles for my "indian blanket" quilt. the fons & porter 60` ruler works really well for this. i especially like two things about it: the top tip is blunted and it has maths on the ruler for you. the ruler is marked with the strip size you need for the finished height you want to achieve.

all that said, i was having one trimming issue - whenever i reached the end of the strip, it was hard to figure out where to cut the last piece straight so i ended up with a half piece, which i need for the quilt. after all the triangles are cut, you are left with a bit that is angled on one side but too wide to be a half triangle.

what i wanted was a piece that is cut down that middle dotted line there, bisecting the triangle in half.

here's a closer look at the line i wanted to trim on. trouble is, of course, that you can't cut through the ruler. so i usually either flip the piece over, shift the ruler to the side, and trim off on the angle (which leaves you with a skinny, angled piece with two bias cut sides), or i use the straight ruler to make a cut, but this is hard to figure out accurately.

well, the other day, my long-buried geometry knowledge kicked in and somehow i got the idea to simply shift the ruler around to get my straight cut. please don't ask me which theorem i used or the measurements of the angles that make this work. i don't know. but i do know this works!

as you can see, i lined up the center line with my outside angled edge and my blunt top tip with the top of the fabric. then i cut down the angled edge of the ruler.

this gave me the perfect half triangle i was looking for and the leftover piece is straight cut, not biased, on both sides.

now i take my bow and leave you for today.