Showing posts with label 4sq blanket. Show all posts

Monday, March 7, 2011

4sq blanket tutorial, part three

time to get your backing on your blanket.

while looking over the original blanket, now almost nine years old, i noticed there has been some slight uneven shrinkage between the front cotton pieces and the back flannel piece. therefore, i think that even if you don't wash the cotton pieces for the front, it is probably wise to wash the flannel before sewing, since it is more prone to shrink.

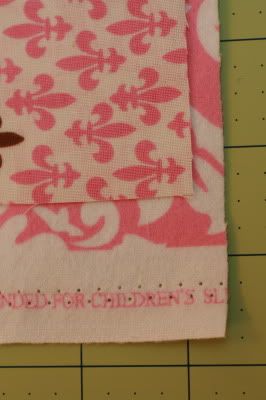
press your flannel backing piece and lay it out on your cutting surface, right side up. smooth the piece out so there are no wrinkles. then lay the blanket top, right side down, on top of the backing. again, smooth out the wrinkles. (i did not turn the top when working on this blanket, it's right side up. regretted that later!)

now cut the backing flannel by following the outline of the top piece. you could measure the top and square the flannel, but i find my top piece is never perfectly square and prefer to use the top as a pattern piece for the backing. when completed, the blanket is not perfectly square, but close enough. i'm okay with that. it's not obvious when looking at the blanket except some times when it's folded.

pin the two pieces together. you are now going to sew them together around the outline of the pieces with a 1/4" seam, making sure to leave a hole for turning. start sewing in the middle of one of the sides. sew around all four sides with a 1/4" seam. stop sewing when you get 4" to 6" away from where you started so that you leave a hole 4" to 6" wide, or just big enough to get your hand in.

before you turn the piece, clip your corners so they aren't so bulky, lumpy, and rounded. to do this, cut diagonally across the corner. cut right up to, but no through your seam.
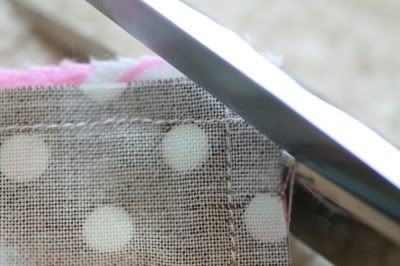
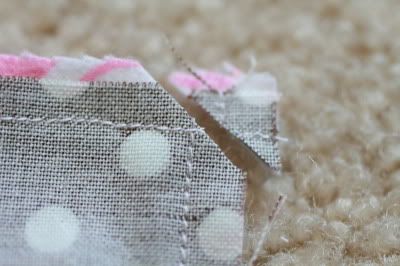
you may notice here that i didn't pivot at my corners, but ran straight to the edge of the fabric, then started the next seam at the edge also. sometimes i do this to check how the blanket is squaring up. since i cut my backing with the top facing the wrong way and the pieces didn't match up properly, i chose to sew this way this time. do which ever you prefer.


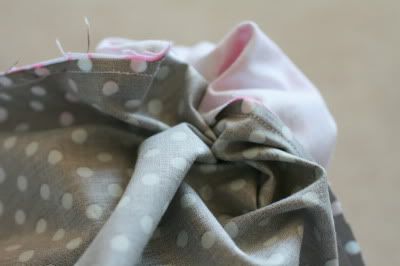
this is what the corner looks like cut off. now is also the time to trim up any excess fabric in the seam allowance like the extra pink showing in this photo. when i said i was a beginner and not a perfectionist, i meant it! i make mistakes and just keep on going. it all works out in the end.

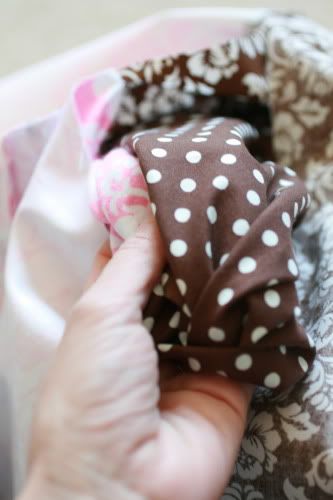
time to turn the blanket right side out. stick your hand in the hole you left in your seam.
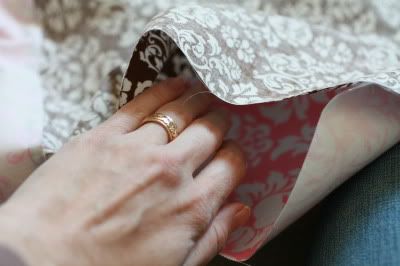

with your hand inside, grab a corner of the blanket on the opposite side of the hole.
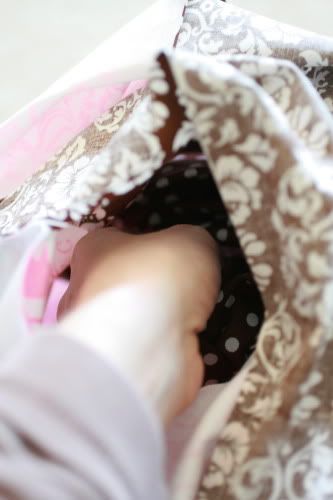
hard to tell, maybe, from the photo, but that's my hand grabbing the inside of the corner.

now gently pull the blanket out of the hole, being careful not to rip your seams.
smooth the blanket out and turn out your corners so they look nice and pointed. (if not, no one minds rounded corners, either. it's okay!)  to help your corners be fully pointed, use a knitting needle or chopstick or pencil eraser to push them out from the inside of the blanket. i usually just use my scissors, carefully, but i hear that can be a problem if you push too hard and pierce your project.

now that the blanket is sewn together and turned right side out, it's time to blanket stitch the edge. at this point you can press your seams flat from the outside, which makes the stitching easier. but i find it's pretty difficult to get the seam wide open when you're pressing from the outside, so i don't always do it this way. my alternative is to just start stitching, manipulating the fabrics and the seam wide and flat as i go. that's not easy either, so do what you will. good luck! don't worry, whatever you do, it'll be fine.

if you don't know how to blanket stitch, see the tutorial.

i learned a new trick with this blanket. i used to stitch the hole up right away, but this time i left the hole open and stitched it closed last. i found that when i do it this way, i don't have to bury my knot at the beginning of each new piece of floss but, rather, i can just tie my knot and then place the thread from the inside of the blanket by going in the hole. does that make sense?

so start blanket stitching on either side of the hole, depending on which direction you like to stitch. i stitch right-to-left, so i started on the left side. when you get back around to the hole, you'll need to press down the seam allowance of the blanket before stitching. you can either finger press or use your iron. simply turn the edges in so they are in line with the blanket edge you sewed and press.
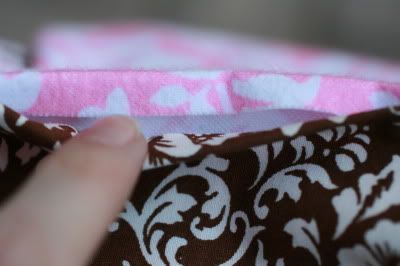
see, both edges are pressed in. hold the seam closed and continue your blanket stitch right over the hole.

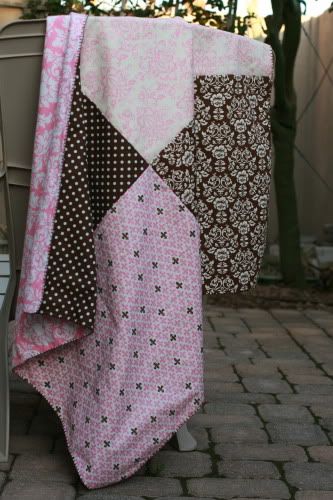
yay! your blanket is done. pat yourself on the back, take a picture, and wrap it up in a pretty bow if you are gifting it to some lucky person. congratulations to you and the new mother.

Tuesday, March 1, 2011

4sq tutorial, part two

once your fabrics are nicely pressed, you have two options for cutting. if you own a cutting mat, rotary cutter, and quilting rulers and are comfortable squaring off fabric this way, then square each fat quarter piece to approximately 18" x 21", or whatever similar size you can get out of your fat quarter.


if you don't have these cutting tools or don't know how to use them to square fabric, you can simply get some large paper (or tape some together) and use a ruler to draw yourself a pattern piece of a square that measures 18" x 21". pin your pattern piece to your squared fat quarter and carefully cut out the square. you won't get it as precise as using the rulers and rotary cutter, but it will be good enough for this blanket. remember, small imperfections are part of handmade's charm.

now you are ready to sew!

lay out your four squares in an arrangement that is pleasing to you. then pick the top left hand quarter and lay it face down on the top right hand quarter.


you want the "right" side of each fabric touching the other one. pin them together along the left side where they will be sewn together, if you are not comfortable sewing unpinned pieces. once you have them pinned together, flip them over so the bottom piece is now on the top.

sew the two pieces together along the right side of the fabric, using a 1/4" seam allowance.

when your seam is complete, lay the fabric down on your ironing board, darker material on top, seam away from you. heat up the seam by pressing along it for about 5 seconds in each spot, moving down the seam until all of it has been heated. heating the fabric like this makes it easier to manipulate.

once you've heated the seam, open it up and press it flat. use your iron's nose to push the fabrics apart, giving you as much available area out of your fabric as possible. before i knew to press as fully open as i could get my seam, i used to think that nice little lip hid the seams wonderfully. turns out you're supposed to get it as open as possible. go for it - no fat lips. (there is a good reason for this, i just don't remember what it was. but i'm not being a stickler about an arbitrary rule.)

if you look closely, this seam has the fat lip and isn't fully open.

see how i can still pull it a bit further open?

use that nose to gently nudge it all the way open.

when your top two pieces are sewn together and pressed, do the bottom two panels. again, flip the bottom left panel over onto the right panel, right sides of fabric facing together.


pin and flip panels again. sew along the right seam with a 1/4" seam allowance. press the seam open.

next, lay out the top panel and the bottom panel. flip the bottom panel on top of the top panel. line up your seams as follows:
you want the seams you already made on the two panels to line up right next to each other so you have a nice meeting of the seams in the center of your blanket top. here i've shown them a bit offset so you can see what i'm talking about. the bottom piece (brown) of the fabric placed on top is butted up right against the top piece (brown) of the panel laying on the bottom.
wow, all the bottoms & tops are rather confusing. hope you got that. it's really not that complicated, i'm just trying to be very clear, which may actually confuse you!

if you were to pick up the materials, this is what i looks like from the side. get that line created when you sewed your panels together to match up. that's all i'm saying.

now pin those seams together and then pin up and down the side to the ends. your top is one seam away from finished. sew the panels together with a 1/4" seam allowance.


at this point, if your pieces are not the same size as each other while it's still folded in half (which could happen for a great number of reasons) then go ahead and trim off any excess that might be on any side.

then open up the blanket top and press your seam open.

getting your backing on is next!

Monday, February 28, 2011

4sq blanket tutorial, part one

as i'm starting my sixth 4sq blanket, i'll be photographing the process and sharing the "how to" with you. it'll come in bits and pieces as i work on the blanket, but since it must be completed by thursday night, it shouldn't take too long. i'll be writing for the complete beginner, with lots of details that i hope will answer any questions you might have. if something is not clear, please let me know!


first, we'll start with supplies.

you'll need 4 coordinating fat quarters of 100% cotton material for the front
one yard of coordinating cotton flannel for the back
thread
two skeins of embroidery floss for the blanket stitching around the edges. (there are two different colors of floss here only because i was debating which to use. any thoughts?)

if your fabric source doesn't sell fat quarters, you can get 1/2 a yard and cut it in half across the width. you'll then have two fat quarters.  normally, when you purchase fabric off the bolt, a 1/4 yard would be cut skinny along the length, from selvage to selvage, measuring 9" by wof (width of fabric), which is commonly 45" or so. but a fat quarter is 1/2 a yard cut in half across the wof so it measures 18" by 1/2 wof. you get the same area, just arranged differently.

on the left is a fat quarter, on the right is a traditionally cut 1/4 yard. you can see a fat quarter is half the length, twice the width. it's short and fat, hence the "fat" quarter.

everyone understand what a fat quarter is now and how to make one if you can't buy it cut that way? good.

step number two once your supplies are assembled will be to prepare the fabric.

at this point, the debate to "wash or not wash" comes in. there's lots of people on both sides of the fence. i've even done both with this blanket. i prefer working with unwashed materials. the theory is that prewashing preshrinks the fabric, saving possible problems later. unwashed fabric is easier to work with. the blankets i've made all used premium fabrics, so there wasn't a problem with shrinkage after washing. totally up to your personal preference. i like quilter carrie nelson's compromise. when she presses all fabric before using, she makes sure to steam them. this causes fabrics that will shrink to shrink some before you start without having to wash them. that's what i do.

so if you have all materials ready, steam press your fabrics, then square them off with your rotary cutter or make a paper pattern and cut them out. i'll explain how to do that next! go get your stuff and press it, then see me back here.

Thursday, February 24, 2011

blanket stitch tutorial

i adore blanket stitch. it's simple with so much rustic charm. (and i just realized my muddled mommy brain has been inexplicably calling it "backstitch" for a few days - why, oh, why?)  it can be used to edge many types of projects, not just blankets, and also for decorative effect on flat items like applique, but that will be dealt with at another time. here's how to blanket stitch an edge, like on my 4sq baby blankets.


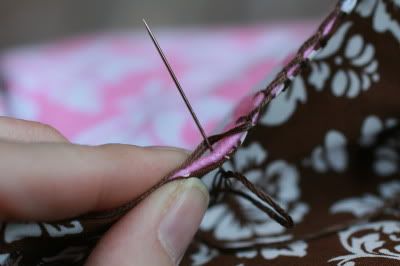
tie a knot in the end of your thread/floss. bring your needle up between the folds of the two fabric edges.  pull needle and thread all the way through. when you get the knot to the fabric, grasp the fabric close to where the knot is with one hand and gently but smartly tug the thread through where it is exiting the fabric. you will hear a satisfying "pop" when the knot goes through. this is called "burying the knot." be careful you don't tug too vigorously or you will pull it completely through the fabric and possibly make a hole.


on the front side that is facing you, insert the needle from front to back of the fabric about a 1/4" inch below the fabric's edge (or whatever depth of stitch length you desire). grasp the thread with your non-needle hand and pull the thread behind the needle in the direction your stitches will be moving in. here, i'm stitching right to left, but you can certainly stitch left to right if you want. whatever's more comfy for you.
i pinch the thread down along the seam and hold it there while i pull the needle and thread through. once you have the thread pinched down with the needle between the thread and the fabric, pull the needle and thread through to the backside until the stitch is tight and complete.

i let go of the thread with my pinching hand once i get close to finishing the stitch.

a this point, if you notice your thread is not inside the loop being created, stop and pull your needle through the loop or you will miss the stitch. this can happen when you don't keep the thread all to the side you are moving toward as you start your stitch.

pull until stitch is snug, but not too tight, pulling straight up and away from the seam.

if you somehow missed and didn't catch the stitch, you can loosen the botched stitch up a bit and run the needle under the stitch, making sure to catch it and correct the miss.

then start again by inserting the needle in the front of the fabric and repeating the same stitch again always making sure to keep the tail of the thread (end away from the needle) pulled to the side in the direction you are stitching. if you don't keep the thread to the side you are moving toward, you can miss the stitch and end up with a diagonal stitch instead. just correct as described above.

when you have a little more than one needle's length of thread left, tie off and bury your knot. this is not a time to be frugal with your thread. quite often i try to eek out a stitch or two more past where i know i should stop, and i always regret it. you need enough thread left to work with, especially to bury the knot. otherwise you will find yourself very frustrated and spending a lot of extra time repeatedly rethreading increasingly fraying thread and trying desperately to get it tied off. no fun. go ahead and "waste" that last few inches of thread.

my method of tying off is not the best, but i know of no other. please, anyone enlighten me who knows a better way. here's how i do it:

i loop around the final stitch, making sure to pull my needle through the loop to create a knot on the thread.

about a 1/4" away from the knot you just tied, wrap the thread around the end of the needle twice. pinch the thread where you just wrapped it and pull the needle through your fingers, keeping it pinched. this makes a knot.
then insert the needle in the seam under the last stitch.

push the needle between the two fabrics for an inch or two, making sure not to peek through either side of fabric until you are ready to exit. then pull needle and thread out of the fabric and tug until you hear the "pop" of the knot being buried. it's very important to make sure you get the knot buried. sometimes i have to use the needle to manipulate it into the seam if i just can't get it to pop.

when the knot is buried, trim off the thread, making sure not to cut into your fabric. tuck the little ends back in if you have to and smooth over the hole. i pull the thread out a little more than necessary, which makes the fabric pucker a bit, snip it, and then pull the fabric smooth and the tiny bit of end left sticking out will pull itself into hiding.

to start up the next length of thread, tie off the end with a knot like you did in the beginning and bury the knot as before, inserting the needle an inch or so back from the end of the last stitch.

OR insert your hand into the hole left open and place your needle in position from the inside.

now just pick up where you left off, stitching as before.


don't forget to hold down that thread along the seam in the direction you are moving and to keep all the thread to that side of the needle.


for how to turn a corner, go here

once you get the hang of blanket stitch, it moves along nicely, falling into a wonderful rhythm. i like to edge my 4sq blankets when i'm at my kids' after school activities, while talking to friends, and i've even started watching a movie or two with the kids when i need to get some stitching done. then again, it's a nice way to busy my hands while my mind roams free, contemplating life and the cosmos. simple but deep stuff!

please let me know if this tutorial made sense to you, how your blanket stitching adventures go, and ask any questions you might have. i'll sure try to answer them.

next up will be a full tutorial on the 4 sq blanket, as requested by shannon. i just got an invitation to a baby shower next week and will be making a new blanket for the occasion, so i'll photograph as i go and get the tutorial posted shortly there after.