Friday, May 31, 2013

while they were swimming

linking up to lee and freshly pieced wip wednesday
when my husband announced he was taking all the kids except baby to swim at his brother's for the evening, i knew i was going to have the perfect opportunity to sew. splish splash stash time even though they were swimming not bathing.

i thought about practicing my stippling on the second doll quilt, but it wasn't sandwiched or basted and i didn't feel like going to the trouble to do all that. so even though i really need to get moving on quilting all my partially finished quilts, i decided to be a bit naughty. i started something new. it was an unlooked for surprise that i was going to have some sewing time, so i chose to have fun rather than do what i felt obligated to do.

i was itching to start hst's for my diamond quilt and i did. i grabbed the charm packs of spring house and my solid and got to work. i only made up the pink squares from the first pack - just enough to get a taste of it.
 i used my new pressing board as a mini design wall to play with how it's going to look. there are a couple of ways this can work, the above being an example of one pattern. i'm undecided on how it will end up. and of course the colors will be a lot more mixed once the other squares are in. but i'm delighted with how it's starting out. looking at this sample, i'm imagining a quilt made out of a few large diamonds like this. that's be fun and pretty simple. goodness, my mind works way faster than my fingers!

the pressing board worked okay for a quick, temporary design wall. but it's not nearly big enough and it really doesn't hold the fabric up too long. that's another to do i've got - design wall! one i can put away when needed since it will be in the dining room.

this photo is just plain embarrassing. why did i put it up here?
 i really was in a silly, playful mood as i sewed these hst's. naturally, i chain pieced them. and chain piecing always reminds me of bunting. so i hung them from the light fixture for a minute. silly. especially silly since it stretched my squares a bit. the first one i cut was curved because of my bunting idea. fortunately, a quick press of each square before i cut and they were good again.

 i wasn't the only one interested in sewing: baby took a turn at the machine to check out all the buttons. fear not, it was completely turned off and i stayed right next to her. no harm done. i do like letting her explore a bit. maybe it will give her happy associations with the machine and encourage sewing some day.

once my playing was done, i worked on two other looming projects: 4sqs for upcoming nephew and a friend. everyone is having boys right now. i got the aussie print for my nevie all ready to edge and the top of the vehicles blanket meant for a friend whipped together. these really are so very simple.

i also squared off the doll quilt so i can bind it now.

4 projects worked on in one evening! we need to have more summer pool parties like this. fun, fun.

Thursday, May 30, 2013

family room quilts

a favorite family room activity
I make quilts to be used: read on, snuggled under, dragged around, built with, laid on, lived in. Loved. I do not make them to be hung on a wall and admired, or folded up on a chair, never to be touched. I do ask the children to be respectful and gentle-ish with my creations, but they are definitely made for use.


Right now, I have 3 quilts that camp out in the family room on the three couches. I made one of those quilts myself and the other 2 are store samples I bought from ETC, handmade by employees there. "Romance in the Garden" is also intended for this room and couch living once I complete it.

Out on a Limb
So far, there is one common thread among those quilts in this room: they each have the room's colors in it. I would like to say this is due to my decorating genius, but it's simply a happy happenstance at this point. My family room colors are red, blue, and green. My color scheme was based on my now 10yr old red Charleston Pottery Barn couches and a painting we purchased on an Anniversary trip in Kauai a few years back.

"Song for the Journey" by Dorsey McHugh
I painted the walls a barely-there light blue, pulled out of the water in the painting, to softly compliment and underlie the strong red of the couches. There are blue and green pillows on the couches and touches of all three colors all over the built-in shelving on the wall. The family room is our casual, hang-out spot, right off the kitchen, where we read together, roll around on the floor, build with blocks, have dance parties, sometimes homeschool, and just live, really. The quilts are meant to add a homey touch to the space and to be readily available for whatever they are called upon to do.
beach pow wow

None of the quilts are the exact colors already in the room, but I've gone more for shades of the color palette than a limited selection of specific colors.
Abbey Lane quilt
I look forward to the day where there are enough quilts in here for everyone to grab one during story hour or an evening by the fireplace.

Homey, isn't it, to have quilts everywhere?


Wednesday, May 29, 2013

quilt sightings

 I always get a kick out of seeing my kids use the quilts we have around the house. Whenever I do see them making forts or having a snuggle, it motivates me to keep making more. And reminds me that I want each of them to have their own mama-mades. This afternoon, I saw my oldest son (12) lounging on the floor, covered in my "out on a limb" quilt for comfort, playing with one of his younger sister's stuffed animals (because it just happened to be lying nearby). It was a lazy, cozy picture.

Even better, he then fell asleep just like that. Oh, it makes me smile. And think of all the times I've pulled one of those quilts over my body, head included, and done just this: nap.

This boy doesn't take naps very often at all anymore. In fact, I can't remember the last time he did. Maybe a growth spurt coming on? Whatever the cause, I'm glad he grabbed a mama-made to doing his sleeping with. Someday soon he'll get his very own.

attempting FMQ and a wip


This is just a little doll quilt that looks like it could even be one single block. But it's my first official attempt at FMQ. And it's the only thing I have to report after a few weeks off of sewing. We hit the beach at the beginning of the month and despite the fact that I took a whole box of little items to work on in the car or condo, I didn't touch any of it. Back home now and getting myself back into my self-imposed sewing load.
 
Because it's WIP Wednesday, I'm linking in with Lee and gang at freshly pieced.


For ages (like, two years) I have been wanting to learn to free motion quilt (FMQ). I took a class in May 2011 and that was pretty helpful. But that's when I was newly pregnant and lost interest in sewing. Anyway, fastforward past the pregnancy, baby, life getting back to normal, etc, until now and I am giving it a go again. Mostly I was motivated to do this because I desperately wanted to stipple quilt "taite". I signed up for a Craftsy class (FMQ a sampler by Leah Day) and bought a few books (because I always get books). Between the two, I finally made the plunge this Memorial Day.

 To say that I had a rough start is an understatement! Oh. My. Goodness!!! Kids climbing on me, doorbell ringing, phone calls, a baby into everything in sight who finally had to be caged (portacrib, really), my laptop shutting down (thanks to a button pushing baby) and then trouble getting Craftsy going again.

And that's not even saying what happened at the machine. I couldn't get the bobbin thread to come up to the top for the life of me. I had to remove everything and dig into the bowels of the machine to see what was going on in the bobbin. And it was filthy with lint down there, which required a good 15 minute clean out. Once I got the bobbin fixed, it was back to the top. Working around that darn open-toe foot was miserable. I think I really am going to cut mine apart like Leah recommends doing in her class. Finally, though, FINALLY, everything got into place and I started sewing.

I was using the Supreme Slider, as recommended by several people, but something felt more restrained this time than I remember from my previous experience. Anyway, I got to work and it wasn't going too badly.
 I got this far (about two rows) before running out of bobbin thread. Seriously! So I pulled everything off and refilled the bobbin.

This time around I had more luck getting the thread to the top. I think I figured out it didn't work unless I rotated the needle all the way up rather than just raising it enough to get it out of the fabric. I got Craftsy running smoothly so I could watch Leah while I worked. I also consulted a book and sketched some stippling, too. At this point I decided I better check out how my stitches were looking since I was already stopped.

 I was pleasantly surprised with how well I was doing for my first time. So my stitches weren't completely evenly sized, but I can live with that for now. I was far more concerned about the shapes I was making, which I found acceptable. I did make one tiny loop on accident, but that's not too bad.

 However, just as I was feeling pretty good about myself, I remembered to check the back. ugh. Not so good. The tension was off and there was even a birdsnest there. Fortunately, the birdsnest was at the end of the stitching and easy to pick out. I left the tension problems as they were because I really wanted to get moving. I tightened the tension and did a little more stitching, then checked the back again. A bit more tightening and we were good to go.

Here's what I've learned so far:
  • Going over the seams makes for tension problems on the back.
  • I prefer to move back and forth with the previous stitches at the top so I can see where they are. If they are under where I'm working, I don't do as well with spacing.
  • I like working at the top speed when my machine is set at medium speed (there are 3 speed settings on my machine)
  • working in rows is great
  • slow starts make for big starting stitches on my machine (opposite of what Leah said)
  • and . . .
after just that one small doll quilt, look at my needle and foot!

 When I sat down to work on this stippling several weeks ago, I found my machine had a stipple stitch and decided to try it. Uh, who invented that?! Totally not helpful. I guess it was made as a decorative stitch. If you were making a border or something it's okay but it definitely wasn't made for quilting anything. Yuck! I'm just going to have to do it myself, FMQ style.

my wip for the week:

completed: none

in progress:
doll quilt: stipple quilted!
romance in the garden: nothing
twirl: nothing
taite: nothing

trips to the store: none

internet activity:
picked up a few new Craftsy classes that were on sale
purchased some amy butler and anna maria horner from Fabric.com

organization:
started using a new green pitcher for containing my thread scraps

 I pick up new pottery serving pitchers, platters, cakestands, and bowls from Marshall's periodically. This last week I happened apon these pretty green pitchers and got a pair for super cheap. Whilst sewing at the dining table, I needed a place to put my cut threads and just threw them in the pot that happened to be sitting in front of me. I like it!

my doll quilt still needs binding. up next, i'm going to stipple my other doll quilt for more practice and then tackle a real quilt. I think i'm going to stipple "romance in the garden" before I do "taite" because it's not quite as important to me. I really want to get "taite" right. wish me luck!

Wednesday, May 8, 2013

starting a stash

 2010 was the year i finally got in to sewing. my desire to sew had started a year or two before that, with some crazy, "i want to create!" spring fever each year. but it wasn't until Scrapbooks, ETC, my local store, began carrying designer fabrics as well as scrapbook supplies that i made the leap. i already had a book or two about some simple projects like aprons and softies. (i always start with a book; i'm a bibliophile and book collector first and foremost.) when my birthday month came around, i took advantage of the store's birthday coupon, good for 20% off an entire purchase, to start my stash.
really, i had no specific project in mind. i just wanted to make something and get some fabric, especially since i could take advantage of my coupon. this is not the best way to fabric shop. once there, i wasn't even sure how much of the fabrics to get. i went for 2 yds each of my favorites. i knew a yard might not be quite enough for a skirt or larger project, so i aimed at 2. it was just a shot in the dark. i also purchased 39 (!!!) fat quarters, a few sewing tools - including my gingher rotary cutter, and some 100% wool felt in about 20 colors. even for my birthday, and with a coupon, it was a large purchase.

last weekend, while sorting scraps with a sick little girl for entertainment, i came across the receipt from that original purchase. it made me smile. then i remembered i still had a stack of that fabric (or most of it) on my stash shelf. so i photographed it. i was curious to see how much of it was still there. looking at what's listed on the receipt compared to this pile, i've only dipped into this once or twice. i've used some of these fabrics for projects, but have always rebought them first, for some reason. probably because i selected them to go with the other fabrics for those projects without remembering i had them.

these are still some of my very favorite fabrics. my tastes haven't changed. sandi henderson and heather bailey are well represented: pop garden, nicey jane, meadowsweet. they continue to be my top two designers and favorite lines. i'm surprised to see there's no amy butler since i know i went in looking specifically for her designs. i'd read enough sewing material at that point to know her name. maybe i got fat quarters of her stuff. those are so thoroughly mixed i have no idea what came when.

it tickles me to see that i have this original pile mostly intact. it actually goes together pretty well. maybe what i need to do is make an entire project out of this "pull." with about 30 yards total, there is more than enough here. i could probably do a couple of quilts out of this.

but i'll start thinking about one.
definitely a quilt.
and i already know the name for it: starting a stash.

Tuesday, May 7, 2013

scrappy wrappy


i am a scrap lover/keeper. even the tiniest bits have a place around here. and i just found a new use for super skinny strings. they make nice ribbon for gift wrapping small presents. it has sort of a shabby chic look with their fraying edges.

i was running out the door to my mom's 60th birthday dinner party when i remembered that in addition to the event we'd gifted her, i had a cd of the les mis soundtrack i'd gotten her. and it needed to be wrapped, pronto. i knew i had some nice tissue paper on hand and i remembered louise telling me she liked to save her squaring-up strings for gift wrap embellishment.

honestly, i didn't particularly like the idea when she suggested it. so i'd never tried it. but i was in a hurry and i remembered all the lovely strings i'd just sorted a few days earlier, so i rummaged and found some pretty ones to tie on the package.

i actually like the effect. a pretty gift tag added on and i had a nice little package to hand mom, who is a sewer and could maybe appreciate my use of scraps. i have gift bags aplenty around here, but i prefer wrapping if i can manage it because i think it's more fun to unwrap than it is to dip into a bag.

my only regret: i didn't think to recycle the strings after she unwrapped them! now they probably are in a trash bin somewhere.

Monday, May 6, 2013

next "to do's"

with me nearing completion on my chevron quilt, it's time to start a new project. yay! a fresh beginning is always so exciting. i have two in mind that i'm burning to do. after working with a kit, i am sooo ready to pick my own fabrics and do my own quilt design again.

my newest idea: an offset diamond out of hst's made in spring house  collection by stephanie ryan for moda. with the makings for a few dozen quilts in my stash already, i absolutely didn't need another new project, but the fresh, jazzy colors of this line seduced me. i don't think i have anything like them. just a charm pack, i thought? well, i sat down to consider what i could do with a charm pack and my new hst skills. a new design was born and i gave myself permission to get the charm pack. or packs, as it turned out.

it uses 3 charm packs each of the porcelain solid squares and the printed fabric to make the hst's. the yellow and green floral is the backing. the hot pink floral print is the binding.

i love that with a charm pack i get just a tiny bit from each fabric. it's a relatively inexpensive way to get just enough of lots of different fabrics.
 
i know most quilters use graph paper to design, but i just sorta sketch it out myself. i'm not decided on how i will place the hst's exactly, but i have the general idea and am looking forward to playing with placement. i better get my design wall done before then.
 
as much as these colors have me swooning, i really should get my sons' quilts done. so i probably should tackle this design i made for s2 next.
 my sketch is almost too light to see, but it's just basically some rows of jelly strips with large panels in between. it'll be quick and simple (i hope) and please my son.
i didn't record my idea really well, so there will be some improv because i'm not exactly sure what i got all the fabrics for now. silly, me. i do know that the large dot is for the backing, the 3 smaller dots are for the panels on the front, and where the jelly strips are to go. it's just the quarter yard bits i'm not sure about. they are either for piecing the back or for a pieced binding. maybe both? i guess i'll find out when i get started.


Friday, May 3, 2013

diy pressing board

i have three quilts in the quilting que, fully pin basted and ready to go. oh, and that little doll quilt i want to use to practice fmq on. so, alas, no finishes there.

this week my friday finish is my pressing board! it's not a quilt, but it's a project i've had in mind for a while and it will help with all those other sewing projects in progress. linking in with other friday finishes at crazy mom quilts.

i've been wanting an official pressing board, as opposed to an ironing board, for my quilting for some time now. when my 12 yr old son decided to use my nice ironing board as a bench press for weight lifting (and consequently busted it), i figured i really ought to get that pressing board made. i knew you could make them because Elizabeth Hartman of oh, fransson! had done so. her portable tv tray pressing board is especially cool and useful.

it's really quite simple to do. all you need are some plywood, 100% cotton batting, 100% cotton canvas, a staple gun, and duct tape.

i found a nicely sized piece of plywood in the backyard, a leftover from one of my mr.'s treehouse projects. it's about 36" sq, give or take. i don't remember the measurements anymore. since i scavenged it from the backyard, it even has some child chalk graffiti on it. but that'll be covered up.

my old, sorry, stained ironing board and the batting for my new pressing board. i'm going to have a lot more room to press those large pieces.
for the batting, i got lucky again. when i sandwiched and basted "romance in the garden" i used a prepackaged, 100% cotton, warm and natural brand batting that turned out to be larger than needed on one side. the leftovers were perfect for my pressing board. when folded in half, it was just large enough to wrap my plywood piece with a few inches to spare per side.


at this point, i was supposed to wrap the batting and staple it down with the staple gun. but our staple gun could not be found. after waiting a few weeks, hoping it would show up, i just skipped the staples and went straight to duct tape. when the stapler emerges, i'll get this baby properly fastened. until then, it is okay.
simply wrap the batting around to the back, making sure it's snug but not pulled too tight, and secure with the staple gun (or tape). repeat on all four sides, securing opposite sides first.

 check the front to ensure the batting is smooth, then lay face down on the wrong side of the canvas piece.

when i went to joann, etc to get a cotton canvas fabric, i went looking for a solid white because i like a plain surface to press on. it helps me see the pieces i'm working with much more easily than a busy pattern would. i think all those ironing board covers in cute fabrics are darling, but not practical for me. however, when i saw the selection of cotton canvases, i started drooling over the designs and changed my mind. it got changed right back when they all read "flammable" on the label. how on earth is an 100% cotton canvas fabric flammable, i wonder? any more flammable than anything else, that is. well, to be on the safe side, i went with the plain cream solid i came for. i don't need my pressing board catching fire. "flammable" and ironing/pressing with lots of hot steam do not mix. better safe than sorry. (this is why you should use 100% cotton batting and canvas - they can take the heat better than a synthetic mix would.)

so, back to the construction. lay the batting wrapped board down on the wrong side of the canvas fabric.

 fold one side of the fabric snugly over to the back. begin stapling in the middle, working your way out to the corners.
 or, like me, just duct tape that baby down.

if stapling, again work your way out from the center of the side you're securing. at the corners, make a fold in so you have a nice mitered corner. it's like wrapping a present.

 then pull that side corner to the back and secure.
this cuts down on bulk and weird corner flaps.

once you've stapled it all down, you can go over the edges with duct tape to keep it clean and prevent the fabric from fraying.
now i have a nice, large pressing area to work with. and because i used a solid cream, i also have a neutral background board to shoot photos on. i love when tools can multi-task.

Wednesday, May 1, 2013

just desserts


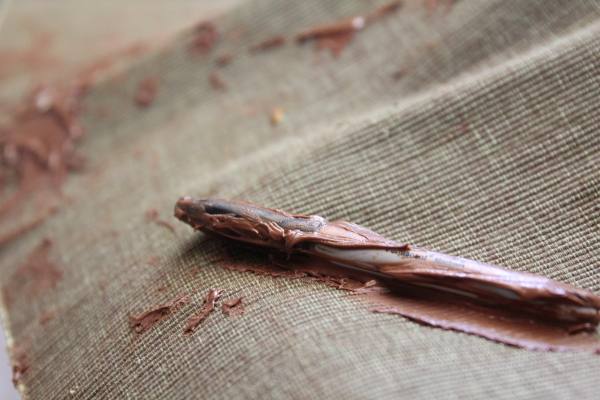
this is what i get for blogging when i should be paying more attention to my kids: my baby got into a costco-sized jar of nutella and took a dip. i heard my younger son yelling, "emergency! emergency!" but not in an urgent tone. i came downstairs to find her covered in hazelnut spread.

 oh, goodness. i hosed her and the clothes off in the shower. fortunately, and quite unexpectedly, it came off of her. i fully anticipated it to stain that darling dress.

 she'd done a number on the table, too: 2 placemats, a sippy cup, the jar, the table top, and a chair were all well coated. i really thought i'd put that jar away after the kids used it on the waffles son #1 made this morning. guess not.

my favorite part of the mess: the sharpie marker she must have been stirring with.

she is safely napping in her crib now and i can blog some more.
but i better check on the other 6 first.