

i have yet to sort and store all my scraps. this basket is leftover from the pile i was working through at the beginning of the year.
but . . .
i am making progress and have a good system in place now, which feels really good. and while i may be backlogged on old scraps (i recently uncovered a few more baskets of them), i am doing much better at putting scraps away as i make them.
my new scrap drawer tower was working really well, but it was not letting me sort as thoroughly as i would like to. so i decided to get two more towers. i now have one each for solids, prints, and low-volumes. it takes up some space, of course, but i really like it! ideally, someday, i would like to have drawers like these built in under a custom cutting table. that would be so convenient!

here's the top of the towers, which sit side-by-side in front of my design wall, just to the right of my cutting table. i have a few baskets of various collections on the top, as well as some of my rulers. this is in easy reach of my cutting table, so its a good place to keep the rulers and makes it a snap file away scraps when i cut them.
the baskets on top contain old scraps waiting to be sorted, my small bonnie lass block pieces, my bigger bonnie lass pieces, and i think that bottom one is more scraps of some sort that need to be put away. i'm still finding things hiding here and there in my sewing room as i tackle different areas. the bonnie lass blocks are longterm, on-going scrap projects that i use for leaders-and-enders. it's really nice to have them accessible on top of the towers so i can drop new pieces in when i cut them, and i can grab them to put by the machine when i want them there for leaders-and-enders.
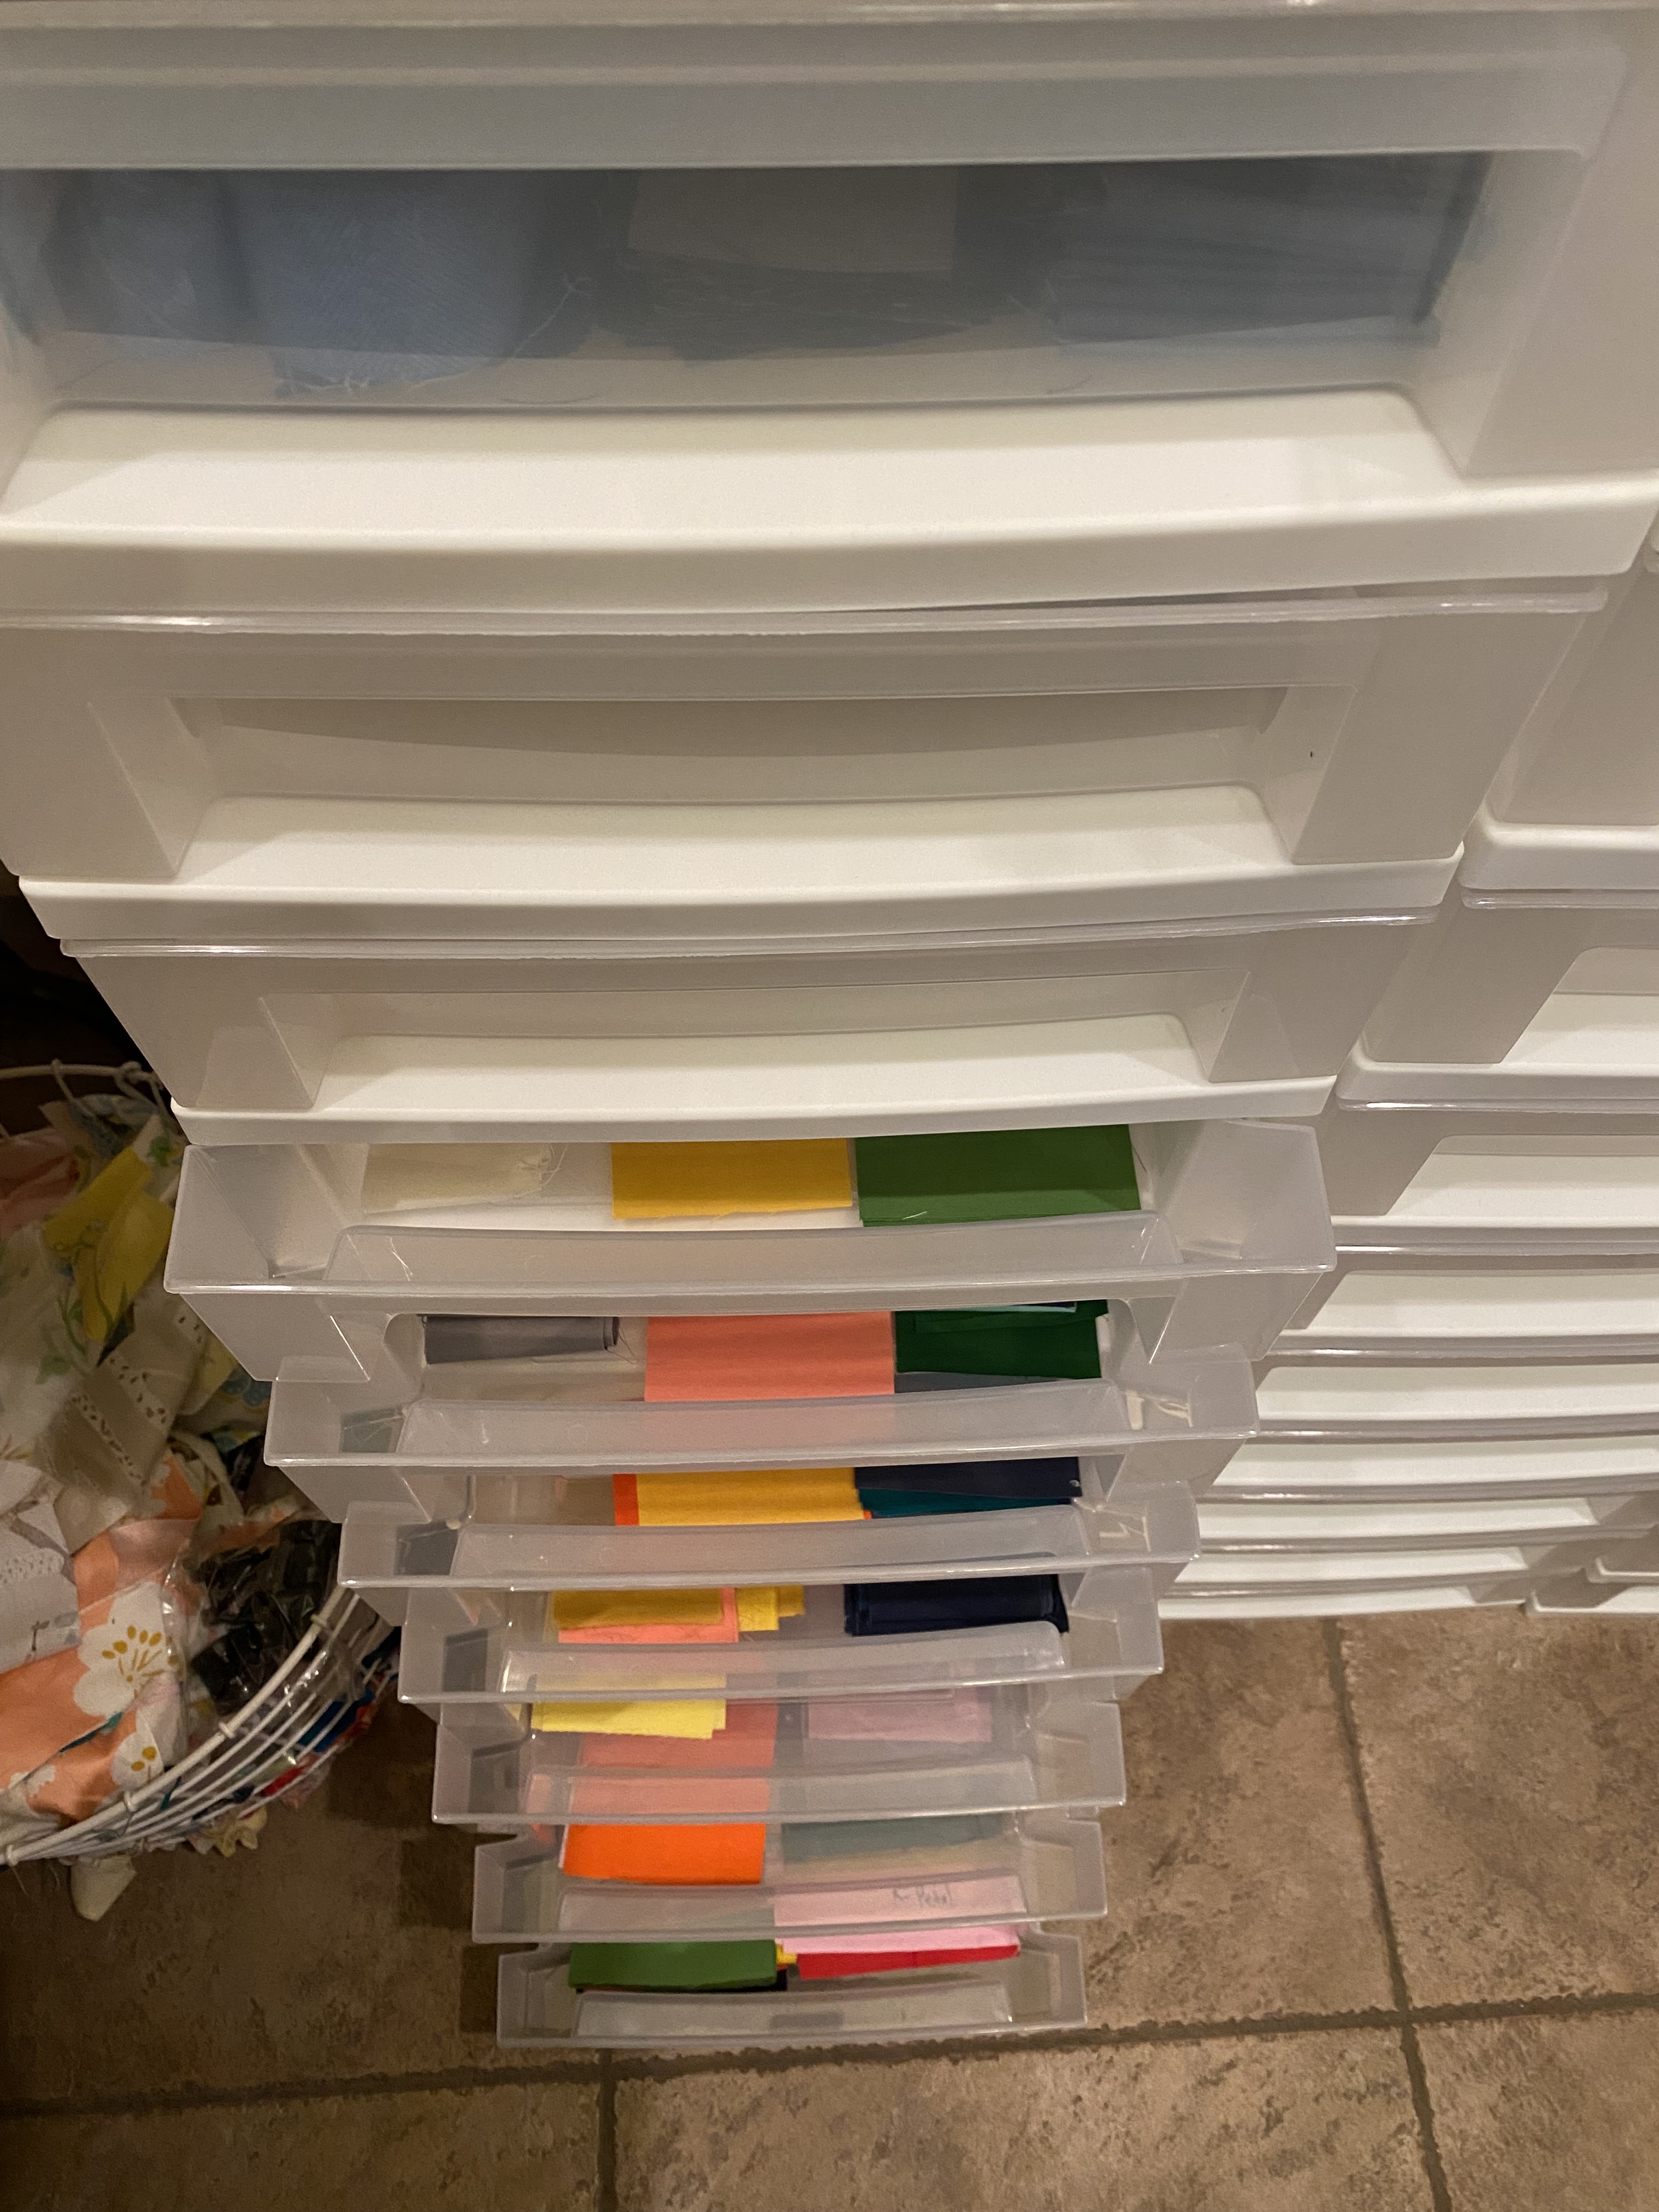
the top drawer of each tower is dedicated to my liberty + chambray scraps: (left to right) binding and chambray pieces in the solids tower, low-volume pieces, colored pieces.
below the liberty top drawers, i have a drawer each for scraps in width sizes from 1" to 5", in increasing increments by each half inch, a total of nine sizes. i know this is more sizes than other scrap quilters keep, but i have my uses for each width and this is how i want to do it. it definitely takes up more space and requires more drawers, which is a deterrent for some.
 |
| 2.5" wide low-volume scraps, mostly from "edna" |
in each drawer i sub-sort pieces of the same width into these categories (left to right in the photo):
- crumbs - smaller than a square, but the right width for the drawer size
- squares
- chunks - longer than a square, but not a strip
- strips - length of the drawer or longer, so folded
there are different uses for each type and reasons why i keep them as i do:
- crumbs can be pieced into scrappy strips
- squares are useful for patchwork and corner triangles
- chunks can be subcut into squares or pieced into scrappy strips
- strips can be subcut into squares, made into binding, and are useful for a variety of patterns, such as log cabins or courthouse steps
larger pieces can always be cut down to smaller ones when needed. storing them by size lets me know what i can get out of them in addition to finding specific sizes for use. pieces that are not in exact increments are rounded down and get stored with the closest smaller size. ex: 2.75" falls between 2.5" and 3", so would go in the 2.5" drawer. i'll cut as needed later.
as i begin to use these scraps for true scrap quilts, i may find my ideas about categorizing and sorting change. maybe i won't need certain sizes or categories. but for now, this is what i'm trying. i'm willing to be flexible and change course later on.
the solids scrap drawers, top to bottom: chambray, 1", 1.5", 2", 2.5", 3", 3.5", 4", 4.5", 5".


these skinny 1.5" wide strips are thin enough i can sort by color family.

 |
| more scraps that showed up |

my room is so crowded that i was at a loss at first where to put these towers. but i stacked all of my project boxes in a corner, clear to the ceiling, which opened up some floor space for the scrap drawers. i need to clean out those cubby shelves next, which should make more room for further condensing the

i'm still not used to taking "before" photos of my messes so i can see the improvement as dana white suggests, but i did think of it once i got started with this shelf. if i had the real "before" photos from january, you'd see i've actually made a lot of progress in this space. it's still not pretty and is visually overstimulating, but it's a lot better than it was.

Wow! I am always momentarily inspired by sorting and organizing posts and then I quickly return to my messy color-sorted bins. I do have more bins for specific projects now and that has been really helpful. I have four quilts going right now but when they are finished, I am going to do another sort and purge. Before pictures are a great idea.
ReplyDelete