Wednesday, January 30, 2019

don't scrap it yet - border it

***this is a post i made during the gypsy wife 2016 quilt along that never got finished or published. as there is a new 2019 qal going on, and i have had visitors checking in on my gypsy wife posts, i am adding it in to help the new gypsy ladies.

 gypsy wife has produced it's fair share of blocks that went wrong or pieces that are extra.

for example, there were extra triangles that resulted from fussy cutting a goat from a fabric scrap for the center of a bordered sq-in-sq block. i was able to use these red floral triangles for another smaller sq-in-sq block, even though they weren't exactly the right size. all i had left from the fabric scrap were 4 oddly sized triangles. one of the triangles even had a nipped corner. but i checked my required measurements for a 4.5" sq-in-sq block and found they were big enough, or even bigger than needed, so i was able to incorporate them into a block. the triangle that had a nipped corner was usuable because i placed that triangle so the nipped corner would be behind another fabric and wouldn't show at all.

also, i found a square of that green and navy AMH fabric i had fussy cut slightly off, which was also slightly too large for the center sq of my sq-in-sq block. by carefully cutting down a bit to the right size i needed, i was able to correct the fussy cut at a smaller size and use this piece, too. once i assembled all the odd pieces, i was able to trim it down to a perfectly sized block. i love my little make-do sq-in-sq block.


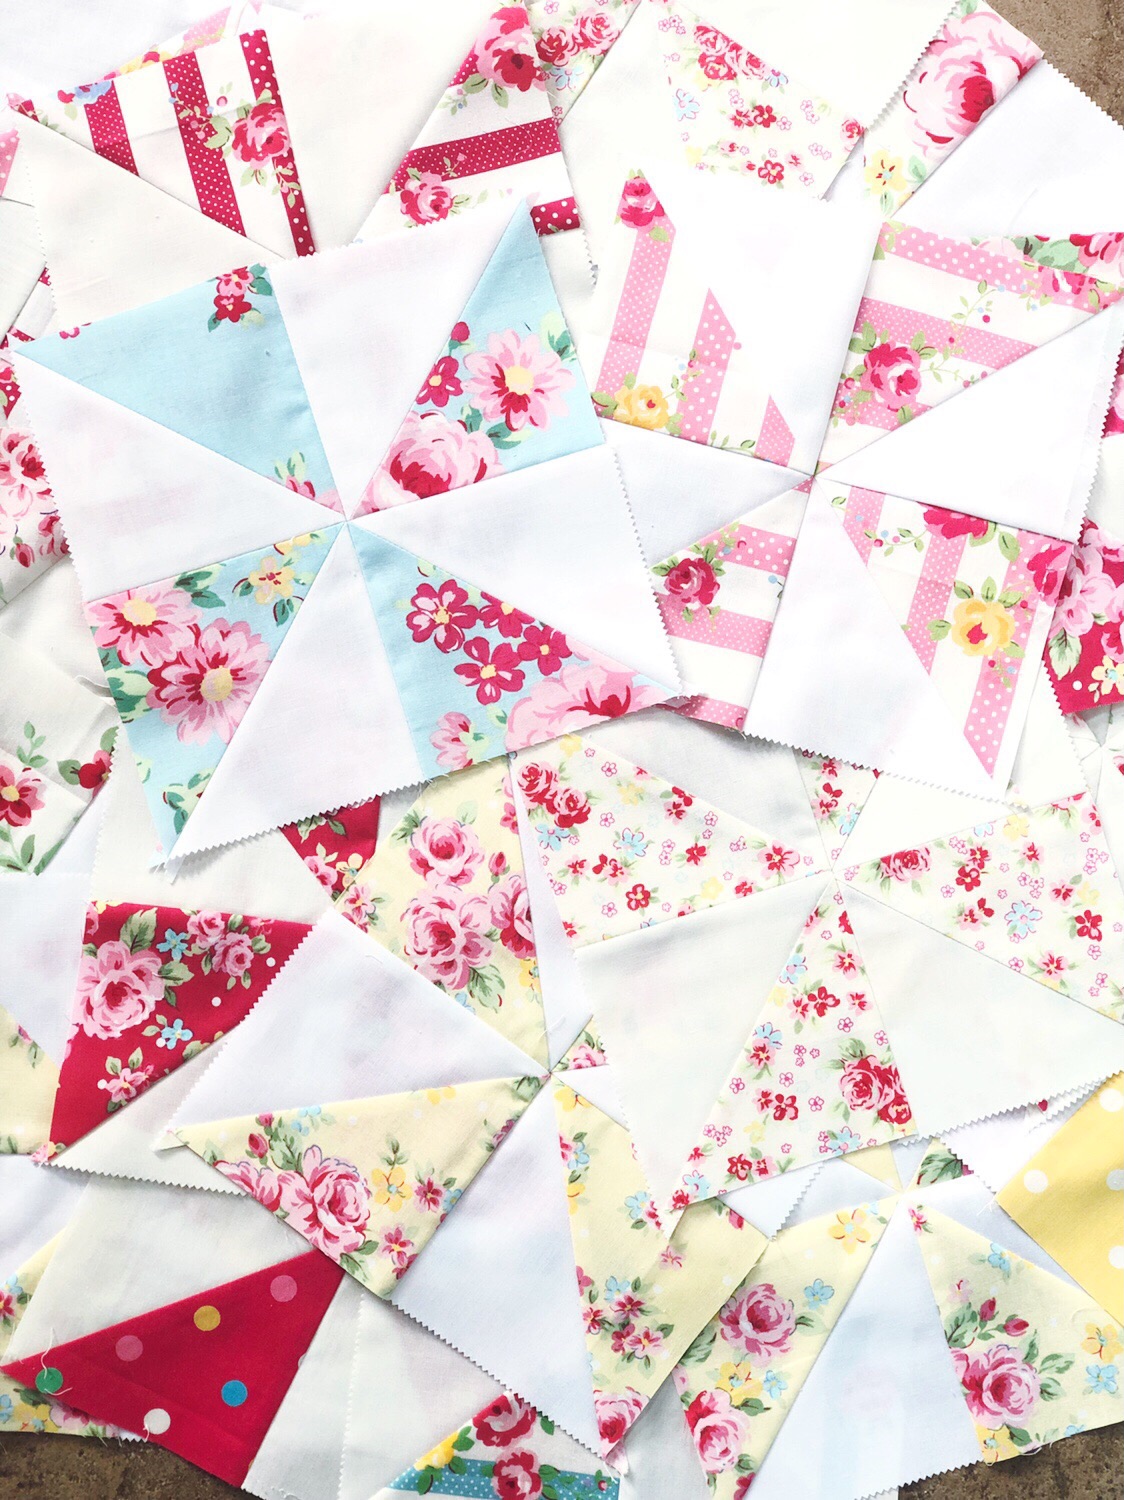
some of the extra hsts that have been made during the production of various other blocks, i simply used in the large hst blocks called for in the pattern.

and then there were the blocks that just got made wrong and were altogether incorrectly sized, like some sq-in-sq blocks i made in the very beginning. i simply read the directions wrong and got some blocks that were off in measurements.

i goofed this one twice! but i didn't like that border anyway, so it worked out


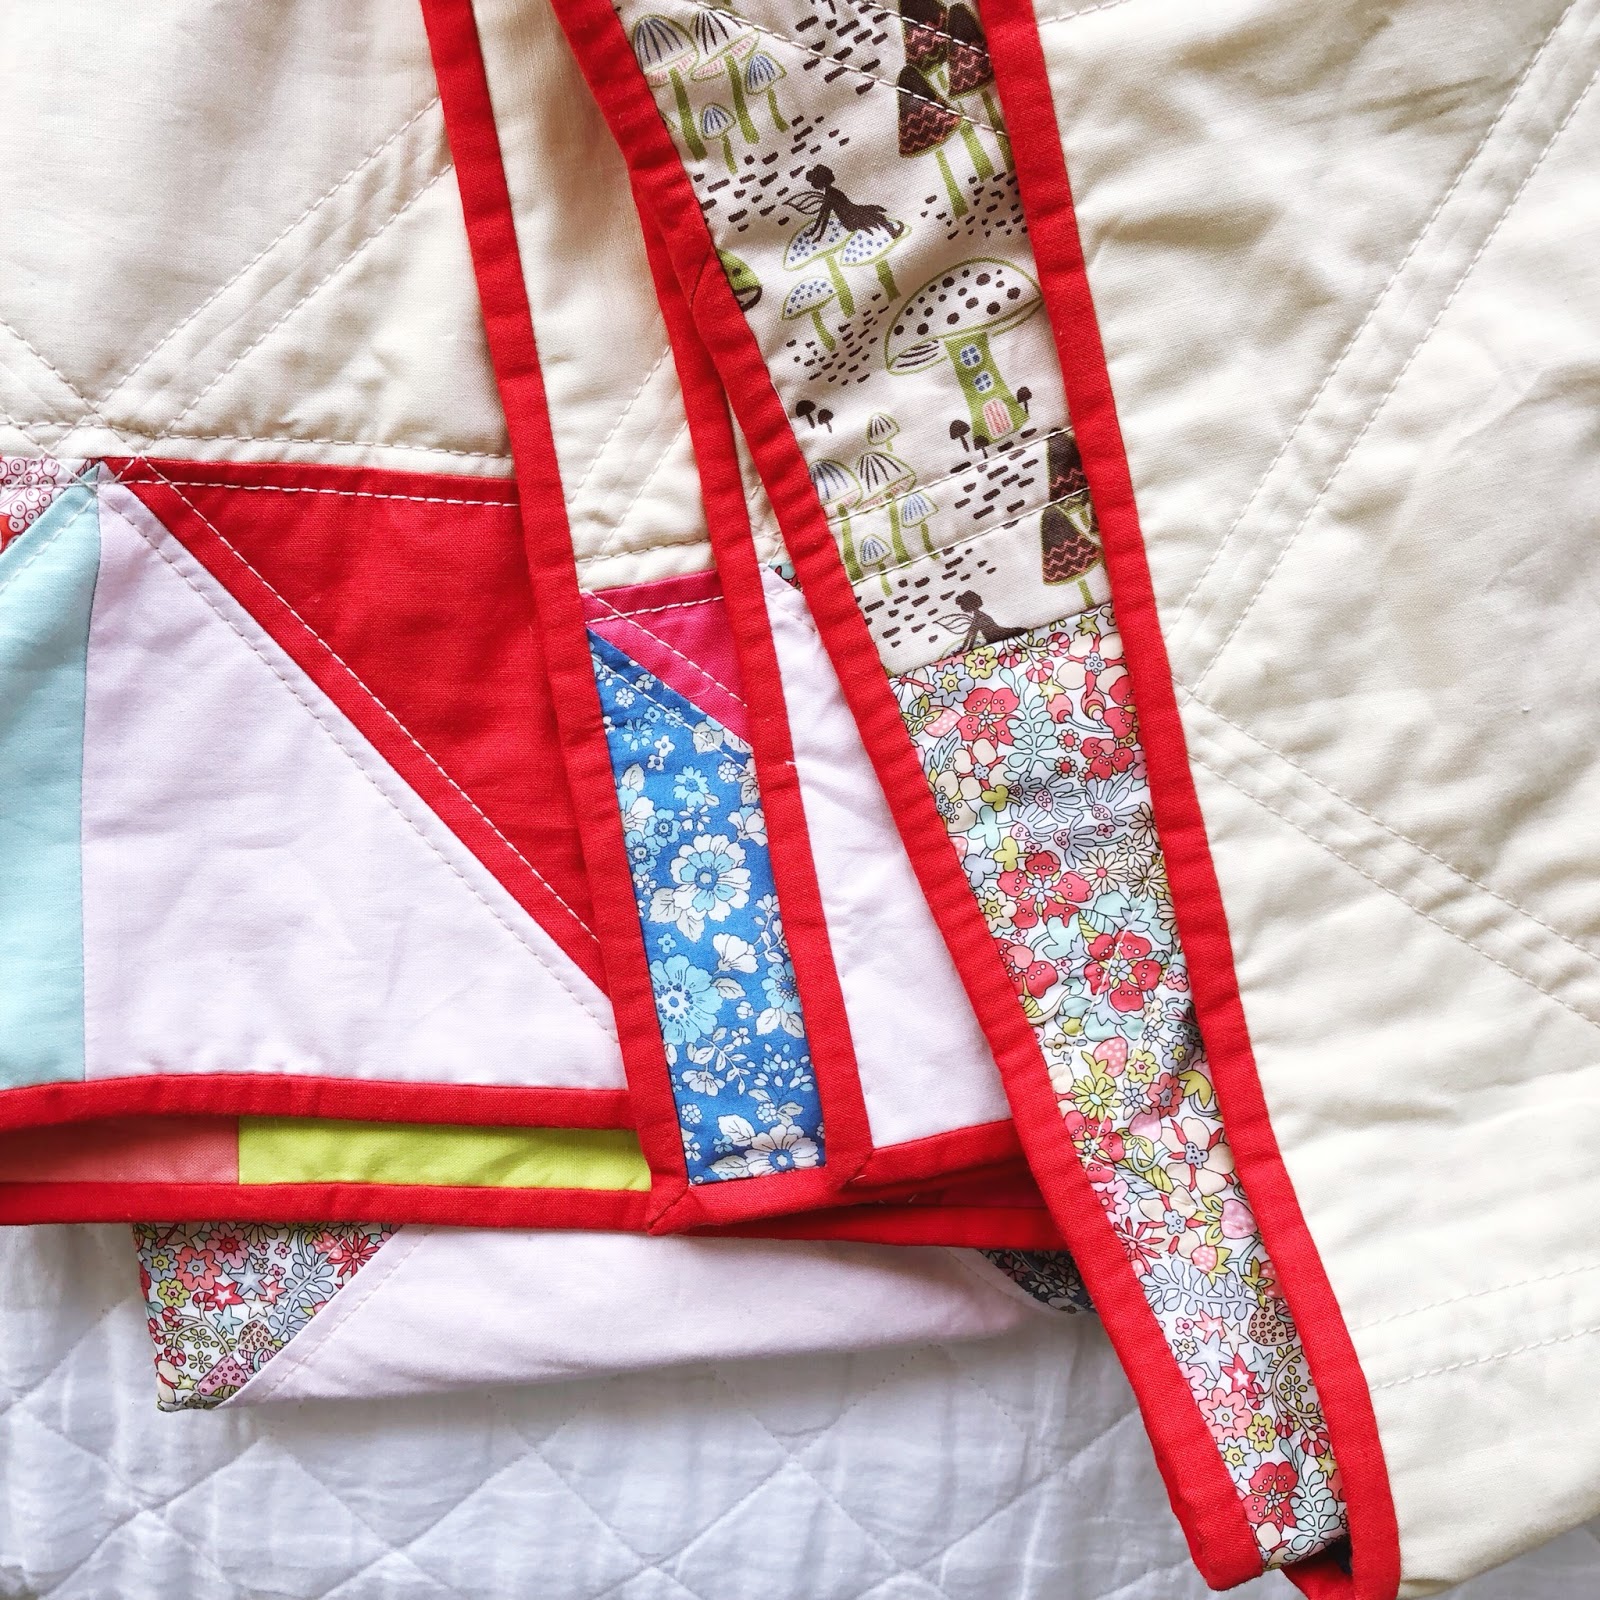
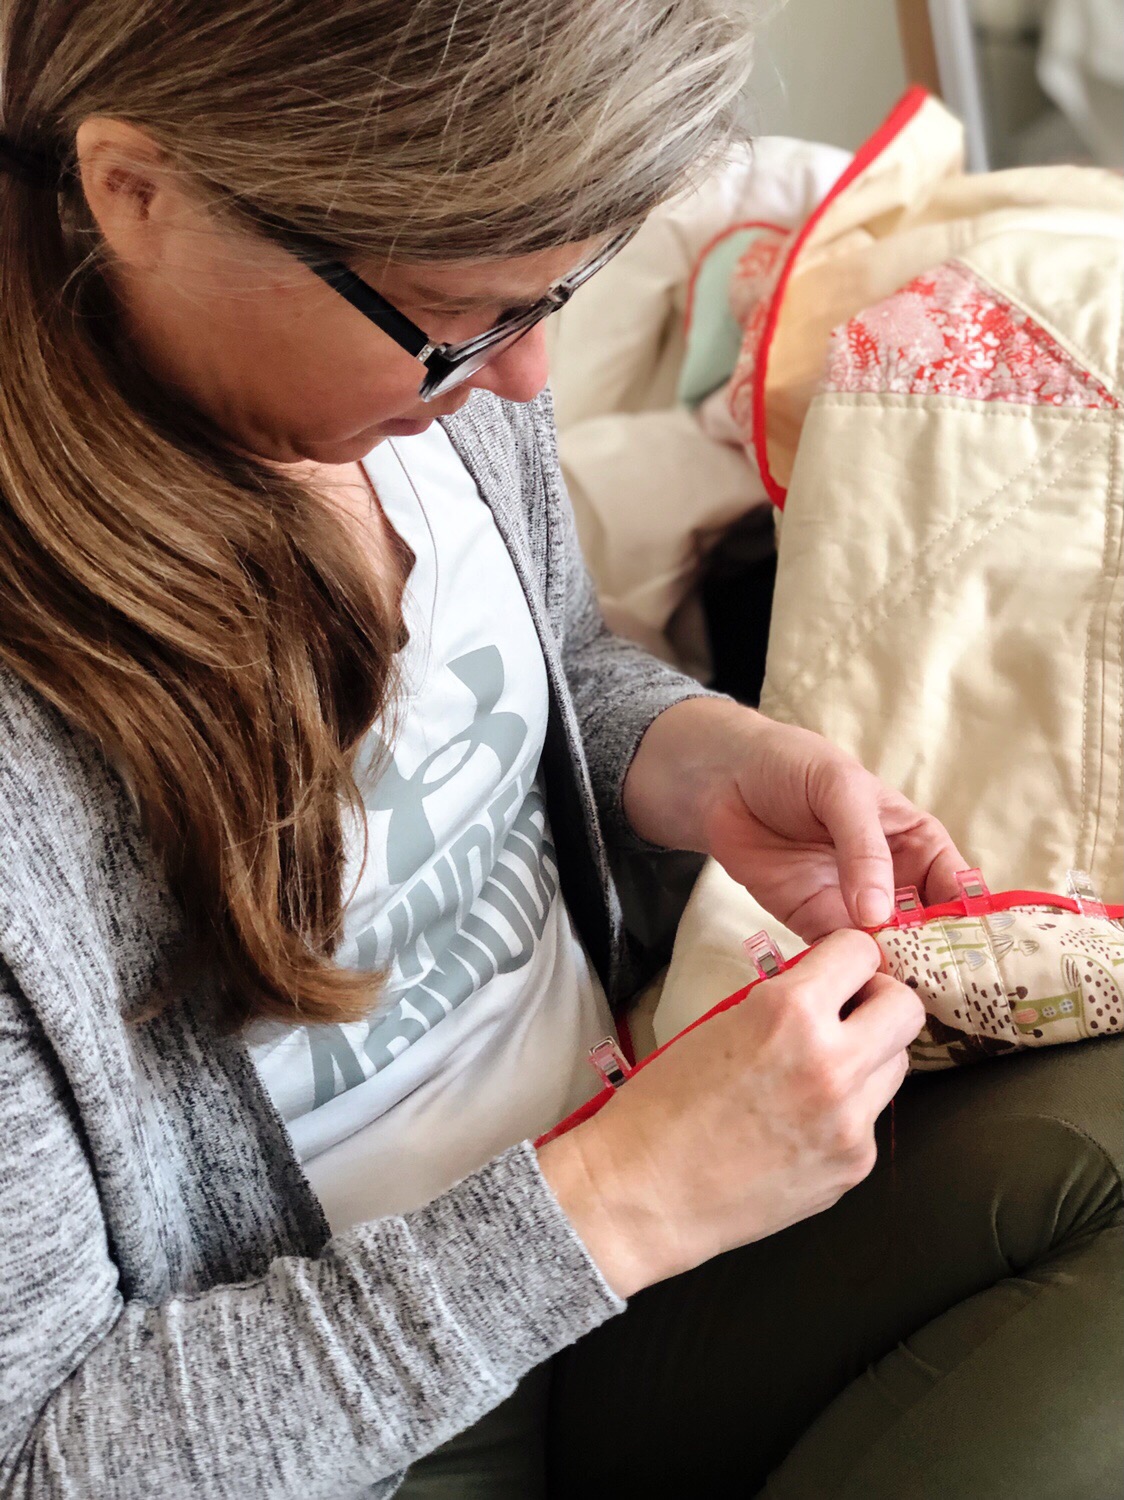
 this little center block here is one of them. i decided i could still use it by trimming the excess blue outer square away and adding another border. originally, the outer square was just too big at more than 1/2" away from the points of the inner square. so i trimmed it down to 1/4" from the inner square, which will give me points right up against the next piece. any time you have a block that is too small, use this formula:

((required block size - actual block size) divided by 2) + 1/2" = width of border strip needed

that looks complicated, but really isn't.

for example, i have a 3" block but i need a 4" block. (all measurements cut/unfinished)

((4"-3") divided by 2) + 1/2" =
(1" divided by 2) + 1/2"=
(1/2") + 1/2" = 1" wide border strip

in the above photo, i only added 1/4" for the seam allowance, when i needed 1/2" because i forgot both fabrics would be loosing 1/4", not just the border. you can see my block is still too small!

 when it came to this block, which was slightly too small (again, used wrong measurements), i just put it up against a ruler of the correct size. you can see i'm 3/8" shy overall.

divide that in half, and you have 3/16". that was a bit fussy for me, so i rounded up to 4/16", which is 1/4". so my border strips were 1/4" + 1/2" wide, which = 3/4" wide.


that gave me a block slightly too big. using my ruler, i just lined up the points of the inner square so that there was an even amount of fabric on each side of the points and trimmed.


and there you have it - three nice blocks i would not have been able to use that i made usable. the bordered blocks will be slightly different than the pattern called for, but in this busy quilt, who will notice?

Tuesday, January 29, 2019

spare pennies


i hardly know what to think of myself - i got this quilt top fully assembled in a few days! so unusually speedy for me. it felt like my first penny patches took for.ev.er and a day. probably because i was much more concerned about fabric placement with those.

penny patches can turn into a huge game of fabric sudoku if you care about spreading the fabrics out and get really caught up in the balance of everything. but since this was a quilt of leftovers, that happened a lot less. it was kind of like, "well, let's just get these pieces used and this top made."

i did end up with two of those large blue squares caddy-corner to each other, but it's not that big a deal. in reality, i kind of wish i hadn't used them in this project at all. without them, this would have a much lighter, low-volume feel. but that's ok.

what is a little sad to me is that i thought all the pieces of the fabrics i used for this quilt were in the same box and had to pull some other fabrics to fill in the squares i needed to make the full top. and i had to purchase/order backing fabrics, which i got enough of for two more quilts. then, when i was cleaning out my sewing room yesterday, i found a whole stack of these fabrics piled away in a place i didn't at all expect! ugh. i could have made the quilt a little more cohesive and saved some money, too. that's the problem with owning too much fabric - it can get lost in the masses. i am trying to remedy that.


beyond the surprise of getting the top for this quilt finished so quickly, i got the backing made and the quilt sandwich basted in one evening and began quilting it today! can you even believe i got two-thirds of it done in one night?

i can't.
who am i?

the muscle memory on the orange-peel/dogwood petal quilting came right back and i zipped through it. this might be done and ready to bind this week!

something curious i noticed while quilting that i never have before: the initial pinwheel design i do, which is half the shape of the orange peel, looks like apple core on the back where there are no grid lines to draw attention to the pinwheel shape.

maybe you can see what i'm talking about in the two photos above? secondary designs like that are so interesting.

i make the pinwheel/apple core design because i work my way down a row, curving back and forth in this fashion, forming half of the peel/petal design, and then make my way back up the row to finish it out. this is my preferred way to move through this particular design.

you can actually go quite a ways like this, doing several rows or blocks in one direction before turning back around. you just need to pay attention to not cutting yourself off on accident and follow the path you can down.

Saturday, January 26, 2019

star in the fairy forest, a finish


"star in the fairy forest" is a finish and has been handed off to my daughter, d4, it's new owner.

she and i will have to take it out for a location photo shoot at some point, but in the meantime, i took a few shots of it, particularly of some of my favorite details of the quilt.


that little strip of the mushroom forest print to the left of the coral star point (liberty "fairyland" in melon) is one small scrappy detail i added for fun. it's not part of the quilt's pattern or main design, but an element i slipped in on a whim. i think these bits give quilts a make-do, pieced-together feel.


this quilt is a variation on my "stella grande" large sawtooth star pattern. these medium-sized blue and green hsts i put in between the star points are one of the ways i varied this quilt. perhaps this makes this a different kind of star, whose name i'm unaware of, rather than a sawtooth. but my quilt history knowledge isn't suffiencnt to know what it might be called.

i added these blocks in so i could use more of the color palette i had in mind for the quilt and place touches of the colors in more places than i did with my other "stella grandes."


the fiery tomato red paired with the icy pink and blue is such a pretty color combination, even if it is a bit washed out in the sunlight here.


a meeting of points. so many seams packed together there. these spots give me a bit of trouble when i quilt over them, but juki and i manage.


much of the quilt bursts with color, but when you pay attention, you can find small, quiet pairings of color in places like this intersection. i like to zoom in on these small details because they have a different feel than the quilt as a whole, yet are still a part of its character.

plus, that little grid made by the stitching with aurifil 12 wt pleases my senses, too.


i used prints on the top of this quilt, where my other "stella grandes" were strictly solids. each print represented one of the solid colors from the top, and was used interchangeably in the design. this colorway of #libertyjunesmeadow was the grey print.

three of the prints were liberty of london tana lawns, one was a lecien "memoire a paris" lawn, and the last was a quilting weight print. the use of the lawn gives a luxurious feel to the quilt, especially since it comprises most of the backing. it was a little tiny bit persnickety to work with, but really not that bad at all.


here you can see the two main prints that were the inspiration for my color palette and the quilt's name: liberty's "flower tops" and the mushroom forest fairy print, "enchanted forest" by lewis and irene. they had mostly the same colors, but in slightly different shades of each. by using the color variations from each print, i got some nice color play in the quilt top. and the parchment background color from the fairy print inspired my background choice for the quilt's top, also.

the addition of the smattering of prints on the top gave this quilt a vintage feel the other "stella grandes" don't have. that's something to love and admire about this quilt. they each have their own distinct personality, much like my children.


another happy finish of my #7kids7quilts series.
this is no. 5 of the 7.
almost there.

Friday, January 25, 2019

chain piecing the gypsy child


these are the last sets of fabric pairings for my "gypsy child hst" quilt. the fabric has been sitting in a pile by my pressing table for months and months. finally, i got to them this week.

i now have all the blocks i need for "gypsy child hst" quilt. in fact, i have several dozen extra blocks. that seems to be a theme for me and my quilting life lately. all three projects i'm currently piecing are either in this state or came from leftovers in this state. even when i do the math ahead of time and know what i'm going to need (which i did with this one - 567), i tend to end up with overage.

and then projects beget projects as i try to find a use for them. (as if i didn't already have enough quilt ideas to make.) that's why this is called "gypsy child," after all - it came about because of a block from the "gypsy wife" quilt.


although i suspected i had near enough blocks for the quilt already, i spent an evening earlier this week making the last pairings of hst blocks i wanted to include in the quilt. most of them were the ones i most wanted to include in the quilt, so i wasn't going to leave them out in place of others i wasn't as keen to use.


i ended up with a very long chain of squares. i just love how this happens when chain piecing. i will never get tired of making bunting out of it until it gets snipped apart, a job for my littlest one.

i really do get a kick out of the bunting effect and want to photograph it every time it happens. this IG post from @thencamejune reminded me of this the other day. i'm glad to know i'm not the only one!

i like photographing it so much, that once i had the chain done, i put it aside to photograph the next day in natural light, and pulled out another project, also begotten from another quilt, to work on the rest of the night. besides, my little one wasn't available to cut it apart for me and i don't like taking up her job.


the next step to getting this baby gypsy finished is to trim the several hundred hst squares i have pieced and pressed.

i wish i was as excited about this as i was about the chain piecing.

but since "little quilting chores make big quilting finishes," i'll keep going.

Wednesday, January 23, 2019

make all the quilts

penny patch 1.2

the last few days, i have had the unlooked for and rare opportunity to grab lots of quilting time.

i have been quilting like it's my job.
night and day.

i must say, i'm glad it's my hobby and not my work, for i wouldn't want to do this as intensely all the time.

but it's been rather fun.
and a tiny bit grueling at times, too.

my mind has been exploding with quilting inspiration for a few weeks now, but i have been plugging away at wips and leaving the inspiration for another day. this is not like me at all, i must say. yet it feels really good to get some of these things done.

last night i even pulled out yet another old project and started banging away on that. penny patch 1.2 is currently all cut, laid out, and being assembled. i had nearly all the needed pieces already cut since it's being made mostly from culled pieces from my first penny patch made as part of rachel hauser's penny patch quilt along at stitched in color in 2013. yeah, the project is that old!

sugar sweet pinwheel quit for valentine's decor

i have all these pinwheel blocks put together into a flimsy and am awaiting backing fabrics to arrive, at which time i will decide if this becomes one or two quilts. there are enough blocks left over (3 columns worth) to make either a baby quilt, or to add here.

while assembling the top i was going to make just one large-ish quilt, but ran out of steam and interest. so i stopped when it seemed big enough.

my heart just isn't in this project and i really want to move on;
move on to projects i'm excited about and still love, like this:


gypsy child hst quilt now has all it's blocks made!

this project does make my heart sing.
it makes me happy, happy, smiley, happy.

there is some pressing, tons of trimming (500+ yikes!), and the assembly to go.
but this baby is back in the works and i am so excited about it.

now please excuse me while i get back to my temp job as full-time quilter.

happy wip  wednesday to you all!

Tuesday, January 22, 2019

pins and more liberty


i haven't pin basted a quilt in ages. in fact, when i decided i wanted to pin baste this quilt, i had no idea where my pins were being stored in my sewing room. i had to spend some time hunting them down.

as a side note - that room is such a mess. it really needs some attention! but look what i found in there while i was searching for pins:


i got to have another small #chocolateonquilts moment when i stumbled across these dark chocolate covered graham crackers with sea salt, from trader joe's. totally scrumptious and addictive. i was surprised i found a box with a few left in it because i normally devour them all in a few days. you've been warned - stay away! unless you need to sweeten up your pin basting experience.


actually, i quite like pin basting, the process of it. the push of the pin and the give as it slides into the fabric are quite satisfying. it's a similar sensation to hand sewing.

i used to be a die-hard pin basting fan, partly due to the fact that my 4th daughter, here known as d4, used to really like to take the pins out of the quilt once it was done. it was her quilting job and we both liked that.

however, i found that the best way to overcome the issues my juki has with straighline quilting is to spray baste my quilts. and, my goodness, is it so much faster and easier and more convenient. so now i do it for most all my quilts.

yes, there is some expense involved.
and some mess.
and i've read that the spray might weaken/damage the quilt's materials a bit in the longrun. (it's probably not best to have the glues in there for months/years before you complete the quilting and wash the quilt. like i do.) who knows for sure?


regardless of all that, i am a converted spray baster.

not having to stop in the middle of my fmq flow to remove pins while quilting (or having to worry about running over them when i don't stop - done that) is one other large argument in the favor of spray basting.

plus, you can have as many quilts basted at one time as you want. no waiting for your pins to be freed up. this may be a perk or it may enable bad habits. i'm undecided on that point.

the fact that i have a large, wide hallway of ceramic tile on which to do my spray basting only makes it that much easier for me to succumb.


speaking of that tile floor, here's another side note - basting of either kind, when done on the floor, especially on tile, can be hard on the knees. so just do like i do and lay on your belly.

truly, i don't normally lay on my belly to baste so i'm not sure why i was in this photo. maybe because i was trying to get out of the way of the photo i asked my daughter to take of my hands pinning? she thought it was funny to take this full-body shot instead. it is kind of funny, so enjoy.

end of that tangent.
where was i?


yes, i just said i was a converted spray baster.

and here i am pin basting.

i am handquilting this 'liberty makes do too' quilt, so i pin basted it. spray basting and handquilting don't mix as well as machine quilting and glue sprays.

so i got to enjoy the process of old-fashioned pin basting on this little beauty.


all the chocolate was eaten. all the pins were placed.

and now i am at my leisure to enjoy the contentment of handquilting this liberty and crossweave quilt.

wouldn't it be nice if i always have my pins in a handquilting project because i like having one on hand. that is a quilty goal i could aspire to.

Sunday, January 20, 2019

Sunday sewing final stitches


Putting final stitches into “Star in the Fairy Forest” quilt late on a Sunday morning after church. After my last post when I mentioned I looked nice while stitching after church on a Sunday I had to chuckle at myself because this photo doesn’t look much different than the one of me sewing in my gym clothes. My hair is cleaner and styled, but I’m not that made up. We have early church this year so it’s a roll-out-of-bed-and-go-in-five-minutes kind of grooming. And with my readers on, looking down at the stitching, making my I’m-concentrating-on-handwork face, I am still looking my age. Which is all just fine. I’m content  to be sitting in this comfortable and pretty spot with a quilt to handbind no matter what I look like in the photo.

And my daughter is very exited to be getting her new quilt.

Friday, January 18, 2019

self-evaluation with social media

i had to break this post into two. i began talking about my aging maker's hands and decided to pursue the rest of my thoughts separately. 

that was already a longer read than most people want, so where to start with the second of two trains of thought that were going to intersect in that post? i really would like to keep it short and sweet, but this is going to be one of those posts where i think and process my way through some ideas. namely, i've been thinking about social media and also about my aging maker's hands.


binding is such excellent busy work for hands when one wants to think. i’ve been thinking a lot over the last several months about my involvement with social media, specifically with instagram because that has been my platform of choice for the last few years. even though i did not post nearly as much sewing with IG last year (68 posts) as I have previously done (208 in 2017) due to very little sewing done last year, i found myself questioning its value and place in my life for several reasons.

let’s be honest - it’s completely addictive. you don’t have to be posting frequently to be on it frequently. and my sewing account is only one account that i have. i also have a cooking account and a personal account so as to separate out my subject matter for various groups of people I want to interact with. personally, i really appreciate accounts that stick to one subject in general. when i want to look at sewing, i go to my quilting account. when i want to interact with family and friends about their lives, i go to my personal account. when it's time to make dinner, i look at my cooking account. this actually influences who i chose to follow, as well. 

well, that was a tangent! and another thought i have about how i like to interact with social media. but back to the addictive nature of instagram and whatever else you use. even when i mean to "just check up on such and such real quick," i usually end up spending more time than intended.

the new features on my phone and also on instagram that allow me to monitor my time spent using are really eye-opening. do i really want to spend a few hours looking at stuff and talking to poeple about it, or would i rather be using my time actually making? social media can be brilliant for inspiration, but i am overloaded with inspiration! i could easily list two dozen quilts i want make or ideas i want to experiment with right now. somehow, i need to be gathering and processing inspiration in a better or more intentional way.


so here's where i'm at with instagram at the moment - i've posted once this year (about my maker's hands) and checked in with my follower feed a few times, but i'm backing off to see how i feel about this. my purpose in using social media for my sewing has been to record my experience and makes, and to interact with like-minded makers. i've met wonderful people this way and really treasure some of the sweet experiences and interactions that come about because of social media. i've met a few of those people in person and would dearly love to spend more time with them, as well as meet more of my friends in person.

at the same time, i have a real-world life that needs constant attention and doesn't allow me the luxury of engaging with my craft or my online crafty friends as much as i would like to. we are real people meeting in a virtual space, which can interfere with our real lives too much if we aren't cautious. i can't judge how others spend their time, but i have to be realistic with myself about mine and the demands of my life. and, in the end, i don't want to spend so much of my precious time in a virtual space. 

"create before consuming" is a phrase i found from becky higgins. i think it's a brilliant way to check one's self when engaging on social media. so another goal i have for myself is to engage with my craft and actually produce something before i spend time scrolling.

my personal reasons for being on social media are not necessarily the same as what other's have. many people use social media to promote their businesses, and as such, may need to spend more time there and their types of posts will be different than mine. me, i want to record my quilting process as well as my finishes and make connections with other makers. i'm not perusing a following or trying to promote anything. the attention when a post gets a lot of likes is nice, yes. but i'm really not about the numbers.

most of the time.
every once in a while the numbers start messing with me, enticing me. and that never leads anywhere good for me. it makes me second guess my posts or choose to post something when i wouldn't have otherwise. this is rare, but it does happen. 

something else that creeps in occasionally is worry about what certain followers will think, if my particular post will appeal to people or not. i don't like it. i have a very eclectic quilting style and so post lots of different types of projects. sometimes a project in a certain genre will get me attention and new followers of a certain type, and then when i shift gears i worry that it's "not what people are here for." that's silly and i should get over it. i can't please everyone all the time and me posting was never supposed to be about pleasing anyone. i'm most happy when i'm just me, posting what catches my eye or gives me joy in my own sewing, talking to a few friends or gracious admirers along the way.

it's okay to be little.
it's okay to post what makes me happy rather than what is popular.
it's okay to live my life rather than being online a lot.
it's okay to disappear from social media with no explanations from time to time.
it's okay to sew and not post it at all.

and it's good to think about how i'm spending my time, what is serving me or not.

happy sewing friends, and happy living, too.

Stacks of sweets


It’s January, so of course I’ve pulled out my “sugar sweet pinwheel” blocks again, hoping for a Valentine’s Day finish. I noticed when I attempted to stack them in a pile that those 8 intersecting seams in the middle really add up and distort the pile a lot. It’s better to stack them with the seams alternating in place, but still not an ideal way to store them if I want them to lay flat until I can sew them together. 


I also realized I have far too many blocks for one moderately sized lap quilt, which is what I was aiming for. I don’t want a behemoth valentines quilt to wrangle through the quilting stage.  It’s not the worst problem to have, but it has slowed down finishing the project because now I need to decide if I’m going to make two quilts instead, which involves a whole other slew of decisions to be made.

To top it all off, I like this project well enough, but really it was all about using up fabrics I purchased a loooong time ago that I don’t really love anymore, if I ever did. When my quilting time is low and I am dying to work on other more exciting projects, it’s hard to keep myself going on this one. However, I am being uncharacteristically steadfast and plugging away at it whenever I can. I really just might have not one but two Valentine’s Day quilts for the family room this year. 

PS - this is the first post I’ve ever attempted from my phone! Here’s hoping that works. It feels like Blogger should have a mobile version of the blog for posting, but I don’t see one. I’ve had to use the regular site on my phone, which involves a whole lot of scrolling, etc. Does anyone know of a mobile version or app for an iPhone that allows for easier posting from the phone?

contemplating a maker's hands

i am a maker of handmade things

i will always grab the opportunity to take photos of myself at work on my quilts on the rare occasion that i also look nice, such as on a sunday after church. it pleases my vanity.

but i also allow photos at other times. today i even had my daughter grab a full-reveal photo of me at work still in my gym clothes, dirty hair, no make-up, while monitoring her math progress.

this is my life and what it looks like some of the time. this is what i look like some of the time at age 45: i need readers now; i have plenty of grey/white hair; i have a stretched out belly that bore seven children and now retains a few extra pounds; my ears, nose, eyebrows, and chins are all a little more there than they used to be. many days i can be okay with this. on others, i struggle with it like any woman.

my most important making tools

this is just as much who i am as those sunday sewing pretty pictures are, and everything in between is me, too. i'm a middle-aged woman who is trying to age naturally and gracefully, but has very little idea how to in our current youth-crazed culture. i believe in embracing who i am as i continue to age while taking care of myself.

this photo is me, even if it's not who i still feel like inside and rather takes me by surprise when i see it.  because even though i accept aging, i don't feel different inside (other than a few creeping aches and pains) and i still expect to look the same on the outside. a 65-year old friend once told me she felt like she'd stopped aging on the inside somewhere around 25. i'd probably say 30, myself, but i totally agree with her. i don't feel much different even though the years keep piling on. i'm not afraid to count or state my years, believing each one is a blessing rather than something to be ashamed of or hidden.

some other maker's tools

all of this is right in line with a hashtag stream from instagram started by 50-something krista hennebury (@poppyprint) called #amakershands (or #makershands). krista is another woman who resents being told to hide her age and her aging, who would rather be grateful for what her hands can do than worry about how they look or what others think of them. i loved her post about her maker's hands.


this is the photo i posted as part of the "a maker's hands" movement. i do like to photograph my hands at work because i think it's important to preserve the fact that my hands, my most important tools, are what make these quilts. and since i would love to have photos of my grandmothers' hands at work on items i have inherited, i take photos of my hands making things my children and their children might one day inherit.

i feel like our hands are nearly as distinct and recognizable as our faces, and i like photos of my loved ones' hands at any stage as much as photos of their faces.


so i photograph my hands at work a lot.

even though i don't think they are particularly pretty and i have a hard time getting photos of them that i'm pleased with, i keep doing it.

my hands are large but thin, and my knuckles and veins continue to become more noticeable with age. they are picking up sunspots. they look older and more awkward in photos than they do in real life. my daughter even said so recently when i asked her to take a certain picture, "mom, your hands look so different in the photo than what i'm seeing!"

they are what they are, and they serve me well.

i love my hands.
i'm grateful for what they can do.


you may have also noticed that my wedding band shows up in my hand photos a lot. this intentional. it's kind of my hand trademark. if you don't know it's my hands by looking at them, you might recognize the band.

i don't have a diamond engagement ring because we couldn't afford one when we got married as 21 year old struggling college students 24 years ago. but i did get the lovely, thick artcarved band i wanted, and it's been enough for me all these years.

my hands are really busy with binding quilts these last few weeks. 
the third quilt i've bound since christmas is nearly complete.
thank goodness i still have two more to bind because i love handwork!

when i completed the first quilt i started binding this winter, my youngest daughter (age 7) said, "ahw, what?! i don't want you to be done! i like you working on it!" 

i feel the same. 
i like for my hands to have needle and thread work to do.
my maker's hands at work making.
this makes me happy.

Monday, January 14, 2019

constellation of the stellas


in 2017 i began a series of large sawtooth star quilt variations on a pattern that i named "stella grande."

in 2017 i also used instragram far more than i blogged, so there aren't many posts about my stella grandes as there could have been.


these large block, simple quilts didn't take much time to make, and i was able to do one a month for the first several months of the year. three of them even got completed, start to binding, during the year. the other two have yet to be done, but here is a look at the stella grande quilts i made or worked on in 2017:


january - star of the circus


the first, and arguably still my favorite, stella grande quilt was "star of the circus." it's vintage colors and border remind me of an old-fashioned circus poster. the backing of this quilt still makes me happy every time i see it. this quilt lives in our family room and gets lots and lots of snuggle time.

you can read a bit about it's beginnings here.

january/february - love all around


"love all around" did actually get some airtime on the blog. it was a political response quilt, believe it or not! you can read about its origins and meaning here. this quilt, which i gifted to my aunt lynn, never got a full finished shot on its own. you can best view it in the two opening photos of this post. and you can see the stash-busting backing above. i have altered the border in almost every single stella grande - this one has chevron-like little hearts made from hsts. also unique, this is the only stella grande so far to have a print binding rather than a solid one. the heather bailey stripe looked great with the monochromatic pink top. (that's me working on the binding early in the morning on my birthday in my dressing gown.)

february - guys and dolls quilt


"guys and dolls" was inspired by a small gift bag i had on hand. and it always reminds me of a swimsuit my grandmother bought for me when i was in the 8th grade - that was the first time i had ever seen navy and pink together. this quilt also has a few touches of gold and white mixed in to mimic the foil hearts and jewels on the gift bag.

this is another backing that makes me really, really happy to look at. for some reason, i didn't quilt this one right away and it has been laying in the flat-lay/ready-to-quilt pile ever since. as soon as my kids' quilts are finished, it's going on the machine.

march - citrus star


"citrus star" was supposed to be an ode to the eight citrus trees we have growing in our backyard, and to what i like to refer to as "citrus season" around here - that most beautiful time of year in the desert when the citrus is in season and the weather is absolutely divine (as opposed to the six months of hellish heat we get after it). i chose several shades of citrus to represent our various trees and wanted to mix in the blues of our spring skies.


but something about the blues against the citrus colors in the star was way off. so after it languished for a while, i reworked it with a white background reminiscent of citrus pith and it looks much, much better - more like the colors in the first photo without any blues. however, it's still only the star medallion pieced at the moment, so i haven't bothered to take any new photos of it. yet another wip awaiting it's turn.


april - valoe quilt


this quilt was a huge departure in color style for me. i was inspired by a favorite quilter on instagram, jenna valoe. i really doubted myself when i had collected all the colors for the quilt top, which were based on colors from jenna's quilts. but in the end, i totally loved it. this one is right next to "star of the circus" in my heart when it comes to favorite quilts to snuggle.


again, i made a unique border for this quilt variation. there's a small diamond medallion in the center of four strips. maybe you can tell the colors in one border's strips are the colors in the other's diamond? the colors are all pulled from the star's palette. i like this one a lot! perhaps i should have made diamonds to go on the ends, too. but i never think that when i'm with the quilt, only when i'm looking at it in pictures as a whole.


the backing was another wild, risky venture for me, but it all came from stash and i like it, too. now that i'm used to it. the strip on the far left is actually left over from from the backing of "star of the circus." i like that it sort of makes them siblings in a way.

so there you have it - the five stella grandes from the beginning of the year. i had many other combos in mind, enough to finish out the rest of the year. but i never got back into them after summer vacation started. i did, however, churn out seven more for my kids for christmas! so i had 12 for the year after all.


these quilts are mostly complete and are being documented as i go. you can find them by looking at the "quilts" page on this blog and links to posts about each are there, as well as see them on instagram at #7kids7quilts.

here are their names, left to right in the above photo, and links to posts about them: