Showing posts with label mishaps. Show all posts

Friday, June 13, 2025

pinwheel problems


making pinwheels for my "groovy liberty" quilt, the newest liberty + chambray chapel lap quilt. i tried three iterations of this fabric combination, switching pieces in and out until i figured out which one i actually liked. you can't always tell how the fabrics will look together in the block until you try them.

the first combo up there on the left felt unbalanced because the two colorful prints on the right blended together once sewn in the block, leaving the other two to look like christmas on the other side.

i switched out the larger-scaled print for a yellow june's meadow. this brought more contrast and color to the block, which i liked. but something was still off. maybe because there were now three prints with a similar smaller scale. i was mising that big, bold print.

so i swapped that out for the smaller scaled floral. and that’s where i stayed. this block feels fun and balanced, too. 

first problem solved.
  

i started sewing together block pieces from the first fabrics i cut from scraps before i did my maths for the quilt and knew how many i needed for each fabric. not a great idea if i do more than a handful. i had a lot of this mitsi print in hot pink and sewed them all up, only to discover later i had done too many. 

time to unpick.

as i was counting how many i'd made, i found that these two blocks had the chambray flipped. the difference between wrong and right sides of the chambray are harder to see in this photo, but they are noticeable in person. well, i already had to unpick some anyway. this made the choice which to unpick easier.


this one is hard to tell in the photo, but it's mitsi that's flipped wrong side out this time. 

another unpick.


now can you tell what i did? the two bolder, high-value prints (on left) are supposed to be opposite each other. there are a lot of blocks in this quilt and this small switch might not be noticeable in one block. but it feels off to me when i had them balanced the way i like already. 

unpick.


i’m putting my cute bohin rabbit/hare snips to good use. i don't use an official seam ripper. i find the tips of my snips fit in the stitches well enough, so i use those. one less tool to have around, store, and find. i like that they multitask this way. in fact, i probably use my snips for unpicking more than for anything else.

by this point in my sewing time i wasn't even batting an eye when i had to unpick about one in four seams. i just wanted to get the blocks right. it made me think of repentance. i used to hate the idea of repentance as much as i did unpicking. they're the same, in a way. repentance used to feel like being forced to apologize. now i see it as an opportunity to self-correct and start over. no big deal. 

same with the unpicking. once apon a time, when i had to fight hard for any sewing time, having to unpick felt like the worst thing i could be wasting my time doing. it felt like a big setback, a lost opportunity. now i look at the need for unpicking as the way to get my quilt how i want it. sometimes i need some course correction and thank goodness i can do that! both in my life and in my sewing.


in the end, i got my set of pinwheels complete. somehow i didn't get the fabrics set exactly the same in all of them, but this is a minor "mistake" unworthy of unpicking. not everything needs correcting, after all. 


i have five more sets of pinwheels to make. i've sorted the fabrics i pulled into sets, but i'm still waiting on the last couple i ordered to arrive. hopefully the rest go quickly enough, with minimal mistakes. 

but if i do need to unpick, i'll get snipping. because i can and i will.

i've shared an inordinate amount of mistakes lately. do any of you other quilters feel like i'm just a hot mess or is this typical for you, too? it does seem i've made more than my normal share, but i can't tell for sure. either way, i'm just going to keep on keeping on.

i make a lot of mistakes, but i also make quilts in the end.

Friday, May 30, 2025

still edna-ing


my edna strips and star pieces are all cut, after no small amount of trial. the number of mistakes i have made in the process of making this quilt is incredible. it hardly seems possible. but i've taken it all in stride, just kept calm and pressed on. after a certain number of errors, it began to get funny whenever a new one occurred and i could laugh it off. 


i had a fat quarter of that large pink circle fabric, a tilda dot basic, and somehow i ended up with not quite enough fabric to cut all 5 sets of large and small squares i needed for the stars i'm making with it. i was a mere two small squares short. i don't know if i turned the fq the wrong way or what, but i came up short.

what to do, what to do?

at first i decided to just replace it with one more star from another of the four star fabrics. i was cutting the purply berry fabric (pod vine from michael miller) next and made an extra set from that.

then i came across this cute strawberry fabric hiding in my stash and thought that would be a good replacement, so i started to cut that up.


but after consideration, i changed my mind. again. (these are the kinds of problems i cause myself.) i remembered there was a spare large square of the tilda dot and chided myself for not thinking to cut that up for my two squares. but on consideration, i realized i could only get one small square with the needed dimensions out of it, of course, because it was 1/2" too small to get two side-by-side. 

sometimes my brain is sloooow to catch on. this day it was sloooow a whole lot. it was like that old dial-up lagging sound you'd hear while the computer was trying to connect through the modem. eventually, the old brain caught up/connected. but it took a minute. every time.

i really wanted to figure out a way to eek out two star points from the fabric i had (why this was important to me, i can no longer say. either of my first options would have been just fine). fully half the square was going to be trimmed off for the star point anyway. so i pieced two squares together from the leftover bits of fabric.

then i decided that didn't look good enough and went to etsy to order more of the fabric. actually, i think what happened is i noticed the tilda dot while i was looking for a different fabric later in the day and just decided to do it right and get more of the tilda dot, which i would use again elsewhere. goodness, i was silly. i think i'd spent so much time already fixing mistakes and was feeling patient with the whole process so i felt like getting it exactly as i had planned no matter what i had to do to achieve this. that was a little overkill.


once the stars were cut, i moved on to the other strip sets. after making the first two sets of strips with the star blocks, i decided to change the length of the strips to accommodate the 16 patch blocks. i knew what the new length was, but when i cut the next set i made half of them 1/2" too short. ugh. 

do over. file the scraps. move forward.

this pink blender fabric is a different colorway of my favorite neutral blender, which i've used a lot and still have more of. (see it on the back of "collins".) it's by corey yoder for moda. the pink looks a lot different from the white with black sunburst spot thingies. i didn't recognize it as the same fabric at first. it's a good blender print. i'd take it in several colors. i think i might also have it in yellow.


i put together the third set of strips and began attaching the star points to the ends of the strips. while trimming off the hst ends, i accidentally cut one of the other strips that was hiding under the end of the one i was cutting. ouch. sloppy.

the good news on this one is that the nicked end will be trimmed for a star point later and there's enough left of it to do the point correctly. i won't get the little bonus hst from that point, but that's okay. it could have been a bigger loss, for sure.


at this point d5 came into the sewing room and asked if she could help me sew. i put her to work on pairing the strips for me and we began to fly through the job. i wasn't done with making mistakes, but it did get better.


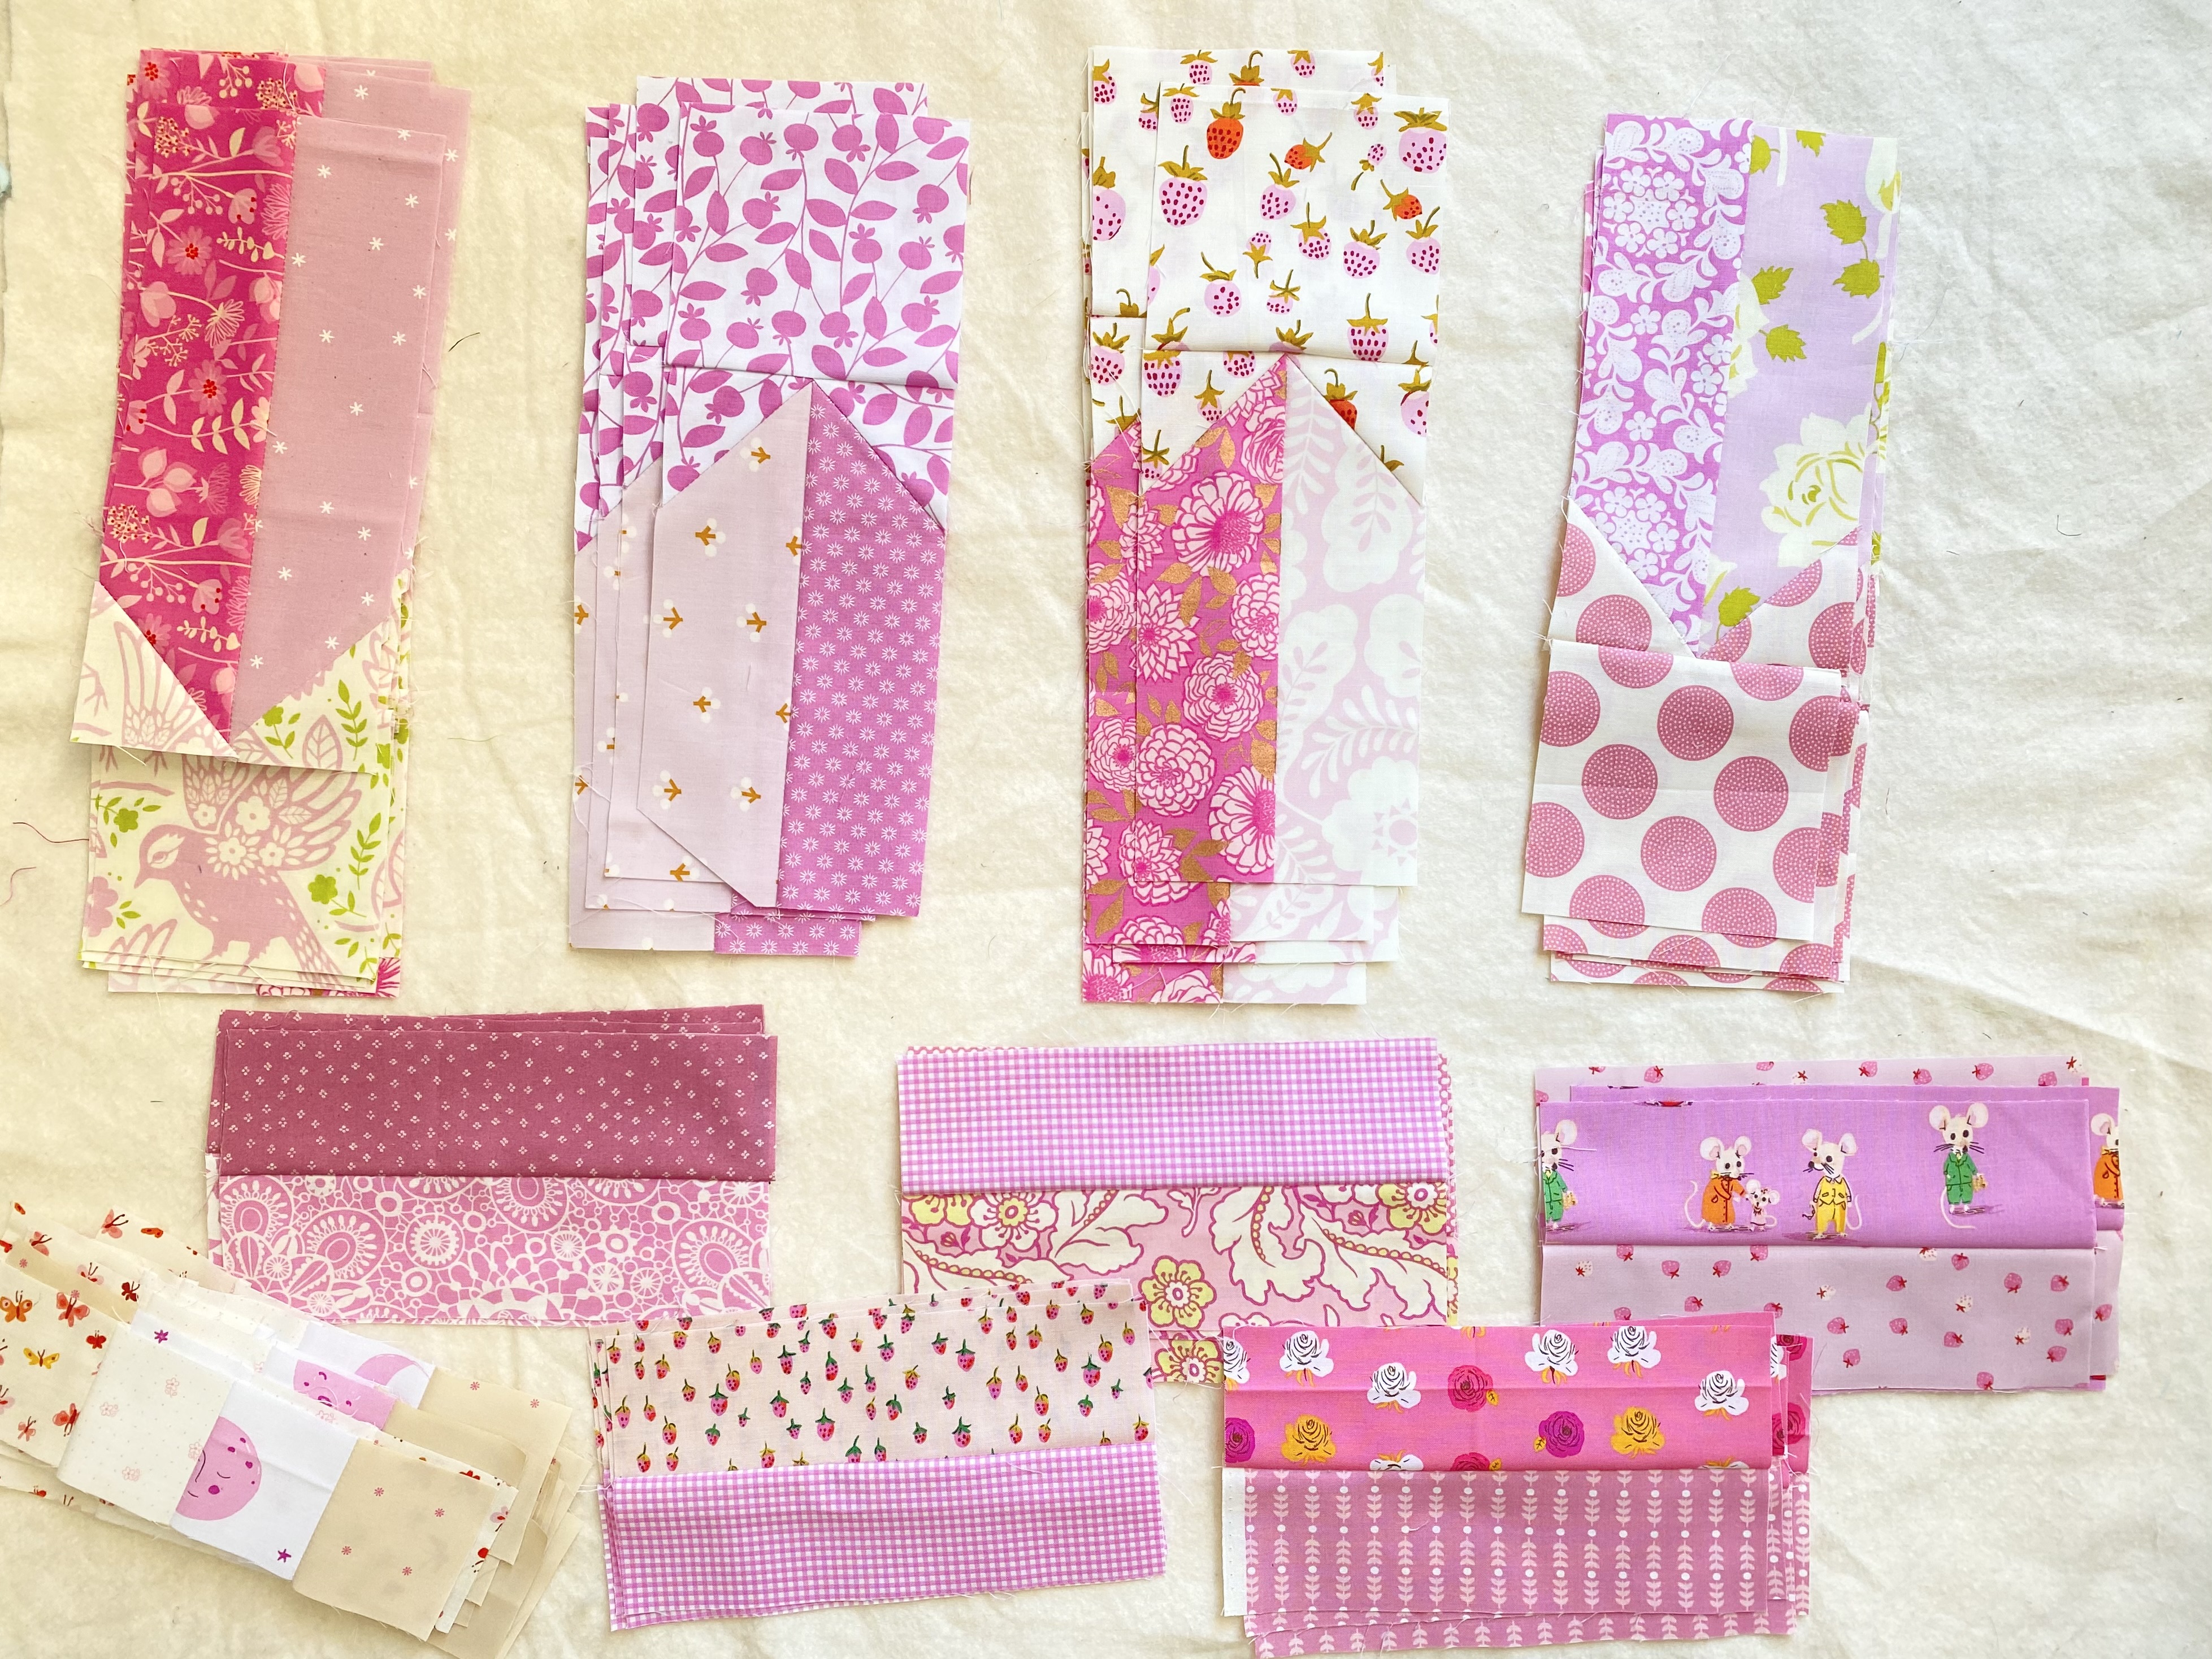
 i don't remember why i took a photo of these mice strips. i don't think anything went wrong with them. just a cute process photo, i suppose. i have been second-guessing this choice because of the strong secondary colors in the mice clothing. but i think it's going to be fine. they're too cute to not include.

the pink rose print (heather ross far, far away 2 collection for windham) is another loud-ish piece that doesn't actually fit perfectly in the color scheme. but i think it's good to have one or two colors that are a tad off to give depth and balance to a scrappy quilt like this. it's not completely clashy, so it adds that little note that an ugly fabric or two can contribute which a lot of quilters like to incorporate. but without using ugly fabric because this one is really cute. 

that's all the strips and stars pieces cut now. we've assembled all the strip pairs and i've added the star center block and top points to four of the strip sets. they're all gathered together in that opening photo at the top of the post. (i put that one first because it's the only daylight photo i took and looks the nicest.)
once we get the 16 patch blocks assembled we can begin putting the top together! 

i'm not stopping til we get there, no matter what other mistakes i manage to make along the way.

never give up, never surrender.
make the quilt.

Monday, May 26, 2025

edna mode


here's a look at my pinky-purple "edna" quilt in the earliest stages. i've had a lot of fun making this quilt even though it's been so labor-intensive, thanks to my own ideas of making it very scrappy with the 16 patch blocks and directional, scrappy stars. "edna" can be quite beautifully simple. maybe next time. this one is anything but simple. there have been soooo many mistakes along the way, but i just keep plugging along.

wrong and correct
 
first, i misunderstood the pattern and made my first star/stripes interface wrong. i mentioned i don't usually use patterns, so i misunderstood the graphic for adding the star points to the ends of the stripes. i think the pattern was attempting to show piece placement 3-dimensionally with seemingly 2d graphics  and i read it as being 2d, so i put the corner square in the wrong place. i thought it was odd and unexpected to put the corner squares where it looked like the pattern said, but i told myself, "trust the process - do it exactly as the pattern shows." and i messed it up. but, i knew how to fix it! and fortunately for me, i was able to use the same stripe pieces, so i only lost two little squares. i turned two of the cut-offs into a tiny hst block, so its okay. and now i know a little more about pattern reading!


i got the first set of 5 with the bird print made and moved on to the strawberry print the next morning. with the first set of bird prints, i was doing everything one at time, which is more laborious. i did it that way because i was figuring it all out. with this second set i got a lot smarter about batch-processing and created a chain-piecing process. this worked great until i realized i forgot to factor in directionality for the strawberries. this wasn't an issue with the bird blocks so it caught me off guard. but with the strawberries, i wanted them all facing the same way throughout the star and i had to figure that out. it's not too hard, once you wrap your head around it. but since the four sides are coming from different directions, i'm going to have to figure it out each time i do another side. maybe i'll share that when i get to it.


since i'm cutting all these corners off, i went ahead and made a second seam so i could make little hsts out of the corners. they're small and very cute, and a bit tedious. it definitely added more time to my making. but i can't waste them, so i went ahead and added those steps to my process. i'll probably incorporate them on the quilt back somehow or put them in another quilt altogether.


once or twice i cut the corner pieces off on the wrong side of the second seam i'd made for the hsts. shoot! i lost those hsts, but at least i didn't ruin the larger piece. i include these mishaps to show that even with constant mistake making, i still make quilts! just gotta keep calm and carry on.

day three, once i had the first two sets of stripes done, i decided to turn my attention to the 16 patch blocks for a change and because i was going to need them in place to start assembly. this is where i got a real headache, a maths headache! i thought i was going to be making 10" blocks, which would me i could use 2.5" squares. then i thought a little more about seam allowances and realized maybe i would need 25 patches at 5x5 squares. i didn't have enough different fabrics for that and it would be a whole lot more work. what else could i do?

somewhere along the way i looked at the cutting instructions for the squares again and realized they were 10" cut (layer cake friendly) and would finish at 9.5" sq. uh, oh! that was entirely different. the real headache of trying to make that work started. i was getting discouraged. should i resize my strips i'd already made? then my brain said, "what are you thinking? you can make the size you need with 2.5" squares. that works out right." so i laughed at myself and got cutting. i cut a whole entire set of rows, 41 squares each of 4 fabrics, and started sewing my rows up.


i was having a great time doing this.

somewhere along the way, after i cut the whole set (using up two of my fabrics completely), i did some more quick math in my head and realized i was so wrong. i was on my way to making 8" finished squares, not 9.5" i just wanted to cry. i turned everything off and left the sewing room for a nap. 

but instead i started looking at "edna" on instagram to see if anyone else had done smaller than four-patches and could help me with my math. i found one! i sent a message to the maker, lydia, and on a whim sent another one to the pattern writer, jennifer, in case she knew how to do it.


jennifer got back to me right away and we began a whole discussion on the topic. we noticed the star points didn't match up in size with the squares, so they weren't 2.5". lydia must have done the crazy math and cut things at 1/8ths of inches. i wasn't up for that.

in the end, i decided to shorten my stripes to fit the 8" blocks. this would simplify my math dilemma, save the fabrics i had already cut, and shrink the quilt a little, which was desirable. it's a generous 64"x77", which is a little larger than i normally make my throw quilts. 

problem solved.
back to work.

my quilt making may feel like this sometimes, but i still get quilts made in the end! it's going to be a while before i'm done with this one. so many small parts and tons of cutting still to do! but i'm up for the process of this one, fussy cutting and directional star points, and all. i'm enjoying the process and making it the way i want to.

 every time i say the name of this quilt pattern - i hear the edna character from the incredibles movie saying her name from this clip in my head. "ed-na mode." that's the mode i'm in!

Wednesday, May 6, 2015

home ec highlights

what's wrong with this picture?
 i've had several people tell me they enjoy when i share all my sewing debacles, or what i call "home ec moments." apparently it's amusing and maybe even comforting to see things go wrong for someone else. i like to keep things real and honest here, which is why i share the mishaps. no way am i a quilting expert who turns out flawless finishes. my quilting experience is a study in mistakes! but i think i am living proof you can continually make mistakes and still turn out usable, maybe even likable, quilts.

here are a few gems from when i quilted "bloom where you are planted" over the course of a weekend. i'm still not sure if i had an unusual number of problems occurring or if it just seemed that way because i sewed a lot more in a shorter space of time. i documented them as i was going on instagram, much to the amusement of several friends.

here are photos i took with the real camera as i went along:

somehow i managed to move my fmq foot under the thread of a very large stitch and then sew over that thread, by one stitch, before i stopped. in effect, i sewed my foot to the quilt top. genius! if this was a required technique, i'm sure i'd never manage it.

in a fmq craftsy class i took from leah day, she said if your stitch wasn't big enough to catch your toe in and trip on, then you should leave it. i wonder if being able to fit your sewing foot under it counts as big enough for catching your toe?

don't you just loathe when you barely get started quilting and then your bobbin thread runs out?! right after i had fixed a messed up spot, i got moving again only to have my thread run out three loops into the row. and when i wound the bobbin, i accidentally wound the thread under the bobbin on the spindle rather than on the bobbin. that was a big mess and further delay, too. (the photo didn't turn out so you'll just have to imagine it.)

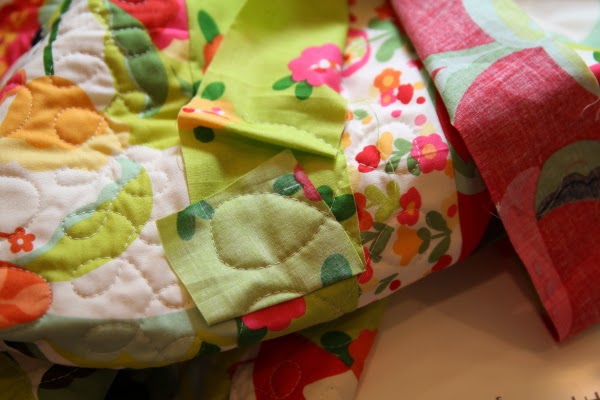
my biggest trick i pulled off may have been sewing my foot to the quilt but sewing this tail of fabric to the back of the quilt took a lot of untapped talent, too. see, the backing had three vertical strips sewn into it and one of them was about a foot longer than the rest. i was too lazy to cut it off before i started quilting. this is a reminder why you should always trim the back properly before attempting fmq.

well, that particular loop there was looking flat on the top anyway so it was a good excuse to have to unpick and resew that portion. i considered leaving it on the back for a "design feature," a sort of raw-edge ruffle on the back, but decided that loop really needed to be redone. so out it went. and the tail got trimmed immediately.

looking back at these photos, it doesn't seem like much at all. in the grand scheme of things, it wasn't. that's the point. it took me some extra time, but everything got fixed and the quilt got finished, even on deadline to be delivered to it's owner.

so when you mess up, just fix it and keep moving on.
think of me and laugh a little, too.

Saturday, January 31, 2015

a binding bind

i like a lot of things about the binding phase of making a quilt. one thing i especially like about binding is all the hsts you get out of trimming the joints.

i save all of these in a box so someday i can make a certain scrappy quilt from sunday morning quilts. it'll be scrappy and awesome; sort of a scrapbook of all the bindings i've ever used on my quilts.

this particular binding is going on "bandwidth", which is long overdue for some binding and finishing. pieced in late 2013, quilted late 2014, and now going for the finish in early 2015. so close.

at first i was going to put on a bright orange binding but thought it'd be too bold, sort of stand out more than i wanted. then i tried out a few different shades of blue prints, and considered doing it in solid kona windsor blue the color of the large panels in this quilt. i really don't want the binding to draw attention to itself. then i began to think a scrappy binding made from all the fabrics in the strips would be great.

but when i pulled out the scraps to see what i had for strips, i found a large wad of this navy and grey circle dot (rings, maybe?) fabric from "superstar", the main line used in the quilt, and it just seemed easier to make a single fabric binding. i'm happy with this decision, the course of least resistance.

i've seen other quilters roll their binding on an empty thread spool and since i sew with it on the thread pin, i thought i'd give this a go. so i began winding it on a spool as i was pressing it in half. this didn't work out too well for me because it kept getting wrinkly on the inside layer as i wound, kind of like a sleeping bag will when you are rolling it up, if that makes any sense. i think it was because the spool is so narrow that i was starting out rolling too tight. going to the trouble of pressing it nicely in half, it didn't make sense to me to wrinkle the fabric on the spool.

so although it was looking cool, i took it off and just rolled it freestyle like i normally would. i'll try the spool again another time. i was too anxious to get the binding going to mess with the winding method too much. i actually tried to insert the spool after i had it wound, but the center of my binding roll was too tight for the spool ends to go through. go figure.

at last, a complete binding roll, ready for attaching to the quilt.

i did something completely out of character here: i changed thread colors. twice, even! normally i am a "sew with whatever neutral color is on the machine at the time" kind of girl, which means i mostly use white or cream for everything, even dark stuff. i know it's supposed to show up if you do it that way, but call me crazy - i just don't see it. i think it blends just fine.

however, i'd already quilted this big boy with a contrasting thread that showed up too well on the navy panel sections. since i was going to machine attach the binding for durability purposes, i did not want a light colored thread showing up, and calling glaring attention to, every single mistake and wobble on my machine binding, which is tenuous at best. plus, i have a small collection of various aurifil shades, some purchased when i was going to quilt "bandwidth" in multiple colors, that would potentially blend in with the binding.

i started by attaching the binding to the quilt top with the deep, glowing blue on the right above, but decided it didn't blend as well as i wanted. so i switched to the grey on the left for sewing it down on the back.

as i rounded the fourth and final corner of this very large (90"x100") quilt, heading for the home stretch where i was going to complete this beast, i stopped to check the back . . . and discovered the backing was an inch short for several feet on the last corner.

how this happened, i'm really not sure. i haven't touched this quilt since i completed the quilting nearly three months ago. i thought i had squared it off after the quilting was done. but as i was attaching the binding, i did notice the edges seemed a little choppy, more like they were cut with scissors rather than a rotary blade. my best guess is i first scissor trimmed this and meant to/thought i had later rotary cut it. that would explain a lot.

so here i am, almost done. but not. this is the second project in a week that got put in the corner of shame/timeout/doghouse to be dealt with when i have simmered down and feel capable of dealing with it.

fortunately for me, i have plenty of other projects to distract me work on in the meantime.

Wednesday, January 7, 2015

as the year begins

my big fabric crush today is on this "antique flower" print from julia rothman's miscellany collection for cloud 9 fabrics
last year i had a lot of goals, ideas, and finishes to complete at the beginning of the year. this time around i'm just continuing to work on where i am. that means i need to get some gypsy wife blocks done, maybe look at the sugar block club again, and definitely get around to completing my boys' quilts. definitely that! it also means to keep at the two quilts on my design walls: penny patch 2.0 and the indian blanket.

new year's day i got penny patch 2.0 back in place on the wall and assembled more than half of it into rows, then remembered i had put it on the wall sideways! i could have more on the wall and less on the floor by turning it sideways when laying it out. i was simply supposed to remember to turn all the blocks when i started sewing it together. this means all the directional prints are now running across the quilt instead of up and down it. oh, goodness. i'm not even surprised by now when i make these sorts of mistakes. however, i should come up with a system for leaving myself notes of my intentions since my sewing time is sporadic and i so often forget what i meant to do.

so now i have lots and lots of text prints going sideways and birds flying the wrong direction. i either have to unpick all of it, increase the size so i can reorient the quilt, or just live with it completely sideways. options one and three aren't really feasible so i'm going to have to add a whole lot of squares. but i can't take that just now so today penny patch 2.0 went in time out until i can deal with it.

i saved my sanity with a another row of triangles for the indian blanket quilt instead! i think the first three rows are looking very nice together. the other row i made is slated for further down the quilt and doesn't look so great next to these two so i'm leaving it out of the photo.

i love these triangles. they are challenging yet quick and easy at the same time. i'm tempted to just do the whole quilt, but this is my breather project for when i need a break. i really, really need to make myself work on the wonky stacked coins quilt for s1. it's time that was done. i don't make a lot of rules for my quilting anymore, but getting a quilt completed for each kid before i do anymore other sewing has got to be a priority. so this afternoon it's back to navy and orange and strips. wish me luck and fortitude!

linking up with lee's wip wednesday at freshly pieced.

Saturday, December 20, 2014

pile 'o fabric

 after i got my penny patch 2.0 all laid out and then made a baby penny patch, too, i needed a break from it for just a little while. so it sat for several days. i knew i should go ahead and get the top pieced and be done with it, but i didn't have a lot of time or even inclination to do that just yet. the mr was planning on taking the little kids to the zoo and giving me the day off last friday, so i thought i'd probably get around to it at that point.

but then some boys were kicking a soccer ball around in our large central hallway, adjacent to the dining room/sewing space and my design wall got hit. game over, for me at least.

it's been sitting there for about a week now. i don't even have the heart to go in and put everything back up yet. yes, i was mad and even teared up a bit, but this is life in a large family, life with children, life with boys. they are the more important piece of this equation. so i'll just sigh a bit, reassemble it when i get a chance, and get that top sewn together, hopefully before they strike again.

thank goodness i always take a layout shot to work from when piecing so i at least know how it's supposed to look and don't have to figure out the layout all over again. because that took hours!

Friday, August 8, 2014

photos that just won't

 so, i know a thing or two about photography. i really do. i have a good camera and a fantastic lens. i use natural light whenever possible and often wait until i can get it to photograph something. i know how to shoot in manual. i adjust my white balance and exposure compensation all the time. i know what aperture means and which way to go when i want more light or depth of field. yeah, i know all that stuff. i aim to take pleasing photos "in camera" and don't edit hardly ever, at all. this works pretty well for me most of the time.

however, i am having a hard time with the latest fabrics i've been using. despite the natural light and adjustments, they just don't look good. whenever i take a detail shot, i end up with what looks like a terrible flash photograph. just look at the ugly pictures i got when shooting in the lovely location above:

white balance - shade; too yellow

white balance - sunlight; slightly grey

white balance - sunlight, exposure adjusted +1 for more light; washed out and colors too bright
 and what happens on the design wall is even worse. i really do try to square myself with what i'm shooting, but it's difficult in the room with the table in the middle of everything taking up all the space. i stand behind it or on it when necessary.

  i tried to get a shot of part of the quilt on the design wall in natural afternoon light. it looks like a nasty indoor flash photo to me. is it that the intense colors in this quilt are difficult to photograph or is it me? the reds, in particular, are always off. and i either get slightly grey photos with not enough light in the whites or nice bright whites but the other colors are too intense and/or washed out.

here's the setting where i'm shooting the design wall photos, all natural light only:

white balance - shade; too yellow
 btw, my walls are a buttery yellow color, best captured on the left behind the ironing board in the above photo.

white balance - daylight; greyish, especially in the whites.

white balance - daylight, adjust exposure +1 for more light; washed out and colors are lurid
i know all our screens won't be synced, so this may come across differently from where you sit, but maybe you see what i'm talking about. any suggestions?

fyi - i shoot with a canon 60d body,and canon ef 24-70mm 2.8 apt ultrasonic L series zoom lens.

Wednesday, March 19, 2014

don't wear corduroy


i've had a few moments for sewing amidst all the kid project support. i finally got around to piecing the backing for "penny patch"! as much as i like seeing it on the floor, i'd actually like to snuggle up in it, too. i tried a new technique i have used once before - i included the selvage in the backing pieces. this worked brilliantly the first time i did it with "paris daydreams" but not so well here simply because the print was too close to the edge of these free spirit fabrics.


they got eaten up in the already scant seam allowance. i am one of those sewers who loves a pretty selvage. therefore, i wanted to preserve the information and art work of the selvage in the final quilt. but it looks like free spirit fabrics are not a good option for that. however, i do have a completed backing now.

unfortunately, i sewed a seam which extended the entire length of the quilt before i realized the tension was a mess. ugh. talk about unpicking for-ever.

just look how long it goes - on and on - the complete left side of this piece was all sewn in that nasty, loopy mess. however, the good news is the loops were so big that i could simply snip at the large loops on the backside of the piece.

then, as i resewed the seam, i just brushed the little thread snips out of the way before i sewed.

this worked pretty well although i did not take into account that i was wearing corduroy pants at the time, which meant most of the thread snips stuck to my pants as they fell into my lap. that is just par for the sewing course around here, though. yet another learning note to self: don't wear corduroy when you plan to sew.
WIP Wednesday at Freshly Pieced