Monday, August 26, 2019

maude’s binding


Some quilting choices don’t come easily or quickly. I auditioned several binding options for “Maude’s Chevron Peaks” quilt over a course of weeks before I finally found what I wanted. I tried reds, blues, yellows, and black-and-white stripes, but either the colors were off or the pattern was too distracting.

Finally, I found two fat quarters of this slightly faded, vintage-y red stripe. Only problem was I couldn’t be sure it was enough fabric since this quilt was on the larger lap side of sizing.

In order to pattern match, as well as to get as much binding out of the fat quarters as I could, I opted to do straight attachment seams rather than my normal diagonal. I feel this is less sturdy and can be slightly bulkier, but it works just fine. And it’s definitely faster and easier than all those diagonal attachments!  


The chain piecing bunting looked so festive, just right for the 4th of July, which is when I was working on it. 


In fact, without meaning to, I ended up with a very patriotic flag-looking binding. The two fat quarters were a couple of inches shy of the total binding length I needed, so I grabbed another binding option I had considered and added it to the mix. It was a blue with dots on it. They weren’t stars, but when paired with the red and white stripes, the binding definitely has an Americana flag look to it.


Friday, August 23, 2019

pink and navy and an improv question


Do you remember this Stella Grande quilt I pieced and sandwiched two years ago? Unfortunately, it’s still in the “to be quilted” queue. But even though it’s not complete, it already has a baby! Projects beget projects in my world. Originally, I tried working this gold pinstriped fabric into the hsts of the border, but I didn’t like the way it looked.


So I had a whole bunch of hsts leftover after I made the quilt. And several 6.5” solid colored squares, too. I was going to simply alternate the solid squares with the hsts and make a nice, structured baby quilt out of the culled pieces and leftovers.


But . . . 
On a whim I decided to make a larger quilt by incorporating other pieces of scraps from the original Guys and Dolls quilt, placing them in rows, piecing in an improv fashion.

At t first I wasn’t sure if the hsts would work in an improv setting. I don’t know why, maybe because I feel like improv is wonky or not structured? That can certainly be an element of it, but it isn’t the only way to improv. 

Which led me to ponder the question:

How do I define improv?

Does it mean no straight cuts with a ruler? Or does it just mean random placement? Does it have to be wonky?

In the end I think I decided that improv meant making things up as I go. I consider the Cheery quilt to be improv because it follows a basic design idea, but each individual block is made up as I’m creating it. You can plan for improv, but I feel like improv has more to do with making design decisions in the process rather than following a pattern. 

I’d love to hear what any readers think about improv, so please let me know in the comments. 


And the answer to my concern:

Yes, hsts can absolutely be part of an improv quilt.

Tuesday, August 20, 2019

gypsy child blocks


I’ve been tackling the trimming of 500+ 3” hsts for this beloved project a couple at a time. The project is beloved - the trimming is not. But I do it because it helps me with accuracy when I put the blocks together and I want that for this project.

I had enough of the blocks trimmed that I decided to begin assembling some. My current plan of attack is to make 16 patch blocks rather than assembling in rows. With all the tiny pieces and seams, I feel like rows would leave a lot more room for distortion as I work with the pieces over and over, which is why I’m doing it in blocks.  So far, so good!

I try to at least trim a few hsts every day. If I have a fair amount of time, I can get one patch worth of hsts trimmed and put into a block. I have been using Suzy Quilts tutorial for chain piecing a quilt to assemble the blocks. Same general concept, just a lot smaller than a whole quilt. It’s working great.


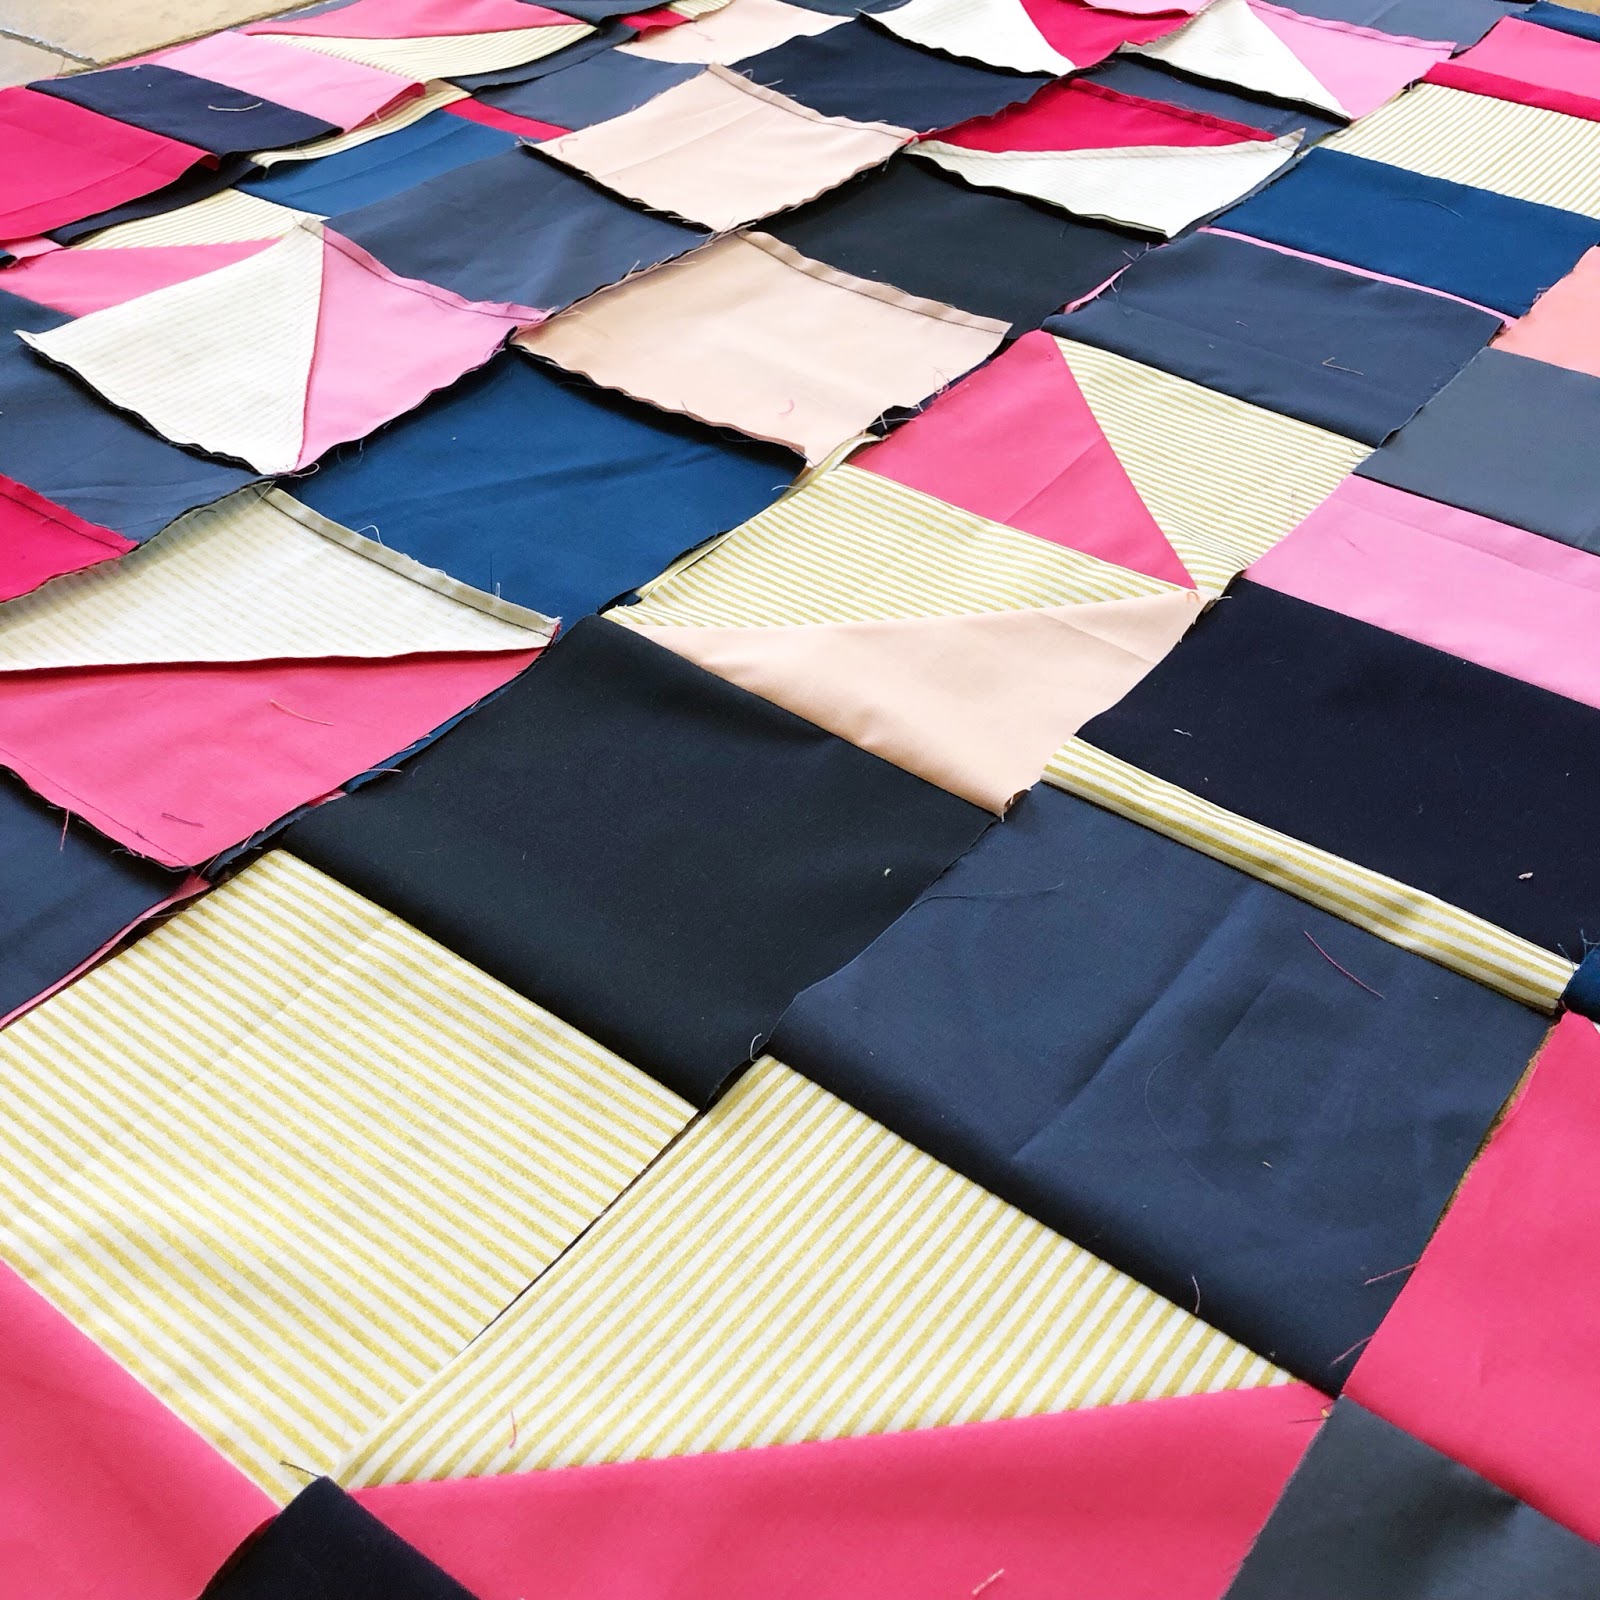
I’m trying not to put too much time and thought into the placement of the hsts, but I am trying to keep them mostly spread out and mixed, so it’s been helpful to put the blocks on a design wall. Even though I have one full wall in my sewing space devoted to a huge design wall, it’s completely covered with several projects already (I’m looking at you, Gypsy Wife). Fortunately, I found a different space for this project that’s working. I can’t get the full width of the project visible on it at once, but it’s helping anyway as I lay out a few blocks. You can see I’ve got 6 blocks done already, and I need 22 more.

I have this one funky piece of design wall that is thinner than the other two from my main wall. At one point when I first got it, I just threw a really large batting scrap up on it, which only ended up covering about 2/3 of the foam core piece. It never stood well on its own because it was thin and wobbly, so it didn’t make a good portable design wall. I had no idea what I was going to do with it when I reorganized my room several months ago. I ended up putting it on a small, unused bit of wall between the doors and my fabric shelves. There is actually a small gap of an inch or two between the shelves and the door wall, so I was able to slide the design board into that gap. The uncovered part is back behind the shelves and the covered part fits perfectly next to the door. It was a great use of the space. My daughter’s sewing machine and table is right in front of it, so I was going to let her use it, but I’ve kind of annexed it already.

I’m really happy to see this project come together and turning into a quilt a block at a time!

Little quilting chores make for big quilting finishes.