Thursday, December 26, 2019

beauty for ashes, a finish


mid-december, our family took a week-long beach vacation in costa rica, right in the middle of the christmas holiday season. it was my surfer husband's doing and christmas present. in some ways, it was really nice. in others, it complicated the holidays. but what's done is done! and it's what we did.

while we were there, i completed the binding for "beauty for ashes" quilt, making it an official finish. lucky me, i was in a nice new environment for photographing the quilt. a balmy, palmy, tropical beach house is not really the style of this vintage-y liberty of london patchwork quilt, but i think the shoot turned out nice anyway.


i did a lot of the handwork while sitting on the second story balcony outside the bedroom to our rental property, overlooking the backyard and pool, enjoying the shade and breezes.


and the views, which were pretty nice, too. the beach was just on the other side of those trees at the back of the yard, providing privacy with easy access, as well as a soundtrack of gentle waves. it was a quaint, contained world of our own.


indoors, our bedroom had this very simple and modern staircase railing that made a good quilt rack for the week. i did need a bit of extra warmth on the bed because the mr. always wants the air conditioner cooler than i do. so a light quilt was serviceable, even in central america.


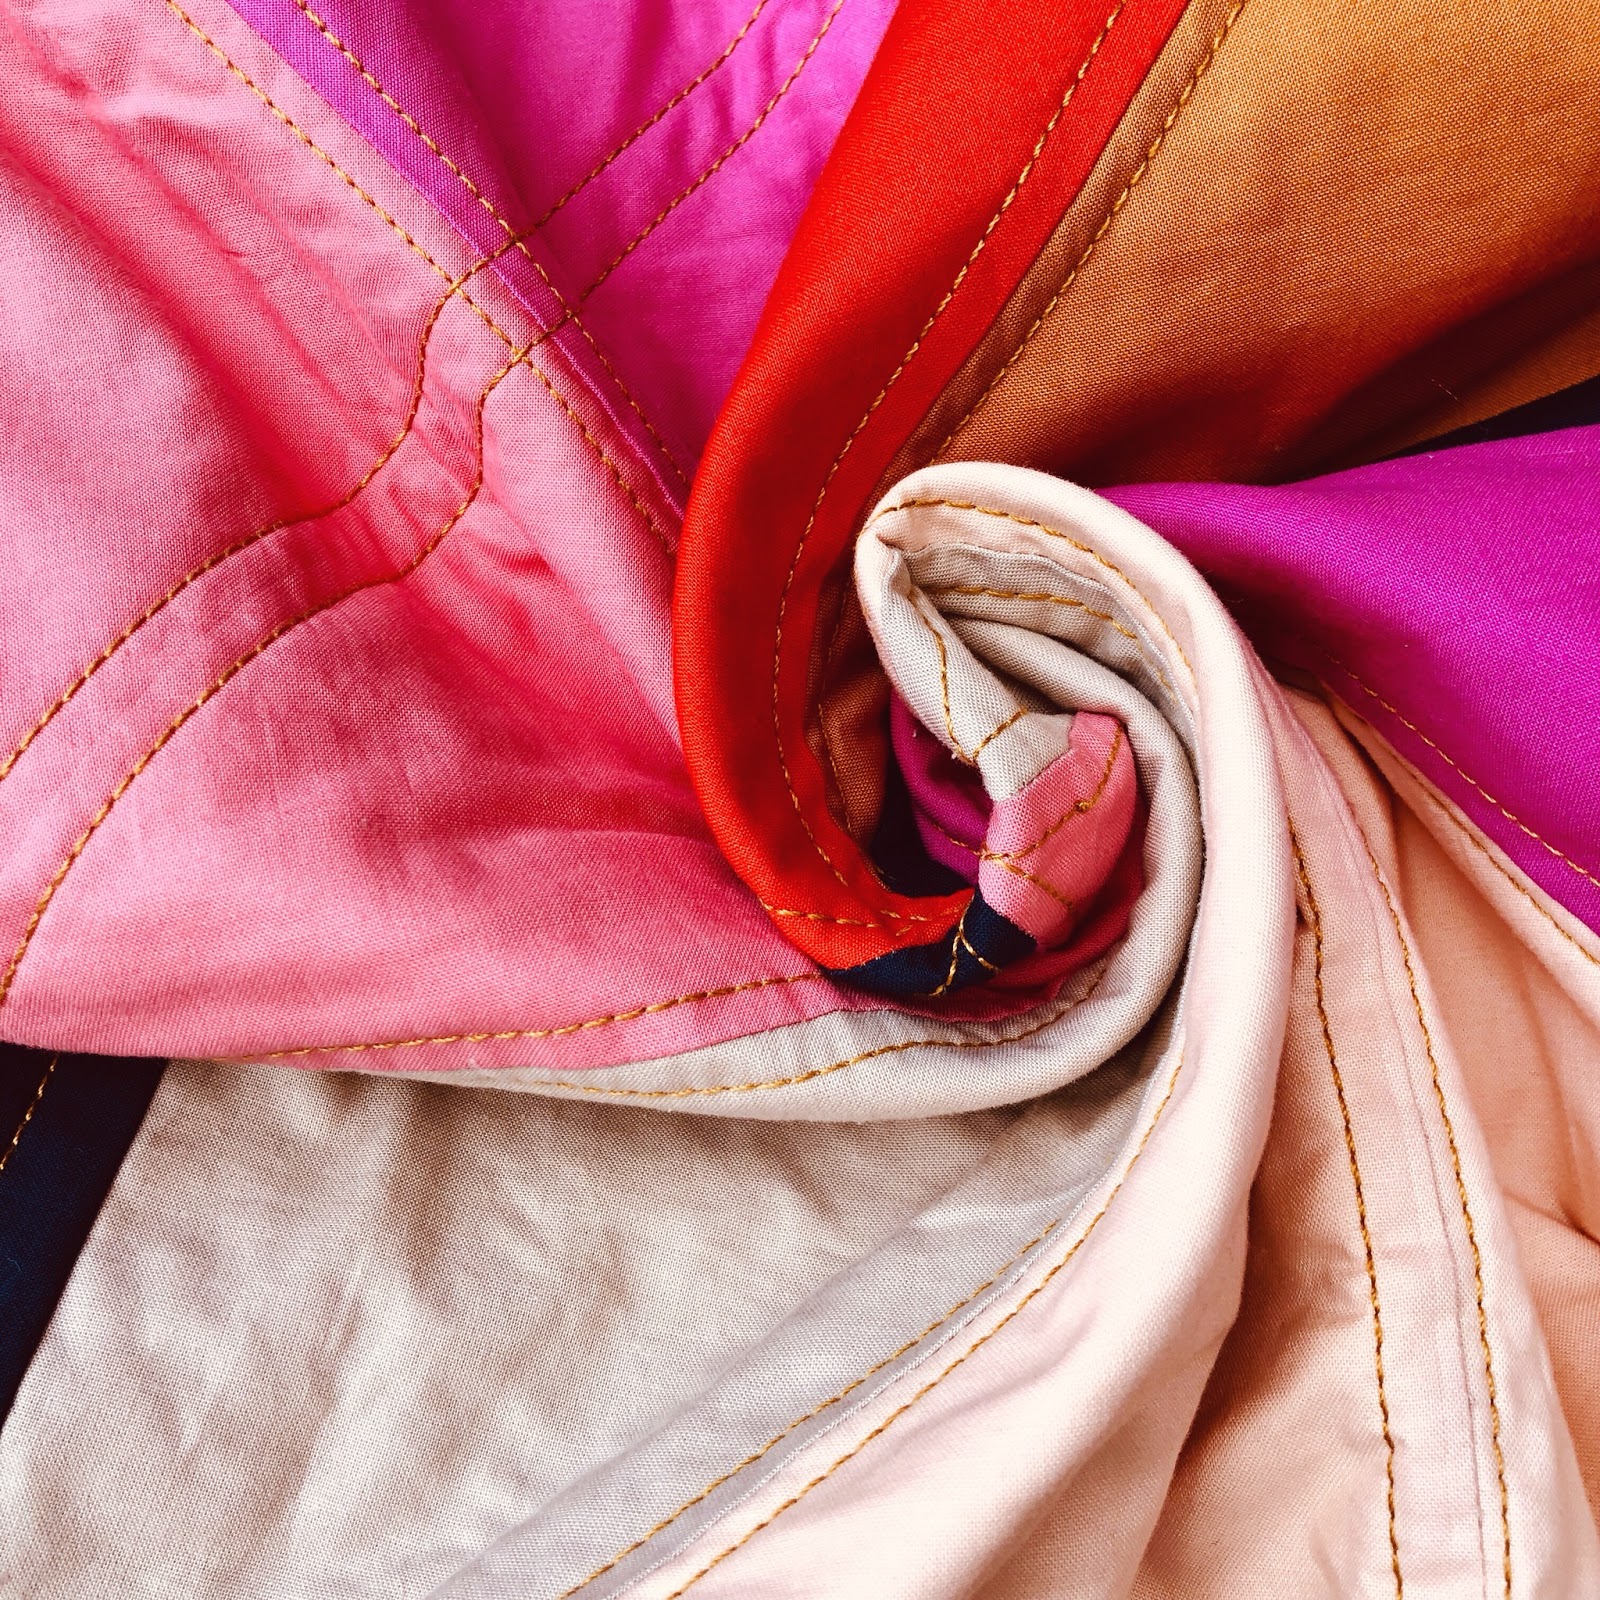
all the bright sunshine was quite lovely, but it made photographing the vibrant pastel colors in the liberty patches against the charcoal crossweave fabric a little difficult - they are often washed out. however, it brought out the contrast of the quilting, so it wasn't all bad.


i used a grey herrinbone flannel for the binding. it's thick and cozy against the linen-like crossweave and the silky tana lawns.


the sparse quilting was done by hand, just straight down the center of each row, with white aurifil 12wt thread. it's a very soft, drapey quilt.

beach house bonus: enchanting unicorn horn shells, which my girls found and brought in by the dozens from the beach. maybe some of their magic got infused in the quilt.


this is another luxurious splurge of a backing: two liberty of london tana lawn prints, half of each. these happen to be two of my top favorite prints, both is some of my very favorite colorways for each. the grey capel (in k, i think) is a nod to the grey crossweave, but in a lighter tone. the very sunny, buttery, yellow mitsi is an exclusive colorway produced for the english shop alice caroline supply, that represents the pastel patches. i also think of the two colors are being the juxtaposition of "beauty" and "ashes."


this particular quilt coordinates very well with my quilt travel tote. i wouldn't want to risk loosing a quilt in luggage while traveling, so any quilt i take along to work on while traveling is always rolled up and carried onboard with me in this tote.


my littlest one, with some coaxing on my part, snipped all the thread tails leftover from the handquilting. it's one of her jobs i save for her so she can be involved in the making process with me. normally she jumps right at such opportunities. this time she was in a vacation mode and snipping sounded like chores when i asked her. but once she got snipping, she dropped that attitude and was quite happy to oblige me.

now for the story of this quilt:

this is the third liberty + crossweave lap quilt i have made. they are intended for "sunday best" use at church, to keep our laps cozy in the pews. i've been aiming to complete one for each of my girls and myself.

i began work on this one the week after my mother died in march. because of the quilt's contrasting color palette of charcoal grey and pastels, and because of the bittersweet experience of my mother's passing, i came to think of this quilt as "beauty for ashes," a scriptural phrase.

it comes from isaiah 61:3, "... unto them that mourn in zion, to give them beauty for ashes, the oil of joy for mourning, the garment of praise for the spirit of heaviness."

the quilt was already connected to the idea of finding joy after sorrow and being comforted in mourning, but it's not really what i thought of each time i looked at it. the quilt began at a crucial point in my life and was therefore entwined with those memories and ideas, but that event didn't define the quilt or it's intended use. i tend to see the beauty that came out of that time of ashes when i look at the quilt, if i think about that connection at all.

however, today, i realized the quilt has a whole lot more to do with mourning and comfort than i knew until now.

more than five years ago, anne, a sweet friend of mine, one of those stellar people everyone just loves and admires as soon as the meet them, was working on a baby quilt for a friend of hers who had lost a baby girl at birth. the baby had been named ruby, and anne used the ruby fabric line (by bonnie and camille for moda) to make a quilt as a gesture of comfort for the grieving family. anne wasn't a regular quilter, but she really wanted to do something for the family and she liked the idea that the fabric line had the name of the daughter they lost. she didn't have any basting pins, so i loaned her my second best basting pins so she could get the quilting done.

this past thanksgiving day, anne and her family suddenly lost their darling toddler, 2 yr old jane, to what appeared to be croup, but was something else that didn't respond to treatment. ever since that loss, i have been thinking and thinking of anne making that ruby quilt for a grieving family. i wished i had a fabric line named "jane" to do the same for her. i wished i had time to make and complete a quilt period! but i knew any quilt i started would take me ages to get done.

today i was catching up with anne's posts about their loss and it occurred to me that i just finished a quilt, a quilt connected to grieving and mourning and everything that family is going through. i started that quilt just as i lost my own mother and it was definitely about "beauty for ashes."

and suddenly i knew that quilt needed to be sent to anne.

i have no idea if she will even like the quilt. the quilt has huge value to me on many levels, including the luxury fabrics i lavished on it and the hours i poured into the handwork. but none of that matters. i know anne gets the idea of sending a quilt to a friend who is mourning a loss. so regardless of whether of not she fully appreciates the things i appreciate about the quilt, i know it's meant for her.

i hope some of the sunshine from costa rica accompanies the quilt and warms her up in this dark winter. i hope she puts it in jane's room and snuggles it when she's in there grieving. i hope she feels the hugs and prayers from me and all the others who love her when she wraps up in this quilt.

what's a quilt, even a splurgy, handquilted quilt, when someone has lost a child?
in comparison, it's absolutely nothing.
and yet ...

quilts are love made tangible, and with this quilt i'm sending my love to anne, as well as the love of her heavenly father who prompted me to send this quilt to her, who whispered to me, "you have beauty for ashes that you could give to anne." along with prayers, it's all a quilter can do for a friend when nothing can be done to change their loss.

Saturday, December 14, 2019

some candy striped binding

in 2016, my middle daughter (d3), then 10 years old, wanted to make a christmas quilt. she picked out 12 fat quarters and we planned to make an enlarged version of my six and one half dozen quilt pattern, which i'm calling two dozen, please, because it involves 2 dozen blocks of fabrics. it was her first quilt, and even at 10 she had no problems putting it together. i photographed her making the top so we could create a tutorial for the beginner-friendly pattern.

from the time we purchased the fabrics, she knew it wouldn't get done in time for that first christmas. that was an understanding we came to when she was picking them out. we were getting a jump start for next christmas, and that was fine with everyone.

and while she did get the top completed quite quickly, the rest took a lot longer to complete. like, a few years. we've worked on it sporadically in chunks about every 6-9 months.

here we are 3 years later and she has been begging to not go another christmas without her christmas quilt complete. i've actualy been thinking about it as the christmas season approached. my sewing room was such a wreck for most of october and november that we couldn't even get in there to do any sewing until i had some time to clear off surfaces.


i've had her do almost every single bit of the process: piecing, backing, quilting. now we've finally got the binding made, and she will be handbinding the quilt herself.

the binding was actually part of the hold up for quite a while. we had no idea where the binding fabric we had picked out went! she would pester me every few months to work on the quilt, but i couldn't find the binding.

and, honestly, in seasons when i'm not fitting in much quitling time or if i'm deep into a project of my own, i'm quite selfish about giving time to a kid project that needs monitoring or handholding from me. sad, but true.

a few weeks ago i was fabric shopping and picked out some new binding fabrics for the quilt. i got 4 different stripes in the colors of her quilt top. i figured she could choose one or all of them for a scrappy look. she went scrappy.


and now that we have the binding made and attached to the front, d3 is learning how to handbind! she's actually enjoying the process and is quite content to do it on her own. i've been working on some of my binding right alongside her. usually, we put an audible program on to listen to as we stitch.

i really enjoy this time together and am so pleased with how she's taken to handwork. admittedly, her stitching is not too sightly just yet. that's alright. i think it will get there as she practices. and if she wants to redo it at some future date, that's easy enough to do.

i didn't want this quilt to be perfect - i wanted it to be hers.

she's already got a few other quilts she'd like to make in mind. i hope she gets more independent with the process so i don't slow her down as much next time around!

Wednesday, December 11, 2019

wip wednesday 2019.50


mid-october, our oldest daughter (d1) returned home from 18-months of church volunteer service in russia and kazakhstan. it has been a joy to have her home and under our roof again. it has also been an extremely busy season of life ever since then. hence, no quilting.

but about 2 weeks ago, as the youngest daughter (d5) and i were working on her homeschool writing, i picked up a quilt and began working on the handbinding. it felt good to be back in the game again!

i haven't done much in the meantime, but i have been able to work in bits of time here and there.


my husband took a short, two-day trip with his brother, and i made sure to get some quilt time in while he was gone. i finally got the sashing done on my fall log cabin quilt, and was able to back and baste it. i was looking at my favorite block from the quilt and thinking it would have made a great quilt all by itself, with just those fabrics (and a few other favorites). so i just went back to my two local stores and purchased more of the same fabrics. that's another quilt waiting in the wings now.


when i was putting the backing together, i decided to splurge on the last small corner the backing needed. who puts hard-to-find, out-of-print, heather ross unicorns on a quilt back?! i do. i think it's a really fun touch that will make the quilt that much more special for having a few unicorns hiding on the back side. they will definitely be noticeable there. i haven't trimmed the piece down yet, but about half of what's in the picture above will become available for use elsewhere.

i've also done a little work on my coins patchwork quilt and helped d3 get to the binding phase on her christmas quilt.

putting it all down here at once makes it seem like a lot has been done.

after all, little quilting chores equal big quilting finishes.

Saturday, December 7, 2019

four coins patchwork


i have started yet another quilt. always and forever, i will do this. no matter how many i have in progress or how old my oldest wip is or what i "should" be working on, i will start new quilts whenever i feel the need to.

this one was inspired by a lovely soft-and-warm palette by quilter megan collins:


i absolutely loved the color combination and even had some of the same fabrics on hand. pale blue is one of my favorite neutrals ever. i was surprised how well it looks with the brown, gold, grey, and pink colors of the prints since there is no blue in any of the prints to tie it in. but it just works!

i like megan's pattern a lot, but didn't want to invest thinking time in a pattern. i wanted something quick, simple and mindless to whip up. i liked how megan's solid pale blue surrounded the prints. i decided to pair a low-volume print and a darker-valued one from my fabric selections, border these with pale blue, then sash everything with white. for a little added variety, i used some pale blue and white prints that mostly read as blue along with the solid blue blocks.


next i had to decide on a block, dimensions, and layout. i chose to make small units comprised of 4 stacked coins. the individual "coins"measure 2.5" x 4.5", cut, with the stacked block measuring 4.5" x 8.5", cut.

the white blocks are the same size as the stacked coin blocks: 4.5" x 8.5", cut.

these two blocks are alternated along the row.


i've got half the top pieced and am really loving the simplicity and softness of the palette and layout.

it's quite easy to make, what with chain piecing and strip piecing the parts.

perhaps when i have it completed, i can put together a basic tutorial for the process.

what i don't have any clue about for this quilt is the name. i'm completely stumped. the colors of the blocks are quite fall-ish, but the light blue and white say winter to me. put together, they straddle the seasons but don't say any one season to me. nothing has clicked yet.

Monday, October 14, 2019

some spray basting thoughts


i've got a backing made, and this pink and navy improv quilt is now basted.

have i ever mentioned that i like to keep the paper label scraps from the batting roll and use them to cover the floor and baseboards around the quilt sandwich while i'm spray basting? the warm and white batting roll (i get mine at joann crafts with a 40% off coupon) comes with a thin paper label wound with all the layers of batting, so whenever i unroll some batting for a new quilt, i also get a long strip of paper to rip off.

by putting it down on the perimeter of my quilt when i'm basting, it protects the floor and keeps any sticky mist from settling on what's nearby. currently i have enough paper to go 3 deep around the quilt. i also have two old towels i keep tucked away in my sewing room for this purpose. i usually lay the towels over the carpeted staircase base or at my sewing room doors, depending on where i've positioned the quilt.


when i'm done with all the basting, i put all the paper strips in a stack and roll them up to stow away with the towels. they don't take up much room at all and really help keep things neat and tidy when i'm spraying that adhesive everywhere. i do try to stay very close to where i'm spraying on the quilt layers, just a few inches away, but the mist still floats a bit sometimes, especially on the perimeter of the quilt. i've got plenty of photos of gummy feet or socks to prove it. (if you followed the "socks" link, obviously i got on the spray basting train! thank you, odif 505.)

some people use old sheets for this, which would also work well. i like the convenience and compactness of the batting roll label. plus, i'm upcycling the papers.


when i was pulling the tape off the basted quilt once it was together today, i had another idea to try.

i'm rather notorious for sewing the extra ends of the backing to the quilt body while i'm quilting. that's one of the reasons i don't give myself as much wiggle room as i should when making the batting and backing larger than the quilt top. standard is 3-4" on all sides. my margins are often closer to 1-2". i also hate the waste, so i make my overage a lot smaller than i "should," in most cases.

today i noticed that the excess batting around the quilt top was sticky and i decided to fold the excess backing over to the top of the batting. i think this might help keep it out of the way when i'm quilting! there's certainly less flopping around now. i'll let you know how it works.


a just for fun photo because i noticed my dress was coordinating with the quilt backing.


here's one more color coordinated photo: my backing fabric and new pink steam iron. i'm giving this oliso iron a try. i don't really know much about it, but someone (can't remember who?) recommended it. i saw a discount code at suzyquilts.com, and ordered it direct from the company for 20% off and free shipping (suzyquilts20).

today is my first time using it. the whole smart handle/retractable platform/horizontal resting is quite new to me. i've only used it on the backing today, so i can't really say what i think. but it did do a really nice, tight job on getting my backing seams wide open and flat.

again, i'll report back when i've had more experience with it.

Friday, October 11, 2019

fall-ing for log cabins

fall's here! in theory, at least. most days we still hover in the 90's for now. i feel like it doesn't actually reach us until december. that's desert living. however, now that it's october, i feel safe making seasonal changes inside the house no matter what's going on outdoors. after practically two months of no sewing, on a complete whim i've started a fall log cabin quilt inspired by one i pinned ages ago:


something about this color combination and the log cabin layout really appeals to me, which is kind of funny because i'm not a purple lover. somehow the purple-loving chromosome got left off my X gene. (or is that the gene got left off the chromosome?) i consider myself a girly-girly, but that has never included liking purple. but here i like it!

yesterday i was picking up a sewing machine from servicing and decided to get some purples for my stash so i could make a fall log cabin quilt. then i stopped at my other local store on the way home and got even more bits and pieces.


$$$xxx later, i'm ready to make a fall log cabin quilt! so bad.
interestingly enough, i must have mashed up all the low-volume log cabins i've been admiring lately with the memory of the fall log cabin, because when i looked up the original quilt i had in mind, once i was home and had bought all that fabric, i was really surprised with what i saw. i didn't remember the dark colors at all. but i like both ideas!

i got mostly 1/4 and 1/3 yard cuts of fabric. i really wanted the quilt to be scrappy, so i got a lot of different little bits. obviously, even with small pieces of fabric, there was going to be a lot of leftovers, which was totally fine by me. there are some other layouts i want to make with the same color scheme anyway. so i plan on having a couple of fall quilts when i'm done making with all this fabric.


i decided to work with 2.5" cut strips to get the size of blocks i want quickly. at first i was just cutting one or two strips, but then i realized it would be much easier to just cut each piece into as many strips as i could get from it at once. that way i would have lots of strips for any other quilts i want to make with this fabric pull. almost all were 2.5'" friendly, anyway, so why not?

i've never bought 1/3 yard cuts before, but i was feeling like i might want just a bit more than 1/4 yard and not as much as 1/2 yard with some printss. i like the extra few inches i am getting out of them.


cutting into this heather ross unicorn fabric from stash was nerve-wracking. the unicorn was bigger than the strip i needed and i didn't want to make it look funny or have a lot of waste after i cut. i know it's "only fabric," buuuutttt . . . heather ross out-of-print unicorns!


after making the first few blocks, i realized it is much faster to work on two blocks in tandem. that allows me to let a pressed block sit under some floppy books and get flat without wasting time waiting on it. also, moving from machine to cutting table to pressing board with each addition takes a lot more time than other types of piecing do. the log cabin block is pretty straight forward and simple, it's just time consuming. maybe there's a better way to go about making log cabins, like precutting everything. but i'm just deciding what to add on in what order as i go, only working with strips and trimming once they are on the block.


the process goes something like this:

1. sew the new piece on the block. 
2. trim the strip.
3. press open the strip and leave sitting under some floppy books to aid flattening of the block.
(sometimes i press and then trim.)
4. move back to machine and work on the other block, repeating steps 1-3, while first piece is flattening and cooling.


i keep building both blocks at the same time in this way. without having everything precut (which would also take a lot of time and thinking and prep), it's as close to chainpiecing as i can get. having to press each strip once attached before adding the next one is what takes so long.

i'm pretty sure i would like the look of the blocks even better with thinner strips, but that would take ssoooo much longer! and i'm really hoping that this will be a quick-ish finish. for this fall, not next year.

how many mistakes can you spot with this attachment? at least two. i got everything wrong at once! which also meant i could fix it all at the same time. hand me the seam ripper, please.


both of my unicorn blocks turned out well. i will lose a little of the horn in the seam allowance, but not too much.

six of the 12 needed blocks are complete.
it's time to get back to the other machine.

Friday, September 27, 2019

mary, mary, star contrary, a finish


this quilt was a finish well over a year ago, but i wasn't blogging much at that time. "mary, mary, star contrary" is the first of my children's stella grande christmas quilts to be completed. it belongs to my oldest daughter, d1

i finished it barely in time for her to fully enjoy it for just a few days before she left on an 18-month volunteer trip to eastern europe. time must have flown, or at least it's passed,  because she is now only about 6 weeks away from returning home. i'll have to pull the quilt out and get it freshened up for her very soon. 


i completed the last binding stitches just before we entered a canyon at the golden hour on a weekend roadtrip. the full beauty of the canyon didn't come through in the photos very well as it's just in the background. but the bridge we shot the quilt on worked out really well. like every other quilt photo shoot i've ever done or seen, the wind made things more difficult, interesting, and playful. all part of the fun.


this post will be a mix of the finish photos and detail shots of the quilt's various parts. i do love details!


the color palette for the quilt came from two  cotton + steel prints i wanted to use for the back: tomato reds, cinnamon, peach, sand, petunia, coral, grey, and a touch of navy/midnight blue. it was an unusual palette for me, but i reeeaaallly liked working with it. delicious.


originally, i had this particular quilt earmarked for my other redheaded daughter, d2, but in the last few days before gifting the quilts, i began to doubt myself. at the last minute, i consulted with d1 and she said she'd take this quilt over "etoile de patisserie," which was meant as a nod to our trip to paris and love affairs with its pastries. she really liked the colors and prints in this one, so i think we got it right in the end.
.

the name of this quilt came about in reference to d2's periodic contrariness, the floral prints (mary's garden growing) on the backing, and the way i put bits of the dark blues randomly in the star. all of those elements collided in my brain to be "mary, mary, star contrary." however, once i switched up recipients, it didn't seem to fit so well. this daughter is the least contrary person on the planet! but the name had stuck for me. 

and so, there you go . . . 


i really adore the effect of the blue bits i worked into the hsts, but they were, admittedly, rather fiddly to work with. it all came right in the end. i wanted a touch of the color, like in the florals, without the blues overwhelming the rest of the warm and softer tones. i had absolutely no idea what i was doing as i added the skinny strips to some of the hsts, but it came out alright. i think the narrow, 1" strips nailed the effect i was going for.


her hair has always been wild and free, practically an entity of its own. once, when she was about 4 years old, i interrupted her play attempting to smooth it back and out of her face. she said, "mom! don't mess with the wild thing's hair!" she does have a wild heart, but in a very good, virtuous kind of way. it's a beautiful combination.


each of my stellas have a variation somewhere, usually a unique border. for this border, i used the 8 colors of the star, 6 of which were paired tones of the same basic color (2 reds, 2 purples, 2 browns). one of each pair color was used in the two different borders as a 2" strip, and a flying geese block of the 2 unpaired colors (pink and grey) was centered in the strips. i'm very pleased with the outcome of this configuration. for some reason, the border stripes make me think of chocolate bar wrappers. 


that wind!


the difference is subtle, but i used 2 different dark blues for the slim accent strips in the star, to reflect the 2 different blues in the main backing fabrics. i chose the midnight blue as the binding. i love how it outlines and sets off the other colors of the quilt. sometimes you want a border to be bold and make a definite statement, and sometimes you just want it to mingle with the rest. this one is definitely the bold, strong kind.


binding is always one of my favorite parts of the quilt making process.


quilting was done with the lovely, chunky aurifil 12wt in brass. i use a large stitch length (4 on my juki), which i think has a similar effect to handstitching. there isns't a ton of quilting in these quilts - just a quarter inch echo of most of the seams. i like to use a high contrast color so it really stands out.


always smiling, that girl of mine.


i snagged a few shots in a parking lot at a different stop about an hour before the canyon, but the dog and the wind were a bit too much at once.