Monday, July 28, 2014

the last bit

 are you sick to death of my penny patch? you ought to be. but i found some photos of the binding which i never used, so i'm throwing them up here. then, like binding finishes off a quilt, i'll be finished talking about this particular one.

i auditioned and even bought a few different bindings but had difficulty settling on one. finally, this clementine micheal miller "tiny tiles" won out because of it's vibrant hue (which photographs too vibrant no matter what settings i use) which matched the backing so well, and because of the subtle orange peel pattern, which matched my quilting choice.

some of the colors on the front are a little flat next to this deep tangerine, but there is enough variety in orange shades that i think it works. it's been on there long enough now that i either like it or am just used to it.

i'm pretty sure i completed the handstitching of the binding whilst watching a movie with my kids, probably bbc's version of dicken's "little dorrit." (really good mini series, by the way - i honestly think i like it even better than the book, even with the changes.) oh, wait! now i remember. everyone else was gone camping except s1 and i. he was watching bbc's "sense and sensibility" with me. really. after a dinner out and stop at the gelato shop, he spent some time hanging out with me while i watch elanor, marianne, willoughby, edward, etc. i stitched on one end and he snuggled up under the other. it was fantastic. see, that memory, sewn into the binding, had to be recorded because i'd already nearly forgotten it.

the last stitch taken in a quilt is always such a satisfying surprise to me. "yipee! i'm done! really, i'm actually done after all this time? yes, it's really a quilt now!" since i have a few finishes under my belt lately, i've noticed the setting of that final moment becomes part of the quilt and another memory added to it's story. some people have even playfully suggested naming their quilts after the movie they were watching when they finished it - common way to cross the finish line, i guess. that would work for me quite often. i suppose this one should be called "sense and sensibility" or "elanor" or something like that. but it remains just plain old "penny patch."

to back up a bit, i got the binding going one friday afternoon while sewing with becky (and boys). it took us another few weeks but we did get together again after our long put off first friday sewing social. she'd managed to get a new machine, too! (i may have encouraged that and her sweet husband may have obliged for mother's day.) now she has more harp space to work with and features to play with. not to mention that she's already working on something completely new - matching hst herringbone quilts for two of her boys. "oh, yes, that other one's done already," she says in passing.

 the 8 yr old was the only photographer available to me for capturing our sewing time. interesting angles and cropping, no?

becky's hst's, which i'm sure are already quilts by now. i need to text her about this friday. maybe i can get a top put together! and have something to show besides an over-advertised penny patch.

Monday, July 21, 2014

modifications - cinched, part 2

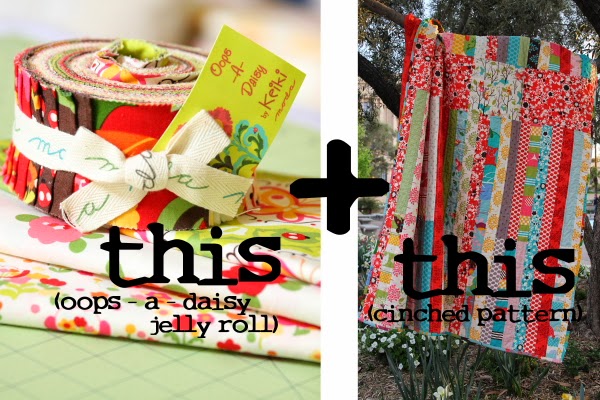
i don't think i've ever followed a quilt pattern exactly as written. i always find some way to make adjustments, whether it be in size, layout, or fabric choices. apparently i can't even follow my own pattern without making modifications. i've made a few changes along the way with "cinched".

***to see where this quilt starts and to get all fabric requirements, go to cinched pattern part one.

accent square/block

first up, instead of that simple accent square in the middle section, i chose to make a courthouse steps block. i spent about an hour fussy cutting and fidgeting to create the block that will be the focal point of the quilt. it's a bit busy, but all the fabrics from this line are loud and luscious. i had a little fun including the critters in the strips i cut for a touch of "eye spy" action in the outer ring.

the white floral fabric came from my backing and the other two pieces came from leftover jelly roll strips not used in the body of the quilt. the sizes of the strips came about purely out of what i had available to work with. i just kept adding until i had the block size i needed.

this block of the quilt is one place where you could spend a bit of time doing something special if you wanted to amp this pattern up just a bit. any favorite block, as long as it's size 10.5" unfinished would work here. or, like in my original, you could fussy cut a fabric you wanted to focus on or highlight. anything the correct size goes - the possibilities are wide open.

if you are simply cutting a 10.5" block, cut it from fabric a. if you are making a "racing stripes" pieced backing like mine, while you're cutting, you can cut additional 2.5" wide strips of fabric a until you have an 80" x 2.5" pieced strip.

*measurement options - another adjustment i've made to this quilt is a few of the measurements have changed. originally, i was trying to keep fabric requirements as small as possible, so i made the accent square 9" in order to get it out of 1/4yd. but after putting the quilt together, i noticed the 9" square didn't match up with the 2" strips. so i enlarged the square/block to 10" finished/10.5" cut. this means the accent strips adjoining the square are also slightly larger than the original at 10.5" high. if you want to buy less fabric, you could reduce the square/block to 9" cut in order to get it out of 1/4 fabric. just make sure you also adjust the adjoining strips to the same height.

accent strip

the rather clumsy name of this quilt comes from the accent strip & block that divides the upper and lower strip sections. i originally toyed with the name "sweet spot" because of that accent square, but that didn't sit right for a few reasons. then i thought how the accent strip looks kind of like a belt "cinched" around the waist of the quilt body. and this quilt is a "cinch" to make, being so easy and all, so that became the name. since nothing else brilliant came along, it's stuck with a somewhat lame name.


the whole point of the accent strip was to add some length to the quilt, making it a larger size than just a jelly roll alone allows. also, it was a chance to add interest to a basic strip quilt and showcase a few favorite fabrics from the line. selecting two fabrics with lots of contrast makes a better impact in the quilt.

anyhow, to make that accent strip, first create your 10.5" unfinished square/block (options above). from fabric b, cut one strip 10.5" x wof (or 42" long) and one strip 10.5" x 12". (this is a little wide, but it will give you room to place your block exactly where you want it in the quilt top.)

sew the long strip to the left side of the accent block and sew the shorter strip to the right of the accent block, as pictured above.

upper strip layer

this is where i left off last time - ready to sew strips together. once you have all strips laid out in a pleasing manner, begin sewing them together in pairs. then join 3 pairs together in one group of 6 strips. square off these groupings of 6 before joining them together. this will help keep everything straight. when you sew multiple strips by just adding the next strip on, you can get a slanted piece. so chain piece in pairs, then group in sixes, and square up before joining them all together.

also, to aid in keeping everything straight, i alternate the direction i sew the strips in. i chain pieced the pairs top-to-bottom and pieced the pairs together bottom-to-top.


now join your upper strip layer to the middle accent strip layer.


when you do this, line up the seams of the accent block with the strip seams above it. pin at the seams and at other intervals along the length of the seam, then sew.

lower strips layer


 a few days ago i got the top section of half strips sewn all together. now for the lower strip section. but as i looked at them hanging on the design wall, they weren't exciting me much. meh. blech. boring. so i just left them alone and did what i was supposed to be doing around the house instead.

however, yesterday i was browsing blue elephant stitches, catching up with jolene's work, when inspiration hit. i don't think i even saw anything specific there, i just got the idea of how to spice up my strips some while i was looking at her lovely quilts.

i was never really crazy about all the half strips put together in this pattern, but it was a necessity because of cutting all the strips in half for the top layer. so i tried cutting more long strips from my extra yardage and weeding out some of the pieced strips. surprisingly, i liked that even less. the joined up strips were adding interest to the quilt. i thought about breaking them up into more pieces per pieced strip, but each time you cut the strip you loose 1/2" length to seam allowances and that cut down the length of the over all quilt.

well, the idea i got was to take one extra half strip of  light green gingham and put a 2.5" (cut) block in between the joined strips. i already had my pieced strips sewn together, but it wasn't much work to unpick those few short seams. and it was worth it! i like the way these little boxes look a lot.

by using the little block to add length, i was able to put more pieces in some of the strips so that there is also variety in where the blocks fall and how many per strip. the lower section is peppered with little bits of green gingham and i like it. this could also be done with more than one fabric but i like the consistency it adds to the quilt having just one fabric for all the small blocks.

 i liked it so much that once i got going, i cut into some of the other long strips that i hadn't intended on cutting at all. now i have more variety and am much happier with the way the long lower section is looking.

new lower section layout awaiting sewing (just ignore the unrelated blocks sharing the board)

next up, part three: sewing the strips together and finishing this top!
nearly there.


the detailed steps for this tutorial are spread over 5 posts i wrote as i made the "bloom" quilt and worked on the pattern. find the others here:

cinched part one - fabric requirements and strip preparation
cinched part three - joining your strips and sections to assemble your top
the three-strip accent stripe pieced backing - how to make the backing
loops and crinkles - quilting choices for "bloom where you are planted"
cinched part four - quilting, binding, and gifting
cinched full tutorial

Monday, July 14, 2014

"cinched" - a pattern in the making, part one


i was quite content to work on that wip list of mine and not feeling the need to start anything new. but then my birthday rolled around and while everyone else spent a few hours watching the world cup game, i decided to sew something. seeing as it was my birthday, i also decided i wanted something fresh, especially since my machine was still tucked away upstairs and i had no desire to lug it down. a little pressing and cutting seemed perfect.

happy birthday to me sewing time
several weeks ago i brought out this jelly roll, which i had slated for a project for a friend, with the intention of completing the quilt before a certain deadline. but that didn't happen and the jelly roll has been decorating a cake plate in the dining/sewing room ever since. until my birthday, that is. a few hours to myself seemed the ideal opportunity to break open the jelly roll and get to work on that gift quilt. (um, sorry kids.)


flat view of the top - taken quickly on the back porch/excuse the sloppiness
i'm revisiting the first pattern i ever put together myself - the very simple jelly roll-friendly "cinched" pattern i used for "out on a limb." i've always meant to do this again, photographing along the way so i could write up a pattern to share. now here we are.

the friend i want to make the quilt for has always admired my "out on a limb" quilt and also likes the "oops-a-daisy" fabric line, so i think it's a good match. i'll be recording my process along the way and then try to do one sum-up pattern post when it's all done.

i'm not doing a quilt-along, but since i'm posting this to share, anyone is welcome to follow along. (that said, i'm not working on any set schedule. this is getting fit in as i have time.) it's a pretty easy beginner quilt, but also a fast and fun way to use a jelly roll you might have hanging around. of course, it could easily be made with yardage or scraps, too.

fabric requirements

i'm starting with a generous amount of yardage partly because i already have it in my stash and partly because i simply like to work that way. generally i need room for error and i happen to adore scraps. for the final pattern, i'll narrow down the fabric requirements more specifically.
  • one jelly roll (or 45 - 2.5" wide x wof  strips *see further options below)
  • fabric a - 1/2 yd for accent block and backing strip a (could be done with 1/4 yd or fat quarter if adjusting measurements slightly - see section on accent block)
  • fabric b - 1/2 yd for accent strip and backing strip b
  • fabric c - 1/4 yd for strip joining squares and backing strip c
  • fabric d - the equivalent of about one jelly strip for joining blocks in the lower strips, if using
  • 1/2 yd binding fabric
  • 4 yds backing fabric
it's a pretty small list. if you want more variety in the strips, which i do, you can use additional coordinating pieces. once i started getting my strips up on the design wall, i realized the fabric line i'm working with has a lot of repeats to make the full 40 strips. since i already have a lot of other yardage cuts for this line (went a little crazy on a clearance sale purchase), i'll be cutting into that to supplement the jelly roll. however, this quilt is totally doable with just a jelly roll + 5 extra strips for the strip portion.

* note - 1/4" seams used through out and all measurements are for "cut" (seam allowance included) not "final" unless otherwise noted.

preparing strips

my design wall is only half a wall, so i'm laying out my pieces in reverse - the top portion of half strips is on the floor

this pattern is constructed with 30 full strips, (measuring cut 2.5" x wof - some full length and some pieced from 2 halves) and 30 half strips (measuring cut 2.5" x 21"). a standard jelly roll has 40 strips so you will need an additional 5 full strips minimum for this pattern. options:

  • one option is to use 5 white or other solid colored strips. this allows for some white space/breathing room in the busy design. 
  • in my original quilt, i cut 2 additional strips from 3 pieces of yardage in the same line and pulled one fabric i didn't like. i did this to add some consistency to the quilt so it wasn't 100% scrappy. 

begin by sorting your jelly strips into those that will stay long and those you will cut in half. options:

  • if you are only going to use the jelly roll + 5 more strips, you'll be cutting 30 of your strips in half, so pull the 15 strips you want to remain long. 
  • if you are using extra yardage or scraps, you can decide how many extra strips you want to cut to which lengths. you will need a minimum of 30 half strips for the upper portion of the pattern. the lower portion is made of 30 strips that are either full length or pieced together out of two half strips. 
also, if you don't want pieced strips on the lower portion, you have two options.

  • for jelly roll + 5 only, choose 15 strips to cut in half to make the top portion. (this means you will have each fabric in this section  repeated twice.) you will then have 30 full length strips left for the bottom. 
  • if you are using extra yardage, you can choose to cut either more half strips or full length strips at your own discretion, so that you have 30 half strips for the top portion and 30 full strips for the lower portion.

 start prepping the strips by opening the jelly roll and pressing the strips. the jelly strips won't be that wrinkled, but i do find they need some quick pressing, especially that middle crease where they're folded in half. once the strips is pressed, i cut the printed selvage off. i don't bother with the other end because it comes off when the top is squared.

when they are all pressed, cut your half strips. you can do this by measuring with your rulers, but i use the following method:

fold the strip in half and lay out on your cutting mat, aligning it with the lines on your mat. slide your ruler up to the very edge of your fold, so that the fold just barely hangs out by a few threads. square the ruler with the fabric and mat lines, then cut along the ruler.

you'll have one tiny bit of a scrap left when you've cut.

my reference photo to check distribution
  if you have a design wall, begin laying out your strips in a row as you cut. you can also use a bed or the floor for this part of the process - just somewhere you can see how it's looking. when you have them all laid out, take a reference photo that you can use to get another view on how balanced your color/volume/scale distribution is looking. also, once it's completely arranged, i print the reference photo as a guide for when i'm sewing the strips to help me get them sewn together as i intended. no matter how well i mark them, i always mess up something, so i find the photo helps me a lot.

if using jelly roll + 5, you will have 30 half strips in a row for your top portion. to make your lower portion, you will have 30 half strips (leftover from when you cut for the top portion) to piece into 15 long strips and the 15 long strips you already set aside.

 as you lay out your strips, start pairing up the half strips to make pieced full strips. my pieced and full strips are randomly placed. in some places, i have pieced strips next to each other, but never in a mathematically patterned way. see the photo above of "out on a limb" for reference. you can make a pattern of every other one or if you are using solid strips for breathing room, place them every 5th or 6th strips. once you are happy with your layout, sew all the half strip pairs into pieced full strips for the lower portion.


while creating this quilt, i decided to join my pieced strips in a slightly different way. i chose to piece the leftover half strips with small joining blocks in between. my joining blocks measure 2.5" x 2.5" cut. i created them from one jelly strip i wasn't using for the top since i had extra yardage i was supplementing with. (see part two, modifications for details on these joining blocks.)

you are now ready to sew your upper and lower strip sections.

ready to move on? see cinched pattern part two to learn how to make the accent block and strip.

linking up to lee's wip wednesday at freshly pieced


the detailed steps for this tutorial are spread over 5 posts i wrote as i made the "bloom" quilt and worked on the pattern. find the others here:

cinched part two - the accent strip and block, modifications from the first quilt, joining blocks for the long strips
cinched part three - joining your strips and sections to assemble your top
the three-strip accent stripe pieced backing - how to make the backing
loops and crinkles - quilting choices for "bloom where you are planted"
cinched part four - quilting, binding, and gifting
cinched full tutorial

Monday, July 7, 2014

from scrap to confetti


how do you explain to a 13yr old boy that the seemingly insignificant and useless scrap of fabric he just mindlessly hacked to pieces with your (off-limits) rotary cutter was in reality rather precious? he certainly won't understand that itty bitty smidge of fabric being a still-useful piece of an out-of-print designer fabric that is hard to come by these days; nor that you had plans for it in your current project which actually calls for pieces to be cut to that size, which further means you now have to deface another larger piece. oh, the waste!

please, son, just don't touch any of mom's fabric, no matter how tiny it looks to you. and definitely leave my tools alone. unless you ask first, of course. then we're good.

#firstworldquiltingtragedy #dramaforascraphoardingfabriholic #thatwasfuntoplayup #butsomeofyougetit

Saturday, July 5, 2014

some fmq tricks and blips

 for anyone that was unduly impressed with my dogwood/orangepeel fmq on my penny patch quilt just examine this photo a bit. i'd like to say this is from the begining of the process, but it's actually from nearly the end, when i should have had the pattern perfected, right? or from when i started getting tired of the dang thing and became frantic and sloppy.

 in case you missed the obvious, just look at that dented/deflated petal in the orange on the upper left there. if you're really perceptive, you'll see another flat petal in the orange/white/blue katie jumprope  floral, too.

a view of the back shows that one more clearly:


people always wonder when to unpick and when to leave a mistake alone. really, it's a personal decision based on what you'll be able to live with later. in a quilt with hundreds of these petals, this is rather insignificant, but these two did not pass muster. out they went. sure, it was a pain, but they crossed the line. when i have blatant gaffs, i always think, "well, i've put this much effort into it already, i might as well spend just a little more time and make that correction." it's worth the extra effort to not be forever taunted by the mistake when you use the quilt later. without fail, that one spot will always be staring you in the face.

it seemed every time i did make a mistake like that, it was always in the most obvious squares where the thread contrasted strongly with the fabric, yelling out the mistake as loud as could be. that may simply be that it was noticeable because of the contrast and the squares where there was no contrast weren't really any better, just better hidden. it didn't feel that way, though.

something i learned along the way was this handy trick: you can still use your auto thread cutter even when you need to leave a tail for tying off and burying. this photo, thanks to the shallow depth of field in macro photography, is not as clear as i'd like it to be, but it still demonstrates my technique. that bent black line in the lower left corner points to where my quilting ends and where i need to tie off and bury the thread. normally i would lift the needle, pull the fabric to the side, and manually cut the thread with my snips. this required me then lifting the quilt and awkwardly snipping on the underside, too. the threads were never the same length this way, which made for further snipping. somewhere along the way i realized i could just lift the needle, pull the quilt to the side until my thread tail was the desired length, and then press my auto thread cutter button. voila! equal lengths of thread each time and no searching for the bobbin thread under a mound of quilt.

i also realized after a while that when finishing off one area and moving to start in another, instead of cutting the thread before moving, i could cut after. as long as the two points were within reasonable distance of each other, this worked nicely. again, looking at the above photo, if i left off quilting at the upper corner of that blue chevron square and wanted to start next in the blue and green square, i would lift the needle when done and then lower it in my next starting point. after making a few stitches in place to secure the thread, i'd be off quilting. later, when i was ready to knot and bury, i'd just cut the thread half way between the two points, pull the bobbin thread to the top, and then finish off.

both of these tricks saved me a bit of headache and time.

sewing my supreme slider to my quilt (for a second time, no less!) did not save me any time. what a mess. this time it happened not because my slider was linty and un-tacky. rather, i was messing in the bobbin chamber with the slider put out of the way to the side, bottom side up. i simply forgot to put it back into position when i got back to sewing. it slid right along with the quilt. poor slider is rather scarred now after all the accidental sewing. it may have to be replaced after this last fiasco.

and the last "we can laugh about this later" moment of the fmq experience was literally the last moment of the entire quilt. i noticed when putting on the binding that i'd stopped two petals shy of where i was supposed to with the fmq. that was annoying, but fixable. i got those two petals completed and was tying off my thread to bury it when my darn knot went awry. this seems to happen a lot lately. i use the wrap know method, but sometimes the knot tightens before the tails pull through and you're left with a knot too high up and no room to get your needle buried. it can be worked out, but it usually takes several minutes and sometimes the thread breaks, which is the worst case scenario. so there i was, literally trying to put my last stitch in the quilt, with the thread stuck in a position that was too short for burying. i was thinking, "seriously?!!! can't i just finish this once and for all?" nope. the thread snapped and i basically gave up. i always do stabilizing stitches in addition to knotting and burying my thread, so i just let it go. if it comes undone at some point in the future, i'll deal with that later.

reading this one might wonder why i do this quilting business. yes, it has it's moments of insanity and supreme frustration, but in the end, there is a quilt. and that's worth it to me.

really, how many more new mistakes can i make?

Tuesday, July 1, 2014

standing still

i hardly know what to say after a month of not saying anything here. my sewing output has been just about on par with my blogging - nothing. nada. zip. zilch. no sewing, no blogging. makes sense, right?

partly this is due to lots of travel and family events. my sewing/dining room even looks like a mostly dining room right now because i had to clear it for a luncheon we hosted for some 75+ people. with the weather too hot for al fresco eating, we had to have the dining room back. thus juki is tucked away in a corner of my bedroom on the floor.

the other factor is simple summer sewing slump blahs. nothing appeals to me. you'd almost think i was pregnant again. but i'm not. i just don't feel like sewing. i've fallen back on the old summer standby of reading. i dutifully took my epp and binding projects with me on my outings, but the only bit i managed all month long for june was to unpick about half a row of bad quilting on the baby quilt that was supposed to be delivered to florida in january. as in january-six-months-ago.

so there. i've done nothing and said a whole lot about it. typical.

however, the one thing i did not do that i'm pleased with is fabric shopping. i managed to not buy any fabric in may or june, completing my longest streak yet of fabric fasting. oh, i saw the quilt market frenzy on instagram. i'm well aware of cotton and steel and have been drooling achingly over up parasol (heather bailey, you know). but somehow i have resisted. i think this is largely attributable to staying away from shops, real or virtual, not reading blogs much, and not actually sewing much. the last factor doesnt' help decrease my stash but it does keep me from buying. it's almost like i just need to give up on quilting all together because i'm such an all or nothing gal and my life can not be all about quilting right now. nor should it ever be, if it comes to that.

 i almost caved when up parasol released a few weeks ago, but told myself it wouldn't hurt to wait just a little bit so i could complete the month honorably.


up parasol by heather bailey - isn't it gorgeous?!

now, with the rest of summer before me and so many events and other trips planned, i think i might extend that fast through the next two months. i'm not committing either way. i'll just see where i end up between now and then.

if i do happen to get juki back in place, i think i'll make myself complete my remaining wips, which are so close as it is:

  • florida baby quilt needs a monogram and binding
  • d1's chevron quilt has only a few feet of binding to go
  • "paris daydreams" needs binding
  • s2's "bandwidth" is waiting for straightline quilting
  • s1's wonky stacked coins needs 36 more blocks
  • diamond hst quilt is barely started
  • "gypsy" is behind schedule and i'm due to host the blog stop in nov (eek!)
  • "sugar block" is languishing, too
  • there are also about 3 baby quilts i had intended to do
so there is plenty for me to do even without looking at another new stitch of fabric.
and maybe i'll find something to blog about along the way.

linking up to freshly pieced's wip wednesday and fabriholics anonymous with rebecca lynn.