Wednesday, March 30, 2011

help a girl out giveaway

designer vanessa christenson of v and co. is facing her husband's sudden job loss. in an effort to help out a bit and spread some goodness abroad, i'm offering one lucky gal any two of vanessa's fabulous patterns, your choice.  for a chance to win just leave me a comment telling me what you like about her or her work. i'll pick and post the winner next friday, april 8th.

personally, i've got my eye on her bag, the abbey tote:


and the just dandy quilt:

the patterns are pdf files, so the winner will tell me which they like and i'll have them emailed to you from vanessa. no waiting for me to sew and mail something. good luck!

WIP wednesday

wow, i just used capitals on this blog. must be something big! it's WIP wednesday. what? i'd seen the phrase myself around the crafty blogosphere and surmised, after viewing freshly pieced's post, that it it had something to do with ''work in progress" on wednesdays. finally googled it and i was right. musings from the fishbowl started the concept over two years ago. it's really just about posting what you're working on. i really liked the way freshly pieced provided a stats list for her week on her last WIP and decided to do the same.

so, how has my sewing week been? let's look.

projects completed "star cookie" quilt

quilts needing a finishing touch "at last," of course. still waiting on it's ruffle.

quilt tops in progress  "out on a limb" finished the piecing of all strips, just need to sew the 3 panels together and it's done! hoping today.

others in progress my follower surprise packages and headbands

projects on hold  a number of quilts, more than a dozen; a pin cushion from heather bailey's fresh picked pattern

trips to the store
one to joann's for some rotary blades, quilting needles, and a new softie book socks appeal (at the request of my 6yr old son)
one to my quilt shop to pick up two long-awaited arrivals, one much bigger than the other. a reveal coming later this week.

in the mail finally broke down and purchased some heather ross prints: far, far away ii (blue colorway) from a few etsy shops and from her collection at spoonflower. arrived yesterday. more on them later.

other cleaned up my sewing table, moved sewing books off fabric shelf to make room for new fabrics, added phone book to my sewing chair to raise me to a better height. i could really use a better chair. better add it to the list of things to save for.

what are you up to?

Monday, March 28, 2011

4sq blanket no. 4

i worry about going to the trouble of making a gift by hand that the recipient won't like. i've been on the receiving end of such items as a child and don't want to put anyone else in that position. but i also like the surprise factor of the gift. when it came to my 4th blanket for my s-i-l's third little girl, i sided with making sure she liked the blanket. i showed natalie several groups of fat quarters and asked her to pick her favorite one. i'm glad i did because she chose something that completely surprised me. i would have selected the yellow and blue meadowsweet fabrics i ended up giving to anne with blanket #5.

this set included the large blue floral from hunky dory by chez moi for moda, the paisley & daisy prints from kate spain's verna for moda, and the unidentified pink swirly print.

the blanket didn't get delivered until my newest niece was almost a month old because it was waiting in the wings for me to finish no.3 first. but natalie said she loved it and when i was over there recently, i saw her using it. i don't know if she was just doing that because i was there or not, but it made me smile and think maybe she does like it after all.

funny story here. my stitching on this blanket was much better than previous and subsequent attempts. i made the stitches deep and they turned out more evenly sized. to my surprise, i got within literally one inch of the end of the blanket and ran out of floss. you can tell i was getting desperate and shortened the two last stitches in an attempt to complete the blanket with what i had. didn't work. i had to make yet another trip to joanne's just for another skein of floss, which was the third trip of that sort for this blanket alone. the first time i picked out the floss, i accidentally dropped one skein before i got to the register, but didn't realize it til i got home. so i had to return a second time for more floss. then the third. when the day arrived to deliver the blanket, the floss i had purchased didn't seem to match the color i'd already used. i was about to cry. i'd taken a long strand of floss and a needle with me to a family party, intending to finish it off and hand it over. natalie looked at the blanket and floss and said if it wasn't a perfect match it was close enough and not to worry about it. so the last inch was finished and evee has her blanket to snuggle in. whew! what an ordeal (of the minor sort). all over one inch of floss. but that darling baby is totally worth it.

Friday, March 25, 2011

finished!

the notorious "star cookie" quilt is complete. oh, yay! time to celebrate. one tiny "to do" marked off my list.


after having languished since i began the hand quilting on it last october, i picked it up again last week and had it done today. saturday was a calmly blissful day of gentle hand quilting while listening to fellowship of the ring on cassette (as in "tape" - how's that for vintage?).  the hand quilting came together surprisingly quickly once i gave up the struggle for perfection. "wonky is nice" is my motto, remember? i started this quilt only having read a few bits of mediocre quilting books and being inspired by the wonderful jane brocket to just try it out without any real training. originally, it was going to be a 4sq blanket, but i couldn't find a coordinating flannel (other than boring white).


well, to start at it's very beginning, i took my two baby girls to the fabric store last september. to keep the four year old compliant and occupied while i shopped, i let her pick out four fat quarters with the idea that i could whip up a 4sq blanket in no time. she picked these rose, pink, grey, and orange prints from soliel. her absolute favorite was the one she called "star cookie" because it reminded her of some star-shaped cookies in a fancy nancy book she'd just read. (the cookies in the book were regular 5 point stars, but she thought these shapes were stars and star cookies, too. works for me.) only problem was i couldn't find a matching flannel despite combing 3 stores for candidates. then i got the crazy idea to just make a small quilt. why not?


i'd been wanting to quilt for a long time and jane helped me believe i could do it. so i did. i thought of making fat strips instead of just 4 squares and the design was born. i added one more print to the mix to pull them together a bit more, as well as another fat quarter and yardage for the backing in the pink star cookie print. six fat quarters cut in half, sewn into two rows. simple. i didn't know a thing about squaring or setting seams or pressing. i just had a vague idea about making a top, putting some batting in the middle, and a backing being needed. with that in mind, i happily got to work. after the top was done, i consulted an on-line you tube tutorial about hand quilting and started in on that phase. jane said she always hand quilts without a hoop in straight lines. good enough for jane, good enough for me. i had a great time doing it, loving the serenity and rythm of hand quilting.

in november, before i had gotten much of the quilting done, i took my first quilt class and learned all the things i'd done wrong. i hadn't squared anything and my seams were far from straight, not to mention not well pressed. i'd done some of the quilting by following the striped lines on some of the pieces only to find out prints aren't necessarily straight. no wonder my lines didn't look right on the back of the quilt! my fun, happy little project began to look like a big mess and headache. it lay in the "on the go" handwork basket until i picked it up again last week. knowing it had many faults already and deciding which to correct, i tackled it again. i remembered the novice joy i began the project with and went back to that attitude. it's still far from perfect, but it's done, done, done! and finally in the hands of the little girl it was meant for.


despite it's many imperfections, she's excited to have it and i'm well pleased with it, too. who needs perfection? i made a complete quilt all by myself! that's enough for me.

Wednesday, March 23, 2011

inspiration for leftovers

as i put "out on a limb" together, i had some unneeded jelly strips and no idea what to do with them. nettie at a quilt is nice just inspired me with her jump rope baby quilt.


i like the look so much, i briefly considered cutting up what i've already done, but i think doing a small coin style doll quilt with my leftovers would be perfect. i even have leftovers of the red bandanna piece i'm using as my accent stripe for a cute side strip like some of her other quilts, like this:

i like it! and i have lots of white strips since i recently invested in a jellyroll of moda's basic white strips. looks like fun. and another "to do." dang, those pile up fast.

Tuesday, March 22, 2011

headbands

hope everyone had a happy, lucky st. patty's day & weekend. we had a lovely breakfast out. did you wear your green? i did, completely by accident! i wasn't paying attention to the calendar at all, i just wanted to wear my flower ring and coordinating headband.  when i saw this picture from that morning of myself in a headband, it reminded me to tell y'all that i've got the fabric for my giveaway headbands and the other surprise gifts, and will be working on them soon. promise. thanks to all for being patient, even if it is free. one night recently, while falling asleep, i had a brainstorm of two new flower styles to try out. i never thought i'd ever be designing anything even as simple as a headband, but maybe i have it in me to branch out a bit on my own after all.

Monday, March 21, 2011

juggling

having more than one project going at a time can be fun, but it also means some projects take a backseat, getting pushed further and further behind. i have at least 3 prominent projects i'd like to complete immediately. finally, i've got a brainstorm of how to embellish "at last" and i'm still in the middle of "out on a limb." also, now that i know a bit more about sewing and quilting, i realize some mistakes i made when i started up "star cookie." that's lead to some decision making regarding unpicking stitches and possibly even more fixes than that. i'm torn between just moving ahead and redoing a major portion of what i've already done. one of the curses of a little knowledge, i suppose. when i didn't know any better, i was blissfully stitching away. can't do that now. i'm feeling a bit pressured to be done with these quilts not just because of the excited babies who keep saying, "is my blanket done?!" every time i touch them, but because i'm taking a quilt class next month and that will mean another project in the mix.

"star cookie" has been pinned together since october, which is a big no,no. i live in one of the driest places on earth, so i didn't worry too much about rust in the beginning. but now that i sew in the bawthroom, i need to get those pins out. so today while the 4 yr old had her bath and the 3 yr old played with some of my recent project scraps, i worked on unpicking a few of the handquilted seams i completed last october. (see how long it's taking me to decide and finish up this project?!) my problems lie in that i didn't square off the quilt sandwich before i began stitching and my straight piecing seams are not very straight, hence some discrepancies between the quilting lines and the fabric seams.  i think i'm going to compromise at unpicking the last few seams and leaving the rest. i really need to undo those because i ignorantly just followed the stripes on the fabric not knowing they weren't necessarily straight and definitely not in line with the previous stitching i'd done.

one good side effect: i know the marking pencil i've been using really will disappear because i can no longer see the guide marks i made last time i worked on this quilt.

Friday, March 18, 2011

on the road

last week my splish, splash, stash time went on the road in an unusual and fun way. the mr. and i took flight from the nest for some aloha alone time. instead of the girls being in the water while i sewed, splish splash time looked more like this:

that's me throwing my lei into the surf at poli hali on kauai. i also snorkeled and swam while there, but it's the only photo of me actually in the water, so there you go: splish splash.

one of the best places i know to catch a sunset and the most incredible sand anywhere. can't beat the napali coast!

even though i was in paradise, there was some stash time worked in, and not just when i was reading quilt books or dreaming about fabric (yes, i was doing that even in hawaii; obsessed, i told you.)

i've passed this building just off the road in lihue for several years now and actually been there once before just to see their native hawaiian quilts, which are beautiful and unique. this time i went in as a sewer looking for interesting finds. i wasn't the only tourist in there. if you look closely, you can see five husbands of the retired sort waiting on the porch while their wives shopped.

even the new, more modern quilts definitely had a lot of aloha and hawaiian flair to them. i find it so interesting to see how quilters the world over are influenced by their cultures and where they live.

this dolphin quilt is an updated version of the classic hawaiian quilts, which are usually done in white and one color, featuring a variety of hawaiian motifs in the round. it's all hand applique work and just stunning. the colors and motifs in this quilt are more modern, but just as amazing as those the hawaiian ladies have been doing for over a hundred years. i got two books about the history of hawaiian quilting. can't wait to dig in and read them. 

the fishy quilt in the back is more of a modern technique patchwork quilt with hawaiian themes and fabrics.

there were a lot of batiks in use here. i can appreciate them, but they're not my style. i don't think i'd ever make the turtle quilt, either, but it thought it was cute and clever the way the fins and tails were all three dimensional (which you probably can't tell from the photo).

i thought about selecting hawaiian fabrics for a commemorative quilt, but selecting fabrics to go with my memories of the trip was overwhelming and i didn't have the time. i did, however, take advantage of their huge asian fabric selections. i even have a pattern in mind for a small throw based on a quilt from the practical guide to patchwork by elizabeth hartman. add it to the list of "to do!"

those rabbit prints are so cute, i'm wishing i'd gotten more yardage and made skirts for the little girls.

also, i've had my eye on a traditional hawaiian quilted pillow cover and this time found one i thought would work with my bedding. lovely pineapple and palm leaf motif. it may not be an entire quilt, but it'll remind me of our favorite home-away-from-home.

that was the end of my stash time. i know there is at least one more fabric shop on the island because it got robbed while we were there. go figure! the thieves made off with a laptop, cash, and fabric. i'll have to make time for vikki's shop next year.

we had one more bit of splish splash excitement that i'm sure everyone else heard about: the tsunami. thank goodness it was all fuss and no real mess unlike poor japan.  just as we were falling asleep on thrusday night, sirens started going off. i made the mr. call the front desk. "hello, there are sirens going off outside. should i be concerned?" the cheerful desk clerk answered quite calmly, "yes, sir. there's a tsunami on the way. it will be here about 3 a.m. we're evacuating the first four floors but you are on the sixth so you should be okay. we'll let you know if you need to move." my unruffled husband responded, "is there anywhere i can go to watch it?" we packed our essentials and set out clothes, then went to sleep since there was nothing else to do. at 2a.m. we got a knock on our door from a manager who informed us they were moving everyone up to the lobby on the ninth floor (the hotel was built on a sea cliff in hanalei bay, with the lobby at the top.) so we got dressed and grabbed our packs to go hang out with the party in the lobby.

 i kid you not, as soon as we settled in our seats in front of the window, a very pregnant lady sat down by us. it was already surreal, but at that point i began to feel i must be in one of the many hollywood movies filmed on kauai and was sure i was going to be delivering that baby before the night was out.  an hour later we watched from the balcony as best we could in the dark. all we could see was the breaking waves moved out several hundred yards and then back in somewhat closer than they had been. the tsunami was over and done. we were sent back to bed at 4a.m. and given a box of chocolate macadamia nuts by the management for our inconvenience. when we woke up, we looked out our window on the aftermath at hanalei bay:

the sun was shining and the beach recliners were still in the same spot as they had been the night before. thank goodness. poor japan.

Wednesday, March 16, 2011

finger puppets

a really simple and cute sewing project for the junior set is felt finger puppets. my 12 year old daughter made some for her little sister for this christmas just past. she got the basic idea and pattern from emma hardy's sewing for children (see left sidebar) and went with it all on her own. after the first one or two mostly copied from the book, she started making up her own designs. felt is easy to cut and doesn't fray, so it's wonderful for young sewers.


she added this bunny and carrot to the collection on her sister's birthday. i think she was in a bit of a hurry because her stitching on these pieces was not as careful or nice as the others. i'm still trying to work out how to encourage their creativity and let them know perfection isn't required, yet inspire them to do good, thorough, durable work. i want them to learn proper technique and take pride in work well done, but i also don't want them intimidated or stifled when they don't know how to "properly" do something. either way, their creations are charming and the three year old doesn't seem to mind its quirks at all.

Monday, March 14, 2011

sunday hostess apron

i finished that apron pretty lickety split. i had it completed in the weekend i started it, as promised. it came from heather ross's  weekend sewing, after all, which is full of projects you can make in a weekend. i estimate it was done in about 3 hours from start to finish. that includes the time it took to unpick a seam when i accidentally sewed some of the middle portion of the skirt into the waistband (i felt so high school home ec at that point!) and the funny gaff i made of using a safety pin to pull the end of the tie inside out. that only works when you are pulling a tube inside out, not something sewn off at the end. if you try pulling the tie through with a safety pin, like i so brilliantly did, then you end up with a safety pin stuck on the inside of your tie's tip. oh, live and learn! it was a fun project none-the-less. and if you don't look too closely at my stitching, it's pretty darn cute.

the pattern was mostly easy to follow except for one part: it wasn't clear enough (for me) about what portions of the waistband and ties to sew together in the beginning. but that was easily remedied when i finally figured out what i was supposed to have done. the only thing i am considering redoing is the gathers on the skirt. i pulled the gathers and then had to set the project aside. they'd loosened up when i came back to sew the waistband on, so they do not appear as full and frilly as i'd have liked and as the pattern intended. but i hear my stylish seester, marcee, about snatched the apron when she was at my house last week, so apparently i'm not the only one who likes the outcome.

Friday, March 11, 2011

4sq blanket no. 3

i did a big no-no on this gift: i took it to the shower not even started, just a pile of fabric tied up in a bow. i couldn't get myself over to the fabric store until the day before the shower and there just wasn't time to get it made. or even started. it's a running joke in our family how many times we got piles of folded fabric as a gift from my mom, with the attached promise that they'd turn into pajama pants or a dress or something similar. more often than not they stayed a pile of fabric. so i was completely embarrassed to take this to my s-i-l's baby shower even though there was also a real gift of diapers and burt's bees baby products included.

when i handed the package to carrie and explained it to her, she looked at me confused, replying, "i'm supposed to make it?" oh, heaven's no. i'm going to make it into a blanket, not you. ha! that was funny. even better was when my seester, jodee, was looking at the tied up triangles and squares and asked incredulously, "did somebody make this?" double ha! i'm not sure what she thought they were, but they definitely weren't complete.

two of my seesters, carrie, my mom and i at the shower.

i went home that night and started the blanket, getting the top complete. but i got stumped at the backing since i wanted to do an applique on it. there were cars on some of the fabrics and i had the lofty idea of making a road and copying two of the cars into applique form. really great idea, but because of it, the blanket sat untouched all through the holidays, three months past drextyn's birth. finally i gave in and nixed the applique idea for the sake of getting the blanket delivered while he was still a baby. however, i purchased more of the fabrics so maybe next time someone has a boy, i can get the applique on there.


i especially liked the bright, cheerful combination of colors in these fabrics. those dots! the compass-type print is darling, too.

the fabrics for the top were riley blakes. i thought the amy butler love dots flannel looked really cute with them. carrie did, too. she's a pretty stylish gal, so i was worried there weren't hip enough for her, but she keeps telling me she really loves the blanket.

Wednesday, March 9, 2011

sarah's original 4 sq blanket

i finally photographed the original 4 square blanket given to me by sarah martin nearly nine years ago. it has been playing area rug to a doll game for a few days, but i finally confiscated it. it's been well loved over the years and looks a bit sad relative to all the new blankets i've been making, but she's just as good underneath her wrinkles and few spots. the photos didn't turn out very well, so i think i'll have to clean her up a bit and reshoot.

would you believe that's the original red headed baby the blanket was made for? it's cliche, but i've got to say it - "oh, where has the time gone?!" she used to easily fit in one of those squares once upon a time.

i'm going to get sentimental here for a moment and veer away from sewing talk. looking at this blanket has taken me back a few years to the morning sarah brought the blanket to me.

this is me and the three little (now big) ones at some point before sarah showed up with her gift. i remember being embarrassed about how i looked. i had a cloth diaper tucked in my shirt to soak up all the leakage from my milk coming in, for crying out loud! i felt a mess. everything was chaos since the baby was just a few days old. but sarah was just excited to see her and it really was a very sweet gesture on her part. sarah's blanket was much prettier than that ugly hospital blanket i was using at the time she showed up with her gift. i may have been embarrassed, but i was also delighted with the beautiful present.

i found a photo taken a month later where the baby is tucked away in sarah's blanket, sleeping soundly in her carseat.

she was a sleepy baby, always sleeping.

sarah's blanket was backed with a natural colored flannel, which was perfect for a backdrop to baby photos. i used it several times for that purpose.


thanks again to sarah for the thoughtful, handmade gift at the time and now for the inspiration to make these darling blankets and pass the gift on.


even after eight years, i still love sarah's fabric choices. they're girly, homey, and sweet. gingham! and that beautiful floral, not to mention the pretty stripe. very nice indeed. while looking over the blanket as i photographed it, i noticed sarah's blanket stitch was much deeper than mine. i'll have to try that on a new blanket. i have four scheduled for the next few months, as it is, so there will be plenty of chances.

these photos definitely need to be redone. too grey. i get so frustrated when lighting looks okay on my tiny camera screen but not on the computer screen. always room for improvement!

Monday, March 7, 2011

4sq blanket tutorial, part three

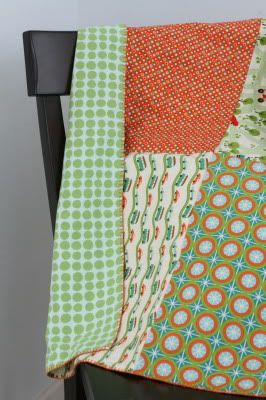
time to get your backing on your blanket.

while looking over the original blanket, now almost nine years old, i noticed there has been some slight uneven shrinkage between the front cotton pieces and the back flannel piece. therefore, i think that even if you don't wash the cotton pieces for the front, it is probably wise to wash the flannel before sewing, since it is more prone to shrink.

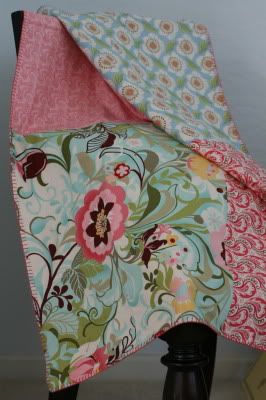
press your flannel backing piece and lay it out on your cutting surface, right side up. smooth the piece out so there are no wrinkles. then lay the blanket top, right side down, on top of the backing. again, smooth out the wrinkles. (i did not turn the top when working on this blanket, it's right side up. regretted that later!)

now cut the backing flannel by following the outline of the top piece. you could measure the top and square the flannel, but i find my top piece is never perfectly square and prefer to use the top as a pattern piece for the backing. when completed, the blanket is not perfectly square, but close enough. i'm okay with that. it's not obvious when looking at the blanket except some times when it's folded.

pin the two pieces together. you are now going to sew them together around the outline of the pieces with a 1/4" seam, making sure to leave a hole for turning. start sewing in the middle of one of the sides. sew around all four sides with a 1/4" seam. stop sewing when you get 4" to 6" away from where you started so that you leave a hole 4" to 6" wide, or just big enough to get your hand in.

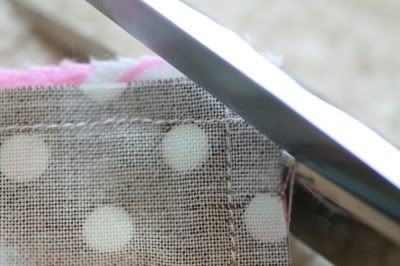
before you turn the piece, clip your corners so they aren't so bulky, lumpy, and rounded. to do this, cut diagonally across the corner. cut right up to, but no through your seam.

you may notice here that i didn't pivot at my corners, but ran straight to the edge of the fabric, then started the next seam at the edge also. sometimes i do this to check how the blanket is squaring up. since i cut my backing with the top facing the wrong way and the pieces didn't match up properly, i chose to sew this way this time. do which ever you prefer.


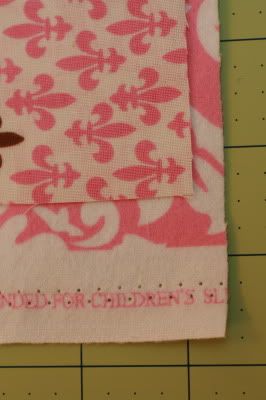
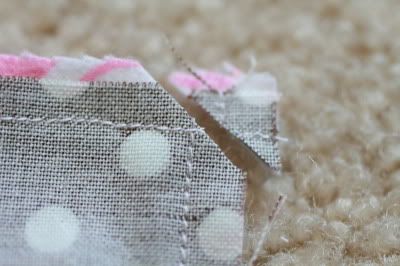
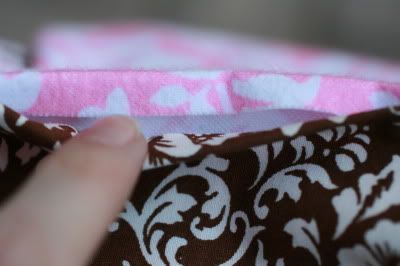
this is what the corner looks like cut off. now is also the time to trim up any excess fabric in the seam allowance like the extra pink showing in this photo. when i said i was a beginner and not a perfectionist, i meant it! i make mistakes and just keep on going. it all works out in the end.

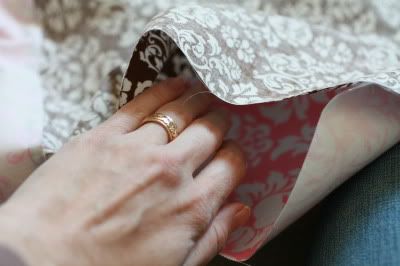
time to turn the blanket right side out. stick your hand in the hole you left in your seam.


with your hand inside, grab a corner of the blanket on the opposite side of the hole.
hard to tell, maybe, from the photo, but that's my hand grabbing the inside of the corner.

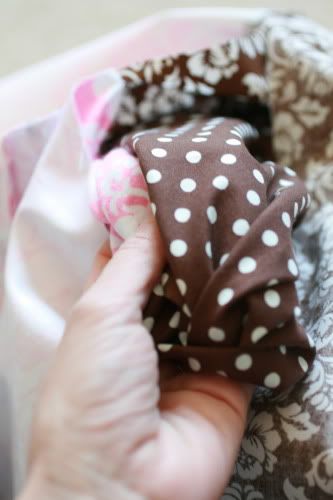
now gently pull the blanket out of the hole, being careful not to rip your seams.
smooth the blanket out and turn out your corners so they look nice and pointed. (if not, no one minds rounded corners, either. it's okay!)  to help your corners be fully pointed, use a knitting needle or chopstick or pencil eraser to push them out from the inside of the blanket. i usually just use my scissors, carefully, but i hear that can be a problem if you push too hard and pierce your project.

now that the blanket is sewn together and turned right side out, it's time to blanket stitch the edge. at this point you can press your seams flat from the outside, which makes the stitching easier. but i find it's pretty difficult to get the seam wide open when you're pressing from the outside, so i don't always do it this way. my alternative is to just start stitching, manipulating the fabrics and the seam wide and flat as i go. that's not easy either, so do what you will. good luck! don't worry, whatever you do, it'll be fine.

if you don't know how to blanket stitch, see the tutorial.

i learned a new trick with this blanket. i used to stitch the hole up right away, but this time i left the hole open and stitched it closed last. i found that when i do it this way, i don't have to bury my knot at the beginning of each new piece of floss but, rather, i can just tie my knot and then place the thread from the inside of the blanket by going in the hole. does that make sense?

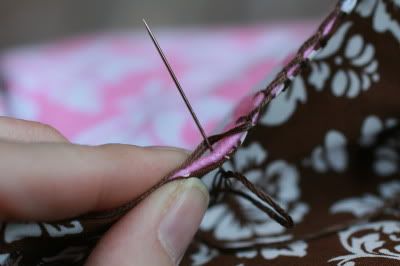
so start blanket stitching on either side of the hole, depending on which direction you like to stitch. i stitch right-to-left, so i started on the left side. when you get back around to the hole, you'll need to press down the seam allowance of the blanket before stitching. you can either finger press or use your iron. simply turn the edges in so they are in line with the blanket edge you sewed and press.
see, both edges are pressed in. hold the seam closed and continue your blanket stitch right over the hole.


yay! your blanket is done. pat yourself on the back, take a picture, and wrap it up in a pretty bow if you are gifting it to some lucky person. congratulations to you and the new mother.