Saturday, October 7, 2017

4 square baby blanket gallery

 this 4 square baby blanket, composed of 4 fat quarters and edged with a blanket stitch, which was inspired by a gift i received for my 3rd child, was my go-to baby gift for a few years. originally, i made this as a blanket with no batting in between the top and backing. however, i now prefer to make it as a quilt. click on the blanket number for a related post and more photos.


no. 18, completed june 2013
for my nephew dillon

no. 17, completed oct 2012
for carter, my college sorority president jen's little boy

no. 16, completed oct 2012
for my friend becca's baby boy

no. 14, for my daughter #5,
completed may & oct 2012

no. 13, completed april 2012
for my niece laynee

no. 12
for my niece hailey, completed april 2012

no. 11
for my nephew, ollie, completed march 2012

no. 10, for grace's daughter charlotte,
completed march 2012

no. 9
for becca's baby may, completed oct 2011

no. 8
for nikki d's son preston - completed october 2011
  
no. 7, for heather l's daughter isabella
completed sept 2011

no. 6, for my friend heidi's baby girl
completed march 2011

no. 5, for my friend anne's baby claire
completed february 2011

no. 4, for my niece evee
completed january 2011

no. 3, for my nephew drextyn
completed january 2011

no. 2, for my cousin michelle's baby emma
completed september 2010

no. 1, for my niece liberty
completed september 2010

Friday, May 19, 2017

how to mcguyver a design wall in 5 minutes


i posted a quick version of my process for creating a design wall on instagram a few weeks ago, saying i would have more detailed instructions up on the blog later in the day. then didn't post it. man, i don't like when i do that! if i say i'm going to post something, i like to keep my word. even some casual words thrown out into social media land. i doubt anyone has been waiting with bated breath for this explanation post, but it feels good to get it off my conscience anyway.

i also don't like using the same photos here that i use there, but it's all i've got. so be it.


one friday afternoon when the entire family was busy in various other places, i sauntered into my sewing room, ready to work on any of the several projects already underway. then i spied this pile of already cut fabrics which had recently been pulled out of storage oblivion to photograph for the march instagram quilt festival. i was completely seized by the urge to sew up this plus quilt i'd cut out ages ago. the only problem was i knew i would need a design wall to lay it out for piecing and i had no spare design wall space. that darn gypsy wife is still all over the two half design walls i already have.


A post shared by @hydeeannsews on


one of the two design half walls in my sewing space actually has room above it for another half wall, making a complete, full-sized design wall capable of accommodating a full quilt. i would have just put the two half walls i already have together, but one of them is thinner than the other and i wanted them flush on the wall. (time to stop rambling about unimportant details and focus, wouldn't you say?) i've long meant to complete that third piece but never have. (obviously!) all of the sudden it was time to do that.

i already had batting and duct tape at home, i just needed another wall insulation panel from the home improvement store. that was simple enough to pick up, even if carrying it through the parking lot in a brisk spring wind wasn't so easy.

here, at last, are my instructions for making your own design wall at home.

 gather supplies

  • one foam wall insulation panel of desired size, at least 1" thick (mine is just the standard size available at Home Depot: 4' x 8' x 1")
  • a piece of batting about 4" wider than the height and length of your foam insulation panel (OR scrap pieces that will collectively make this size ***)
  • duct tape
note: my first design wall i made is 1" thick, which allows it to stand on its own without any bending or distortion. 1" thick is a good, sturdy thickness. my second design wall is either 1/2" or 3/4" thick and it bends and wobbles and doesn't stand well on its own. if you are going to attach your design wall permanently to a wall, you can get away with less than an 1". but if you want a portable wall that you can move around, get 1" or thicker. a portable design wall is actually pretty handy. i might make one more of these just to have one i can move around at will.

assemble


lay the batting out on the floor and place the foam board on top, with 2" or so excess on each side.

you really want the batting to be able to wrap around the foam board and overlap a minimum of 1" on the backside. with my first design wall i tried to save batting by cutting it about the same size as the board. this was a bad idea because it meant i had duct tape showing on the front of the board in places, which meant i couldn't use pins there or get fabric pieces to stick in those places. so give yourself a good 1" on the back.


starting on a short end, begin pulling the batting to the back of the foam board and taping it down with duct tape.

since i was working by myself and didn't have anyone to help me hold the duct tape and/or batting, i found it easiest to work with shorter pieces of duct tape (about 12" long). if i tried longer pieces of tape, they would stick to themselves before i could get them down and just caused trouble. if you are more adept at working with duct tape than i am, go for it. otherwise, i recommend manageable lengths of tape.


when you get to the corners, miter them like you would do when gift wrapping.

by this i mean fold the end you are finishing in at an angle to the piece you will be starting next, like the above photo.


then proceed down the next side of the foam board, attaching the batting with tape as before.

this whole process took me only a few minutes.


suddenly, i had a new design wall! i put my little sewing slave to work lining the top of the board with pins because i find it handy to have them on the board, ready to go.


we just make a line from one end of the board to the other along the top.


***you can see here that my piece of batting, which was a scrap, was actually a few inches short of the length i needed to fully cover the board. i simply found another piece of batting to make up the difference. i could have sewn them together, but being lazy i just overlapped them by a few inches and taped them down together on the back.

that's how you do it!

any questions?

how did my plus quilt go, you want to know?


A post shared by @hydeeannsews on

it came together super-fast, thanks to the design wall.

Sunday, April 23, 2017

final stitches


i've been working on this binding for a week or so. soccer season is over, so i don't have practices or games for handwork time anymore. but lately we've been doing a couple of sessions of listening to books on audible, which has given me a chance to hang out with the family and keep my hands busy at binding. i do enjoy reading aloud to the family, but sometimes i want to be able to listen, too, and not just be the reader. enter audible. it's been great. i can be with the kids, listen to something i like, and do my handwork. win, win, win.

currently, one group of us is listening to a charmed life, a chrestomanci novel, by diana wynn jones. this is a great fantasy novel for all ages that i've read a few times and have now introduced to the kids. the reader's britsh accent is ever so much better than mine, which makes the listening that much more fun. friday evening the three youngest girls and i listened to most of the book instead of watching movies like we normally would on a friday. they can move their bodies around and do whatever quiet thing they want while we listen. and i can, too.

another group of us is listening to the girl who drank the moon, a new find by kelly barnhill. this is another wonderful read/listen that i can't recommend highly enough. the writing is almost like poetry and i love the message of the story. a beautiful story beautifully told. on saturday night we found ourselves wanting to do some listening together with the addition of dad to the company, so i got some more time to bind.


normally, i try to do handwork as a secondary activity while i'm involved in something else with the family. but today after church i had only about a foot left of this quilt and everyone else was busy elsewhere. so i enjoyed some quiet stitching time, just feeling the rhythm and pull of needle and thread, soaking up the afternoon light, and sitting with my own post-church thoughts.

a friend and i were joking yesterday about how our great-grandmothers tisked and looked askance at sewing on sunday. we'd both been scolded, "when i was a girl. i was told any stitches i made on sunday had to be removed with my teeth on monday." we figured that sewing was a chore and necessary work in their day - work that was to be rested from on the sabbath. with all due respect to previous generations, to us a little handwork while enjoying conversation with family is not chore work, and perfectly acceptable on a sunday.


putting the final stitches in a quilt i've worked on over a long period of time, 2.5 years in this case, is always a bit surreal. to be actually done is rather astonishing. quilts really do get done a stitch at a time. if you just keep putting those stitches in when you can, even if it takes months and months, with gaps between sessions, eventually you have a completed quilt.


and here we are.

the final stitch.

Wednesday, April 5, 2017

wip wednesday 8.13


i miss freshly pieced's wip wednesday link party. don't you?

there's nowhere to link up, but i'm going to post a wip wednesday report for nostalgia's sake today.

the top photo is my "piecing wip pile." but it's actually more like a pile of things that are too big to put away in my sewing room and need to be spread out on the piano parlour floor.


  • on bottom is "guys and dolls" stella grande quilt. fully pieced and basted (yay), needs quilting
  • off to the upper right are my giant swoon pieces - definitely still in the piecing stage
  • on top is the latest stella grande version, "citrus and sky," which currently has me stumped. i'm not loving the blue background. this quilt is lacking a certain dynamic interplay of value and color the previous ones had. it's going to stay put while i do some other piecing instead.


and this is the "binding wip pile." can you believe i have four quilts in this pile? some kind of record for me, this is. especially since one quilt was completed over the weekend and removed from the pile!

  • the top quilt, "star of the circus" only had about a foot of binding left for completion
  • penny patch 2.0 has a binding roll that needs sewing on (teal strip fabric up top)
  • "love all around" quilt needs it's binding cut
  • "dorothy's girls," my indian summer quilt, has binding cut, but not pieced (that ocher strip on top)
of course there is cutting waiting all over the place. 
so many projects niggling away at my brain right now. 
so little time. 
always.

Wednesday, March 8, 2017

building a c


 quite often when i'm in the middle of a project, i'll take photos of the process as i go, with the intention of making a blog post out of it at some point. and sometimes, much later, i find those photos when i'm looking for something else. such was the case with these photos of when i decided to make letters to spell my son's name for his blue and orange wonky quilt using the letter patterns in denyse schmidt's "proverbial quilt."

the letters could either be patchwork pieced or paper pieced. i chose to trace the pattern and patchwork it together. you can watch my letter "c" quickly come together.


there are 4 pieces to letter "c." i cut apart the paper pattern, then selected a fabric scrap for each component. when i cut the fabric, i added in a 1/4" seam allowance on all sides by pinning the paper the the fabric and using a ruler to gauge 1/4" outside the pattern piece. all the letters in this patter have all straight lines to each piece, so this is quite easy to do.


next i sewed  pieces 2 and 3, the top and bottom segments of the "c," to the center background piece 1. once pressed, there was only one more bit.


piece 4, the long left side of "c" was last to go on.


setting the seam.


then pressing open.


and there you have a letter "c."

this process was very quick and quite enjoyable! i do plan on doing an entire quilt of a favorite quote someday.


next time, i'll just need to make sure i can see the pins so i don't accidentally sew one into the letter.

this quilt is now in the binding phase, by the way. it should be a finish quite shortly!

Wednesday, March 1, 2017

why i blog

A post shared by @hydeeannsews on

i've been thinking about the different forms of social media i use to share my quilting and to connect with the international quilting community. i use two: blogging (here, of course) and instagram (find me at @hydeeannsews).

i was completely loathe to add instagram to the mix. blogging was enough for me to keep up with, and i enjoyed the depth of blogging - mine and others' as well. once upon a time i was a facebook user, but found it so completely overwhelming and such a black hole that i just stopped visiting after a while. blogging was good enough for me. i couldn't fathom the people who used all the media outlets. where did they find the time? (i do recognize a professional promoting their work and business has different needs than a hobbyist seeking connection only.)


but then one of my bestest and dearest quilting buddies made the transition to instagram, and i either had to join in to keep touch with her or let go. i wasn't going to participate, just observe. of course i got sucked in! (liz of shush, i'm quilting is now @lizfromshush, in case you miss her like i did.)

here's my list of what isntagram has going for it:


  • instagram is so instant. that's the whole point. i can share and get feedback right away. 
  • feedback - people will often "double tap" (like) a post, even if they don't comment. i see less and less commenting on blogs everywhere these days. i may have over 600 views on a blog post and only a comment or two, which doesn't tell me what people are thinking at all. while the like-to-follower ratio on instagram is also low, its different. and when i have a question, people do comment. right away.
  • quick sampling - it's a fast little soundbite of what everyone's up to (even though i'm pretty wordy there, too). my timeline has lots of small bits from so many people, easily scrolled through all at once. it's sort of like speed reading blogs.
  • connection on multiple levels and search-ability - those hashtags make searching and connecting so easy! hashtags are like instant link parties. and it's super easy to discover new people or ideas by chasing hashtags or other features that make suggestions.
  • parties - the swaps and giveaways and destashes, etc, that go on at instagram are numerous and pretty fun. there are sew-along times when everyone is chiming in during the appointed time, which is a lot like being with people while you sew, but without the complete distraction of talking constantly. there are generous volunteer swappings and iso (in search of) opportunities, too.
  • communication compatibility - there aren't any "no reply bloggers" on instagram. i can communicate with those who comment to me and i don't have any issues on the other end, either. 
  • convenience - it's on my phone, which means it's available to me anywhere, anytime. i don't have to sit down to the computer and type away.


so, yeah, i really like instagram!


i was never a regular blogger. i'm a busy mom who's only a hobby quilter. like most people who move to a new platform, i found my participation here dwindling even further. so many of my favorite bloggers of old have stopped almost completely. and i think that's sad.

blogging allows for depth.

when i want to include more than just one photo (without overgramming and blowing up everyone's feed), i blog.

when i have a lot to say about a project, or want to think my way through a project, i blog.

when i want to share the steps in a process or do a tutorial, i blog.

that's the difference for me.

so, for now, i'm not going anywhere.
this blog isn't leaving or dying.
it might be more quiet than some times in the past, but it will be here.
all the information will stay here.

and i'll be stopping in when i get the chance.

happy sewing and sharing wherever you are, friends!

Wednesday, February 22, 2017

binding the little ones close

 i'm currently binding "star of the circus" whenever i get the chance: soccer games, while visiting with friends, or when we're just hanging out as a family. it's nice that it keeps my lap warm while i work since this is the time of year that's desirable.

i like to have some photos snapped of me working on the quilt because i'm foolish enough to think future generations who own this quilt might actually like a picture of grandma working on the little piece of her they've inherited. i would certainly like to see any heirloom i have when it was in the works, in the hands of the maker. so i grab a child and ask them to take some pictures.

 naturally, i prefer that this happen when i feel photo-presentable, which is usually on a sunday afternoon after church. a few weeks ago all of this was happening when i got an interested photobomber. first, she asked if she could sit next to me in the photos, wanting what she always wants: attention and the world to revolve around her 5 yr old self. she's a cute enough prop that i said ok.

 then she asked if she could help me sew! one of the reasons i enjoy handwork is the methodical, meditative, slow-paced aspect of it. i can either concentrate on a conversation in the room, or have one in my head. either way, it's always slow work. but adding a 5 yr old into the mix makes it even slower.

i admit i was reluctant to let her into my personal stitching space at first. but we worked it out very nicely. i place the needle, getting it started. she pulls it through. she did ask to do all the work herself after a minute or two, but i held firm to the arrangement. i do want the binding to be functional and look good, too. (it's the perfect opportunity to introduce her to her own stitching projects, like burlap stitching.)

however, giving her a chance to sew with me has many benefits.

it increases my enjoyment of the project and adds to the emotional value of the quilt. i imagine someday i'll look back and say, "i remember when d5 was so little and we stitched this binding together!" her involvement becomes part of the story of the quilt.

it also creates pleasant memories and associations for her, piques her interest in sewing, and attaches her to the project. when she looks at quilts she's helped me with, she'll be able to think, "i helped mommy make that!" i'm hoping this spurs her to create on her own in the future. of course it's an opportunity to instruct her on sewing skills.


so often, letting the kids "help" me sew is anything but help. it can cause extreme frustration and maybe even some explosions on my part. however, i believe it's an important investment in not only their future as creative people, but an investment in our current relationship, as well.

i already know this quilt is going to take several sit-down episodes to bind. slowing down a bit more to let her sew with me isn't going to delay the process much. since there's no deadline on this quilt, i have the luxury of being able to include her.

and as it turns out, she only stays interested for a short period of time anyway. after a few minutes, she'll bounce off to other things. i'm glad this is a lesson i'm learning right along side those she is gleaning.

it has certainly made both of us happy in this instance.

Friday, February 17, 2017

stella grande quilt series

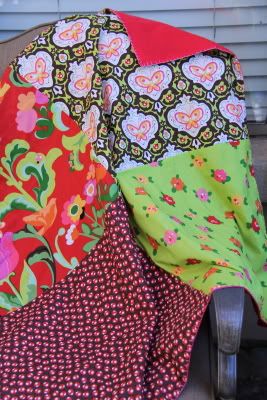
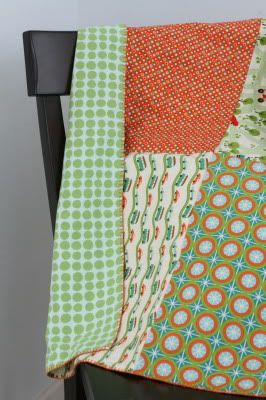
edited to note: i will eventually work up a tutorial for this quilt pattern. for those who have inquired, the large hsts are 12" sq finished, the neutral border is 6" x 12" rectangles with 6" sq corners, and the colored border hsts are 6" sq finished. the quilt measures 60" x 72", a generous lap size.

nearly as soon as i started this over-sized sawtooth star quilt composed of large hsts, i began dreaming of other color combinations and slight border variations that i could do with this basic pattern formula. i got all excited, envisioning a whole series of these giant star quilts. maybe one a month for a whole year!

and then i remembered this is me we're talking about. the world's slowest quilter who has completely sporadic, unpredictable quilting time available to her. the girl who was crazy enough to co-host a gypsy wife quilt along last year, and then had to bow out halfway through due to extenuating family circumstances. granted, we don't have major accidents in our family often, but our life is pretty demanding, nonetheless.

so i decided a commitment to some sort of timeline for a quilt series was out of the question.

but the colors wouldn't get out of my head or leave me alone. they were morphing and multiplying like rabbits in there.

i literally fell asleep dreaming of color combinations. when i woke up in the morning, i went through the limited selection of solids i have on hand and tried to recreate what i'd been dreaming of. this pull came somewhat close, but not really.

i started to get obsessed.

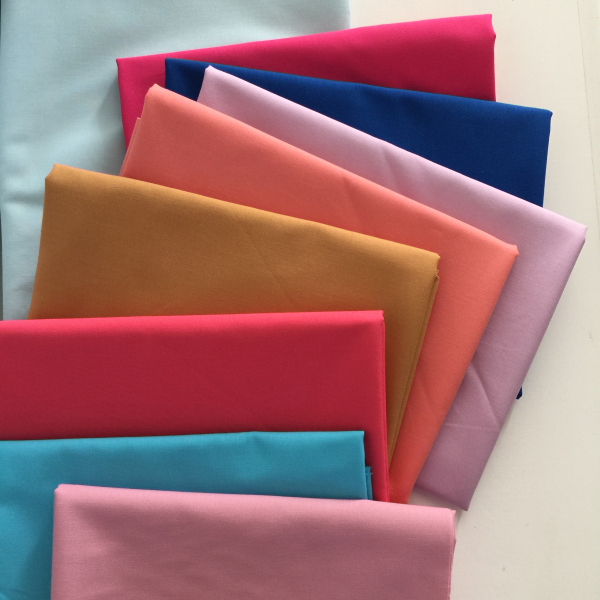
so i packed the littlest one in the car and we went to the local(ish) shop that carries all the kona cotton solid colors, and i started pulling out colors.

i think i brought home about 20 different shades, including several pinks.


so when i got inspired by the love all around block by may chappell, which was made from the same formula as my star center, i was able to pull pinks off the shelf and whip one up in an evening. (realize, when i say things like "churn out" or "whip up," i'm talking about different speeds than the quilters who would have actually completed the entire quilt in the same amount of time. it's a relative term. my "whipping" is always interrupted by one of 8 people who need me to sustain their lives in various ways.)

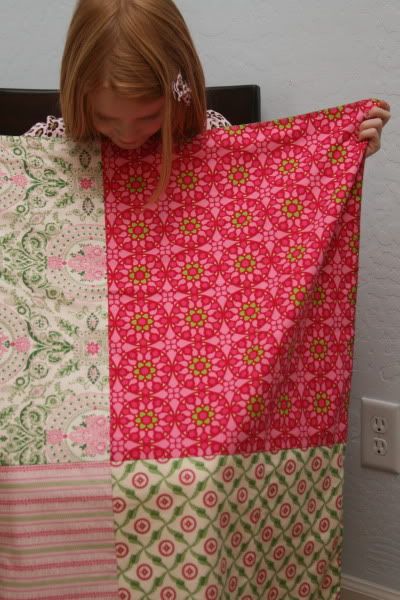
shortly after making that giant block (with the intention of adding the borders like the first quilt), i decided my idea of a quilt series wasn't so crazy after all. i made the backing, basted, and quilted the first quilt (henceforth known as star of the circus) in one weekend. i did. me. i did this! it was so completely doable!

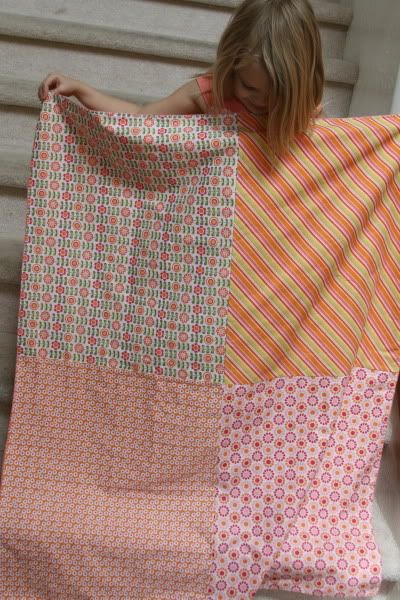
i jotted down several other ideas i had for color combinations, mostly based around some theme or color story i was interested in exploring.

eventually, i went back to the store for more color.

all kinds of greens, especially vibrant tones that echo "greenery", pantone's color of the year, and those with a yellow/puke-y edge to them.

then there was an assortment of other colors i had in mind, too.

this is going to be a winter story of ice and snow and evergreen trees.

although i did have a green and pink floral story in mind, when i was shifting piles of fabric around, i serendipitously created this beautiful combo that i'm dying to play with, too. i'll be doing both the original and this one.

there's also this pile that was inspired by quilter jenna valoe's color palette. i'll admit when i looking at the photos from instagram and pulled these colors, i was a bit dismayed at first. individually, they weren't colors i would usually use. but put all together by jenna, i did like them. so i went ahead and got them. they are totally growing on me as a collection now.

and thus a series of quilts is born.

i'm not committing to timelines or a number. i'm going to play and see where it takes me.

but i did come up with a name for this configuration i'll be working with:

stella grande

large star.

stay tuned to see how many stars get added to my constellation.