Showing posts with label liberty. Show all posts

Monday, February 23, 2026

cute betsy hearts resized


after posting about christmas trees in the month of valentine's hearts, i thought, "maybe i should get out my cute betsy hearts and play a little." so i had a little fun making some hearts over the weekend.

i pulled out the project box and was surprised by the number of colorways of betsy i had stashed away. i didn't realize i had maybe 20 in there and not represented on the main liberty shelf. so, that's a good reminder to myself, for one.

the next thing i had to remind myself of was the dimensions for these hearts that i settled on after experimenting a little. when i wrote up the tutorial for these hearts, i was intending to use 2.5" strips. however, i decided i liked a smaller version, but i hadn't written my new formula down anywhere*. i had to measure the pieces in a finished block to get my own cutting dimensions. 

here are the cutting dimensions i've been using for the blocks now:

  • 1 - 2" square of betsy for the heart
  • 1 - 2" x 3.5" rectangle of betsy for the heart
  • 1 - 2" square of background for the heart
  • 2 - 3" squares, cut diagonally, corner-to-corner, of background for outer triangle pieces


 after making one heart in that gorgeous mustard and neon pink colorway (maybe my favorite betsy?), i realized i'm going to need a whole lot of blocks for even a small quilt as these will finish at 4.25" square. even though i have a lot of colorways of betsy, one block per colorway is not going to get me very far at all.

thus, i began making the hearts in sets of four. i'll probably have to circle back and make more of each after i do some maths, but it's a good start. plus, it's easier to make these in sets so i can chain piece them.

that was a fun midday break in the middle of lots of other work going on here. although moving projects toward completion as i have been doing is quite gratifying, i do so enjoy having variety in my making. with so many wips in the works, i can manage doing both right now without starting anything new!

*note: looking over my tutorial post a little more closely, i see that at the end of the instructions not only did i give a formula for figuring out different sized blocks, i also included the cutting dimensions for three other sizes of hearts, including the 2" strip size i'm using here. haha, i need to read my own instructions a little more closely. 

Friday, October 17, 2025

vintage or calm?


my sashing plan for the autumn nine patch has been to use a wheat colored crossweave i have in stash. it looks nice with the blocks, but it also felt a little less cozy to me than jolene's soft, scrappy neutrals sashing in her beatrix potter autumn nine patch from the book. my fabrics are also bolder, more saturated than her choices, so i knew i wasn't going to have the same cozy, vintage look as her quilt. it was mostly the layout idea i was using to guide me.

but then i noticed this beautiful woven fabric i bought to use for a background (possibly for "spinning elizabeths") and it reminded me of the feel in jolene's quilt. so now i'm thinking of using it for the wide sashing in my quilt.

it has a lovely vintage vibe to it, but it's also a tad busy. the quilt would definitely look more cozy and jolene-like, but the blocks will stand out less against the pattern.


this is the wheat crossweave. it's calm, clean, and crisp. the blocks stand out distinctly against this background. it has the right fall vibe to it. but it's less cozy. i wouldn't exactly call it boring, but it does make the quilt overall look a lot simpler.


here's a look at the beatrix potter nine patch from the book. doesn't it look like it's been around forever rather than something newly made? it's quite dreamy.


i like both ideas, but i'm completely indecisive about which to do. i suppose i could just make two quilts? there are very few blocks needed and i have enough fabrics. that seems a little redundant and excessive. better to just make up my mind.

another idea i have is a meet-in-the-middle compromise: place a thin wheat border around each block and use the strip sashing.

decisions, decisions! options can be paralyzing, can't they?


Friday, August 29, 2025

log cabin at the cabin

and just like that, my blogging streak is over. i've not been quilting, either. early mornings have become workout time and all the other things have taken over what's left in the day thereafter. i was spending a whole lot of time with my grandchildren until my daughter up and took them to my cabin several hours away for the whole month of august. how dare she.

but this last weekend we decided to visit our own cabin ourselves and got to see the grandkiddos. i brought along handwork and actually pulled it out a few times. my christmas liberty log cabin was the easiest pick. i'm not as opposed to its christmas colors and cheer now as i was in the spring by the beach. late summer and at the cabin, i can stomach a bit of christmas. besides, if i want to have it a finish for this coming christmas, now would be the time to start.


i'm shadowing the outer edges of each square in the blocks and will add a stich in the middle of each strip as well. it's actually rather hard to see the handquilting on the print fabrics. that's fine. i haven't decide yet if i'll do any stitching in the green sashing areas. i'm could do it either in white or green, so it doesn't have to stand out. undecided. i'll do the blocks first and make that call later. as d3 says, "we'll burn that bridge when we get there."


while i was working on this, d1 was looking at the fabrics in the quilt and asked if there were christmas fabrics in it or not. basically, no - these are not christmas fabrics. there are one or two that are christmas versions of classic tana lawn prints, like the red "wiltshire" print above, and a "betsy" that has stars added to it, but the rest are just red and green prints i put together. add the dark green sashing and the bright red hearth centers to the blocks, and voila - it looks like christmas, which will be here before we know it.

fingers crossed i find more time to stitch on these blocks.

Monday, July 28, 2025

ducks in rows


 just popping in to say i have all the blocks for “groovy liberty” complete, sashing and all. and one to spare. the rows are in pairs. as soon as i join the pairs together i’ll have a top!

Friday, July 25, 2025

lining up


my last bits of liberty arrived, and while nice, were not what i was fully hoping. but i switched out one print for the pink and brown print i wanted to remove; then got on with finishing the blocks and assembling a quilt top.

i added the grungy crossweave as sashing and am happy with the look. i was thinking as i put the short pieces on the sides of blocks for the vertical sashing that it's so nice how sashing makes it so you don't have to worry about seam matching as you do when the blocks join each other directly.

then, as i began joining up rows with the horizontal sashing in between, i thought how cornerstones are a really good idea for getting the sashing to line up. i was thinking this because i wasn't using any and immediately had issues with the vertical pieces matching up across the horizontal pieces even though i pinned right from the start this time. ugh. i thought they were lining up and everything was going well. but when i pulled the first pair off and opened it up, things did not look good. the photo actually looks pretty good, but it got worse from there the further down the line i went.


i was a bit stumped. i thought i was getting them lined up as i pinned them. i was feeling the seams further away from the sashing where the block and sashing joined together, which felt lined up. but they weren't.

i don't think louise (my quilt mother) every taught me how to line up pieces that have sashing in between. and i haven't seen anyone else talk about it, either. so i had to come up with an idea myself.

this time i marked the horizontal sashing piece with where the vertical piece already attached to it was. i made small pencil marks where the seams were at the outer edge of the sashing that would be sewn to the other blocks. i lined the edge of the ruler up with the seam between block and vertical sashing, then marked down the line from it on the horizontal outer edge. it was the right side of the fabric, so i kept it under a 1/4" where it would be included in the seam allowance and not show.

the pencil marks blended in with the crossweave fabric, but i could see them well enough in person.


then i laid the next row on top, right sides together, lined up the vertical sashing ends with the pencil marks, and pinned at each seam. it worked! whew. i was happy to have that figured out. 


backing up a bit - i did a good job laying out all the blocks in a pattern and sticking with it as i sewed them into rows. i've seen other quilters have a system for stacking the blocks and ways to mark them, but that never works for me. the only (nearly) failproof system for me is to take a photo of the blocks in the order i want; then set the photo up in front of me when i'm sewing and consult it constantly as i sew the blocks together. constantly, as in, for each and every seam i'm sewing i check and double check i have the correct blocks going together and turned the correct direction.

and somehow i still manage to turn one or two overall. but its so much better than when i don't do this!

when putting this top together, i laid out the blocks in rows. first i sewed the short, vertical sashing pieces to the blocks, then sewed the blocks with sashing into a row. next, rows were joined into pairs with the long, horizontal piece of sashing between them.

the above photo is the blocks for one row with the short sashing attached, ready to be sewn into a row. i keep them on my lap and consult that photo propped up in front of me constantly. i put the sashing on two blocks in the first row on the wrong side, so had to unpick those, and put one or two other blocks together the wrong way, and had to unpick that. but for me, this was doing really good!


the lining-up of the short sashing across the long pieces between rows was giving me a bit of a headache, so i had to break out the chocolate for a pick-me-up. it reminded me of a small instagram trend a few friends and i had going once apon a time where we used the hashtag #chocolateonquilts. i'm not sure why it was "on quilts" instead of "and quilts," which makes more sense, but i'm not the one who started it. i just remember we would occasionally share a chocolatey treat photographed with a quilt and mark it with that hashtag. in the good old days before ig ruined hashtags.

Monday, July 14, 2025

pinwheels in process


when i nixed my original idea for a black "capel" sashing for "groovy liberty," i needed to come up with an alternative. i dug around in my stash and found this awful grunge (moda cross weave woven) i am using for a different, old stalled project called "emilia's sampler trip," or something. it's from my "instagram-not-blogging" era, so it's probably not even on the blog anywhere. anyways, this grunge fabric is here in my stash because of that project. 

i tried some of the other chambrays i have on hand as a sashing, but didn't like the effect with any of them. my eye fell on this grunge because it's light and neutral. i think it will blend well enough and not call too much attention to itself.


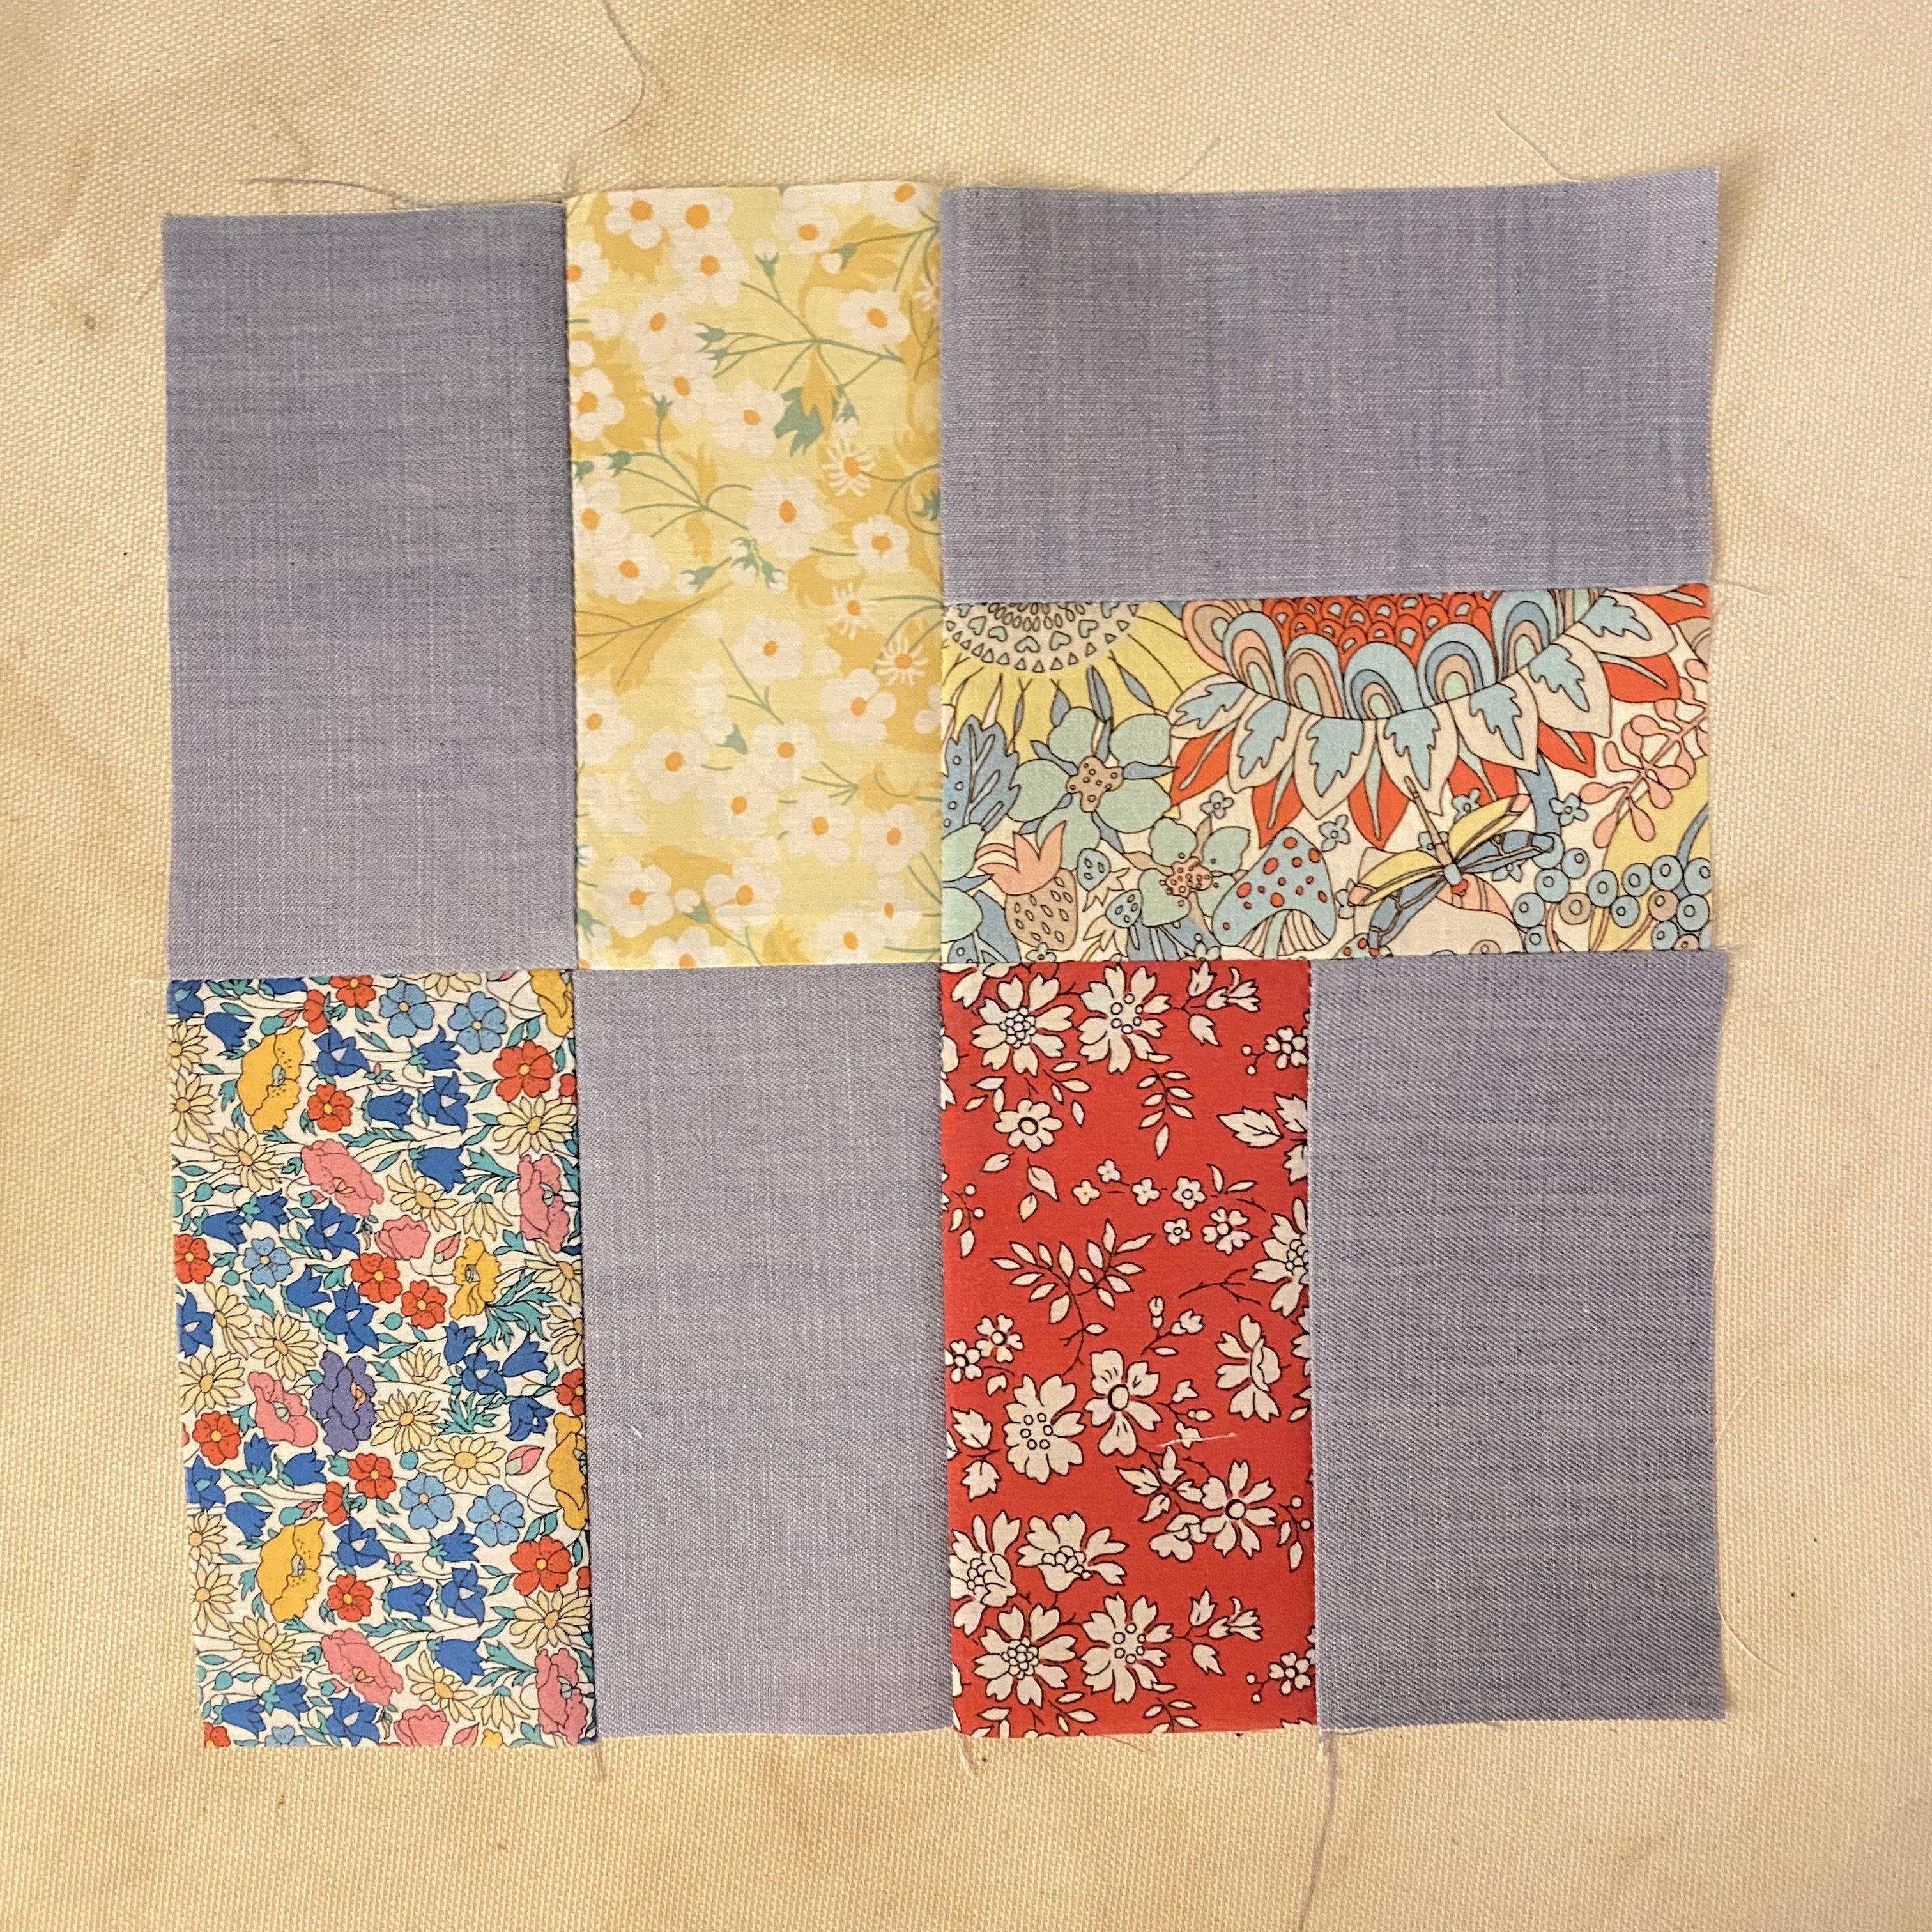
this is a look at the grunge as sashing. i want sashing to slightly enlarge the quilt and to separate the blocks so the pinwheels don't get lost in the secondary pattern when they're laid next to each other.

i really do think this fabric is horrible on its own, but it works for some things. it has a retro vibe to it that i think works nicely with the groovy prints i picked for this quilt. it just goes to show you can dislike a fabric in general but it has its place. some fabrics spark joy all on their own, and some are useful to make others shine.


these are the blocks togther. which is fine, just not what i want. i want to see my pinwheels as pinwheels this time.


something i have completed for this project - the next two sets of blocks. i got all the ones i turned around fixed and then put these next two sets together. i am really happy with both of these. they definitely have the vibe i wanted for my "groovy liberty."

somewhere along the way i realized i had my maths wrong. how many times have i said that recently? this time was extra bad - apparently i can't even do the most basic math anymore. i was making 8 blocks each of the 6 sets. when you need 42 blocks in 6 different sets, that's SEVEN blocks of each type, not 8. maybe i was originally going for 48 blocks before i realized i didn't have enough chambray for that? i don't know. all i do know is it took me way too long to recognize my mistake, resulting in me unpicking one block of each set so i could make my last sets.


here's a look at my selections for this wild and groovy tana lawn (can't remember the name at the moment). it's mostly pastel with red mixed in. i got more than enough pieces i needed from one wof x 2.5" strip i cut from my liberty piece, so i was able to be choosy about which to use. i picked the pieces ith the most red in them, the ones with the large flower pieces in them (on the left). you can see they have a slightly different impact and feel than the more tame pieces to the right. the extras go in the scrap bins for the next project.


this is a crummy studio lighting photo taken in the early morning before the sun came up, but i was having a blissful moment with the yellow "mitsi" pieces and had to snap this. "mitsi" was the first liberty print i warmed up to. (yes, i didn't always like liberty.) the yellow, which i originally used in "beauty for ashes," is unusual for liberty and such a pretty piece. that was my sunshine on this morning before the sunshine came along. 


once i have all the 2-piece units together and know my layout for the pinwheel, i can zip through piecing the blocks pretty quickly. i lay them out on the side of my machine table and put them together in order, chain piecing the whole set.

it's simple - flip the piece on the right over on top of the piece on the left, stitch. do the same for the bottom set of the block.


i clip the pairs apart when they're all done, and i have sets like this. i press the top open tot he right and the bottom set open to the left, which gives me a nesting pair. no need to clip the joining string between them.


somehow i still managed to do this once. oh, boy. i guess i wouldn't be me if i didn't. thank heavens for unpicking (aka: sewing repentance). it can be fixed.


i was really excited to get the last set of (7, not 8) blocks done. all i had left to do before joining the blocks was cut this piece of liberty "over the hills." this is one of those pieces that looked a little different when i came than i was expecting. the scale was a lot larger than i thought, so the pattern doesn't show up much in these 2.5" x 4.5" cut pieces. it 100% has the right look and i can live with the scale.

the problem was the colors (which were as i expected). i decided i could use some pastels even though i really wanted brights. but this piece has brown in it, which i haven't used anywhere else in the quilt. i thought it was okay. i went through the process of cutting and selecting the best pieces.


i liked the pieces with the stripey bits in them the best. but all the brown was a problem.

if you look at my sample pieces in the top photos of all the blocks laid out on the sashing fabric, you're probably thinking, "this looks fine? what are you worried about?" and in the photo (now) it does look pretty alright. but those browns, especially, were catching my eye in a bad way. the print style was right, the colors just weren't. the block in general was just too light and pastel. it needs something to balance the red more.

so i went on yet another internet hunt just once more. this time i went international and found some pieces i like from alice caroline across the pond. when they arrive, i should finally get this one squared away! i actually found more than one print in the right style and colors that looks like it will work. it makes me rethink the very first blocks set i did that has more traditional/less groovy pieces in it. 

but that would be so much more unpicking and i'm not into unnecessary unpicking for the sake of unpicking. that would probably be overboard. we'll make that decision when the fabric arrives and i decide i can't live without one or i can.

Saturday, May 10, 2025

wiltshire rows, a finish


when i was a child growing up on the southwestern outskirts of houston, tx, we would pass cotton fields on the way to church. i loved watching the effect of the rows whizzing by as we passed in the car. later, in high school in the nashville, tn, area, the fields were most often tobacco or corn, but the effect was the same. 

since we've been staying in so cal, we see massive fields of all types whenever we go inland up the coast. witlshire rows, one of the quilts i brought here with me to finish, has always made me think of rows of crops, so i knew i wanted to take some finish photos with it in some of these farm fields. i wanted to use the strawberry fields the most, but those have recently been picked.


as i've passed the various fields on my inland shopping excursions, i looked for some with the correct row orientation for my desired shots. most didn't line up with what i wanted - no one consulted me when planting their fields, haha.

this patch of kale has the santa monica mountains behind it and was an acceptable pick. but d5 didn't want to step very far in, which would have looked better. the plants were up to her knees and she didn't want to wade through too many.


the day we shot the photos was the first sunny day in a week, but it was also windy! i always forget to factor that in. we got a lot of body-hugging or crumpled, whipping quilt shots. she was not in the photo shoot mood yet (i sprung it on her) and we moved on quickly. because we had some errands to run beforei had to drop her off at a church activity.


but as i was driving along the dirt road bordering the highway to get back on, i saw this leafy patch of greens and decided to try once more. i thought maybe the shorter plants would be easier to hold the quilt in and the rows would show up more. and it worked!

we've passed these fields a lot and i could never tell what the crop was. not even my farmboy husband recognized it from the road. but as soon as we got out of the car, the intense scent told us exactly what it was - celery!

this is more the type of shot i had been imaging with the rows showing up around the quilt. the mountains in the background are more distant/less visible, but it's pretty good.


there's my little quilt holder.
this field was muddy-ish between the rows and she was not happy with me about this spot at all. thanks, baby! you did a great job and your shoes are fine. promise.


i took a turn holding the quilt at the edge of the celery with the mountains in the background, but the wind was too whippy at this point. i like this detail crop where you can see the backside of the quilt at the corner.

whiltshire rows is not my favorite liberty + chambray quilt make. the colorways for this one didn't blend as well as my other quilts from the series. there is one print in particular that i really don't like at all with the rest of them and wish i hadn't put it in. oh, well. i'm actually quite pleased with how nice it looks here in the fields, among the rows. it's making me feel better about the finished product.

d3 likes it and is so happy to know it's hers, that she doesn't have to steal it from me now. i put it in her easter basket to gift it to her. we were making-do with beach buckets and bags and things since i didn't bring the easter baskets from home with me. when she found the quilt at the bottom of her "basket" bag, she asked if it was just for filling or if i was giving it to her, haha. yes, babe, it's yours.

details

fabrics: liberty "wiltshire" in various colorways and moda crossweave in "chambray"
backing: liberty "wiltshire" in (d), single piece in navy and pink colorway
pattern: own design, 2.5" strips and squares in alternating row configuration
binding: blue herringbone flannel
quilting: handquilted echo quilting in chambray pieces with auriful 12wt in 2021

*i didn't take any more detail shots to add to this post. if you're interested in seeing the various details, click on the links above for close-ups of the different parts.

Monday, April 7, 2025

pinning is winning


these log cabin strips were looking very pretty in my sewing room where i had them hanging on blanket hangers, but i had a little more time to finish things and this was the fastest finish in the room. so i took them down, finished unpicking the misaligned strips, and got a flimsy put together.

remember how i always turn log cabin blocks the wrong way and mess them up but figured out how to work around that? well, these are all perfect and in sync. except one. just one. but that's real progress for me! i'll take it.


i didn't pin my strips the first time around, which did not work at all. the horizontal sashings didn't match up. not even close. so i decided to get my pins out and do it the longer, more tedious was. which was the correct choice.


my sashings now match across the vertical bars. yay! i was thinking as i slogged through all of this that the case for cornerstone pieces is strong. not only are the a nice design feature, they must make aligning sashings a lot more simple. but i like the look of no cornerstones on this quilt, so pinning was the right answer.


next up was the backing. i had two large pieces of wiltshire in red and strawberry thief in a deep green. i didn't use the strawberry thief on the front because it would have blended in with the dark green sashing. i have a lighter green version on the front. i think the dark looks good on the back. i included what was left of a maroon betsy and the christmas-y adelajda prints. i'm not likely to use them elsewhere and i wanted to keep some of the other two prints, so this gives me the wiggle room to have leftovers from them instead.

i had to look high and low for the strawberry thief, including going through every box in the liberty shelf that i just organized. i was certain i had a large piece in the dark green, but it was hiding. finally i remembered i started a project box for the liberty christmas quilt and found it in there. whew! that was a project. maybe i'm a tad too organized these days? or just need to adjust to being organized a little more.


pining part two - the quilt samich is put together and this is going in the handwork box for my trip.

confession - i'm not loving working with christmas colors in march. it feels wrong. we're far enough past christmas that it feels very outdated and too far away from next christmas to be exciting. what will feel good is having it done by christmas, so i'm going to take it with me anyway.

Saturday, March 22, 2025

wilthshire-ing along

yesterday i got to be a quilter again for a day.

there's so much going on in our family life at the moment, some big developments and changes included. next week the mr and i were heading out of the country to iceland and amsterdam to celebrate our 30th wedding anniversary. instead, we are now heading to california for at least a month with our youngest daughter while our older son has medical treatments there. we're uprooting and relocating temporarily while we try to get him fixed up after four long years of increasingly problematic gastro-intestinal issues. as difficult as it's all been and as crazy as relocation will be, we are so grateful to finally have him on an upward path rather than wasting away while his system shuts down, which is where we've been for the last year. there is still no absolute solution, but we have support and help, and a direction to move in for the first time since this began. it's a good thing.

so i've been busy with the multiple home renos we're working on for our family, with a spring break trip for the kids with their cousins while my husband was with our son, with getting ready to move for a while. it's a lot.

for the day i took a break and was a quilter.

this morning i cleaned up my liberty fabric shelf, bringing more order to my sewing room, and worked on projects to take with me on our stay in california. i made and put on the binding of "wiltshire rows" by machine. i started gathering a tin of sewing supplies for the other projects i'm going to take. and i caught up on blogging, including a couple of retro-published posts for the last few weeks because i like to keep things in place and in order.

while we're gone, i've decided to handquilt "improv in an afternoon" if it turns out i have time there. i might be able to trim "fall paint" and prep it's binding, too. i have a few more days. it would be so nice if i could get my liberty courthouse steps quilts sandwiched so i could handquilt those, too, or my liberty christmas log cabin quilt. but that seems a bit much to hope for the time i have left and the list of other things to do.


while i was putting this binding on today, i happened apon a very useful tip to tuck away for future use. most of the time, i can make and put on a binding without looking at a graphic or tutorial anymore. the very last part where you join the two ends is always the trickiest bit. i'm still a little hit and miss on that one. but today i was using a piece that was leftover from a previous liberty + chambray quilt binding, so the end of the strip was already cut on the diagonal. this helped me know exactly how to put it on the other end piece because i already know right sides go together and which direction the diagonal should run. 

it worked like a charm! i think i'll always diagonally cut the one end piece before i put it on the quilt from now on.


doing the machine attachment of the binding is always so dull and tedious. i have to sew on the turtle speed because i'm using the walking foot. the corners are troublesome. mine have been a little wonky lately and i don't know why (too much fabric? not enough? something else?) so i tried to be extra careful with them. finally it was all done and now it's ready for the part i really like - the handbinding.

d3 (away at college) and i were texting back and forth the whole time because i sent her teaser photos. wiltshire is her favorite liberty print and this quilt is for her, which she still hasn't guessed. she keeps threatening to steal it.


 i showed her the stack of wiltshire i still have left and assured her there's plenty for a few more quilts. really, i'm not sure what i'm going to do with all this! 

i also need to figure out where to put it as i neglected to make room for it on the liberty shelf when i was arranging it this morning.

i'm sure it will all work out somehow, just like the rest of what we're working through, too.

Friday, March 21, 2025

a liberty sweep


this could have been a post with lots of pretty fabric pictures if the light in my sewing room was nice. but it's not. so these aren't very pretty even tough the fabrics are. sigh. someday! someday when i have my new house built and a sewing room with glorious natural light everything will photograph much more prettily. until then, on with the discussion.

i've been organizing and cleaning in my sewing room (which i'm so grateful for regardless of the current light quality). most recently i tackled my shelf of liberty of london tana lawns (top shelf in photo above). i have lots and lots of liberty bits which needed some more stringent order than existed. folding was sloppy and the quasi system i had in place wasn't functioning.

so i pulled everything off and began sorting by print. one of liberty's nicest qualities is that their classic collection prints are continuously reprinted in new colorways. i love this approach to fabric production

poppy and daisy print variations and the mini version

i ordered several small plastic boxes that i had previously used in my kitchen pantry to use for fabric organization, sized 3 x 6 x 10. i wanted to use them for all my fabrics, but they turned out too small for fat quarters or folding for file storage, so i decided to see how they did for the liberty pieces.

i generally buy liberty prints in fat quarter/quarter yard sizes or smaller. the way i've been using liberty, i don't need a lot of any one print. if i really like a print and think i'll use it more than that, i get more based on how much i like it. i also have several one yard cuts of prints i really love for use in backings. mostly i buy the same dozen or so prints that i really, really like. or so i thought! today i found i have a whole slew of one-off prints, far more than expected. but i do have plenty different versions of my favorite prints, too.

all boxed in for storage

once i had everything either in a pile with it's mates or in the one-off pile (except for a few color palette bundles), i began sorting the prints into boxes. some i had enough of the one print to make use of a whole box and others i grouped in a box with very similar prints. 

poppy and daisy got it's own box along with the mini version of the print, as seen in the photos above. so when you see the stack of boxes on my shelf, that's what's in them.


i did keep three color categories together regardless of print because i have plans to make quilts from these. they are: fall colors, pastel w/ neons, and red, white, and blue prints.

the fall bundle is sitting atop my pile of one-off prints that's nestled in between the boxes (for some structure). the one-offs were too big for a box of their own, but they're doing fine here between the boxes. the clear boxes make seeing which print family is inside easy. 


some of the other print collections were also too big for a box, like betsy (and betsy ann, the mini version). i have more betsy than any other print. it sits to the far right side of the shelf atop some cuts of chambray that will be used with the liberty for future liberty + chambray quilts.


moving left from the betsy pile past the boxes we come to the milk crate basket that used to hold all my liberty pieces in one place. it now holds my liberty quilting cottons and the other two color palette bundles for my future quilts. the neon pastels actually came together from, i believe, the alice caroline shop. nope, just looked and it's from duckadilly. both are great liberty sources. 


far left is a pile of my favorite prints also too big for a box but not as big as the betsy stack: june's meadow, capel, mitsi, katie & millie, flower tops. i try to keep each print in rainbow order to make locating one easier. it mostly works.


 aside from everything on the shelf, i moved all the scraps from my liberty + chambray quilts into a drawer in my new scrap tower. there are all the chambray 2.5" strip pieces, the flannel binding i've used on all the quilts, some random joined pieces scraps, and 2.5" strips from previous projects. this will come in super handy when i make more quilts in future. working with liberty in all the same size each time (well, two sizes, actually) really helps me make use of the scraps. it makes cutting a lot easier, too. i just cut 2.5" or 3.5" strips every time and i know they will always get used. 


i have also put all the pieces for my liberty christmas quilts in this basket.

that's my liberty swept up and sorted!

i think i accidentally put away the pile of prints i was using for my liberty courthouse steps quilts, which is a shame. i only have two more rounds to go on those and now i'll have to make new selections all over again. might not be too bad, but it was already done and i undid it. cleaning up does have it's consequences and casualties sometimes. if i'd put them together in a box or basket rather than just a pile before, this wouldn't have been an issue. but here we are. doing my best and moving on!