Showing posts with label gypsy wife. Show all posts

Wednesday, January 30, 2019

don't scrap it yet - border it

***this is a post i made during the gypsy wife 2016 quilt along that never got finished or published. as there is a new 2019 qal going on, and i have had visitors checking in on my gypsy wife posts, i am adding it in to help the new gypsy ladies.

 gypsy wife has produced it's fair share of blocks that went wrong or pieces that are extra.

for example, there were extra triangles that resulted from fussy cutting a goat from a fabric scrap for the center of a bordered sq-in-sq block. i was able to use these red floral triangles for another smaller sq-in-sq block, even though they weren't exactly the right size. all i had left from the fabric scrap were 4 oddly sized triangles. one of the triangles even had a nipped corner. but i checked my required measurements for a 4.5" sq-in-sq block and found they were big enough, or even bigger than needed, so i was able to incorporate them into a block. the triangle that had a nipped corner was usuable because i placed that triangle so the nipped corner would be behind another fabric and wouldn't show at all.

also, i found a square of that green and navy AMH fabric i had fussy cut slightly off, which was also slightly too large for the center sq of my sq-in-sq block. by carefully cutting down a bit to the right size i needed, i was able to correct the fussy cut at a smaller size and use this piece, too. once i assembled all the odd pieces, i was able to trim it down to a perfectly sized block. i love my little make-do sq-in-sq block.


some of the extra hsts that have been made during the production of various other blocks, i simply used in the large hst blocks called for in the pattern.

and then there were the blocks that just got made wrong and were altogether incorrectly sized, like some sq-in-sq blocks i made in the very beginning. i simply read the directions wrong and got some blocks that were off in measurements.

i goofed this one twice! but i didn't like that border anyway, so it worked out


 this little center block here is one of them. i decided i could still use it by trimming the excess blue outer square away and adding another border. originally, the outer square was just too big at more than 1/2" away from the points of the inner square. so i trimmed it down to 1/4" from the inner square, which will give me points right up against the next piece. any time you have a block that is too small, use this formula:

((required block size - actual block size) divided by 2) + 1/2" = width of border strip needed

that looks complicated, but really isn't.

for example, i have a 3" block but i need a 4" block. (all measurements cut/unfinished)

((4"-3") divided by 2) + 1/2" =
(1" divided by 2) + 1/2"=
(1/2") + 1/2" = 1" wide border strip

in the above photo, i only added 1/4" for the seam allowance, when i needed 1/2" because i forgot both fabrics would be loosing 1/4", not just the border. you can see my block is still too small!

 when it came to this block, which was slightly too small (again, used wrong measurements), i just put it up against a ruler of the correct size. you can see i'm 3/8" shy overall.

divide that in half, and you have 3/16". that was a bit fussy for me, so i rounded up to 4/16", which is 1/4". so my border strips were 1/4" + 1/2" wide, which = 3/4" wide.


that gave me a block slightly too big. using my ruler, i just lined up the points of the inner square so that there was an even amount of fabric on each side of the points and trimmed.


and there you have it - three nice blocks i would not have been able to use that i made usable. the bordered blocks will be slightly different than the pattern called for, but in this busy quilt, who will notice?

Monday, February 1, 2016

gypsy wife quilt - nicole calver's handquilted AMH version

i've got one more gypsy wife veteran who's sharing her completed quilt and thoughts with us today. Two things stand out to me about nicole calver's version of the gypsy wife: her brilliant use of all AMH (anna maria horner) fabrics, and her intricate handquilting. nicole's version is so brilliantly executed, it won her a spot in the sewvivor 2014 competition, season 3; which she just happened to win! amidst the crazy of sick kids, meg birthday party prep, and winter storms, nicole managed to take some new snowy photos of her quilt to share with us, and spent some time giving us some thoughtful answers to my questions about her gypsy experience.


what attracted you to the gypsy wife quilt or why did you make one?

The chaos. I love that it has a feeling of chaos, but an organized chaos if that makes sense!
I've never been a fan of samplers, but the combination of the repeating filler blocks and the stripes to tie everything together really made me rethink sampler quilts :)


how long did it take you to complete?

Hahaha! Complete!! I'm still not finished!
Instagram says that I started about 105 weeks ago and finished almost 8 weeks later so almost two months from start to finished quilt top.


The decision to hand quilt the whole thing has added quite a bit more time onto my finish date ;)


how did you go about making fabric selections?

Since this was going to be a quilt for me to keep, of course I went with Anna Maria Horner for the bulk of my fabrics. 


Mostly Field Study and Dowry, with a bit of Hand Drawn Garden mixed in as well. I also went with Carolyn Friedlander for most of the low vol prints.
I would start by choosing one key piece of fabric for the block I was working on and let the colours in that piece decide what other fabrics were going to make the cut. Pulling fabrics for a project has always been my favourite part of the process, so being able to make mini stacks for each individual block was so much fun for me! 


what was your favorite block to make or favorite part of the project?

I don't think I could ever pick just one favourite block, but Crazy Anne is high on the list! I love that block! 
As for my favourite part of the project, definitely choosing the fabrics for each block! Though I didn't think I would enjoy the hand quilting as much as I have!


please explain your quilting choices:

Before my Gypsy Wife I had never hand quilted before but had always wanted to. So with this quilt staying with me I thought it was the perfect chance for me to try my hand at it and not need to worry about how badly it turned out! And much to my surprise I wasn't nearly as bad at it as I thought Ii was going to be, haha! 


My stitches aren't remotely even and I still have a lot to learn, but I think all the mistakes and oddities are what helps add to the charm of a handmade item. (or at least that's what I'm telling myself!)


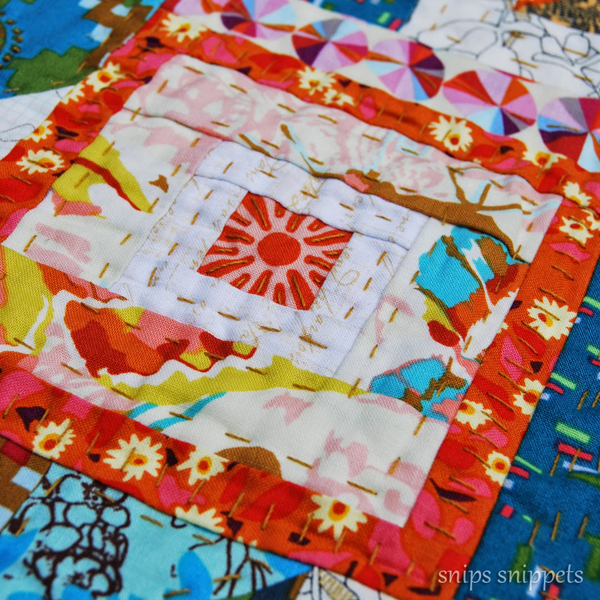
I love the look of chunkier thread and big stitches but also wanted to use my signature Brass Aurifil so I went with a 12wt and I've loved quilting with it! 


I'd say I'm about 65 -75% finished the hand quilting and hope to be done before this time next year, but I make no promises! And in my defense, I'm not so much hand quilting as I am embroidering. Some of those AMH prints were just begging for a fancier stitch ;)


what would you change or do differently if you could?

I don't think there's anything I would change. While making it I questioned some of my blocks and ended up remaking two of them, but overall, now that they're all together, they work. And the little things that bothered me with the blocks alone are no longer visible to me.
As for doing things differently, now that I have EQ7 there's a few blocks that I think I would have rather paper pieced, haha!


what advice or tips would you offer for others making this quilt?

Spend the time now, before starting, to make notes in your pattern book. Number your strips, It will help so much later! Use the resources that others have made available for this pattern. My copy came with quite a few mistakes so I made sure to correct those all before starting. 

When I started my Gypsy someone out there had a spreadsheet for all the blocks that I found super helpful. (clumsy kristel at the blog, work-in-progress girl.) I can't think of who it was but the printout was basically a list of all the blocks, where they end up in the quilt, sizes, etc... It was nice to be able to refer back to it when I needed as well as being a checklist of sorts for the blocks I had finished and still needed to finish. 

Most of all, don't stress over it. Seriously. 
There's so much going on in this quilt that no one will notice those two points that didn't line up, or the two fabrics that ended up side by side (i'm guilty of this and when I first realized that the two prints were going to be beside each other I wanted to remake one of the blocks. I didn't, and now I don't even remember where the two of them are!) Just have fun!
:) Nicole


wow, nicole! i am still so impressed with this version of the gyspy wife quilt. it's just simply beautiful. a few other ladies out there have also been working on AMH gypsies. the two ladies just seem to go together. still, there's enough AMH fabric out there to choose from, so yours need not look like another's. (see ashley's at wasn't quilt in a day.)

and i'm so blown away by nicole's handquilting/embroidery. if i remember correctly, she first did some stitch-in-the-ditch to keep everything basted in place, which has allowed her to take her time with the handquilting and still use the quilt. i like that idea very much. in fact, that's my plan for my own quilt.

you can check out nicole's numerous tutorials and published projects on her blog, snip's snippets, on instagram @snippets101, and even on the cover and inside of several issues of love patchwork and quilting magazine.

Friday, January 29, 2016

gypsy wife quilt - elisabeth woo's value study version

here's another unique look at the gypsy wife pattern. elisabeth woo, of robert kauffman fabrics, has created an energetic and fun take on the gypsy wife by playing down the strips in low-volumes and highlighting the blocks in a bright and bold color palette, with some really cute fussy cutting, to boot.


what attracted you to the gypsy wife quilt or why did you make one?
When I saw Catherine Mosely’s (@cathmosely) version of the quilt hanging at QuiltCon in 2015 with black and white strips and super saturated colors it was the first time I could visualize the quilt in my head! I fell in love with the idea of a background that would fade and leave the focus on all the blocks!


how long did it take you to complete?
I like to work on several projects at the same time, so I move a little slower. It took me 18 weeks of on/off focus from when I pieced the first block to when I finished the top.


how did you go about making fabric selections?
I selected my limited color palette (I like blue and oranges together), then just stuck to it and started sewing.

Crazy Ann block, lower left, and some others
what was your favorite block to make or favorite part of the project?
I think Crazy Anne was my favorite block, but I also really enjoyed making all the filler blocks. J


please explain your quilting choices
I was really stumped with what to do with this quilt once it was finished. I loved all the pieces but was having a hard time feeling connected to it, so I asked one of my good friends, Valori Wells (@valoriwells) if she would quilt it for me. I love her artistic quilting style and I feel like I’m looking at a page in her sketchbook. Seeing her doodles on it really made me love it.

puss in the corner block - with pugs!


what would you change or do differently if you could?
It was really challenging piecing stripes in the background (using Kona Snow + Kona White), but they end up looking very similar and you can hardly see the subtle stripe. I think next time I would try using two colors with a bit more difference so you can see the background striping a little easier (like Kona White and Oyster).


what advice or tips would you offer for others making this quilt?

Keep track of all those filler blocks!! J I actually accidentally made more than I needed to because I wasn’t counting that carefully. 


 thank you, elisabeth, for sharing your photos and ideas with us! to see more of elisabeth's work (like her killer farmer's wife sampler quilt) and a bit about life around robert kauffman fabrics, visit elisabeth on instagram @elisabew.

i have one or two more examples of the gypsy wife quilt that might still make a showing. in the meantime, look for the big kick off post for our gypsy wife quilt along coming on saturday, january 30th, and the first post about section one on monday, february 1st.

who's ready to get gypsy-ing?!

 as soon as my sewing room is finished, i'm in.
hurry up, construction fellas!

Wednesday, January 28, 2015

gypsying along, learning as i go

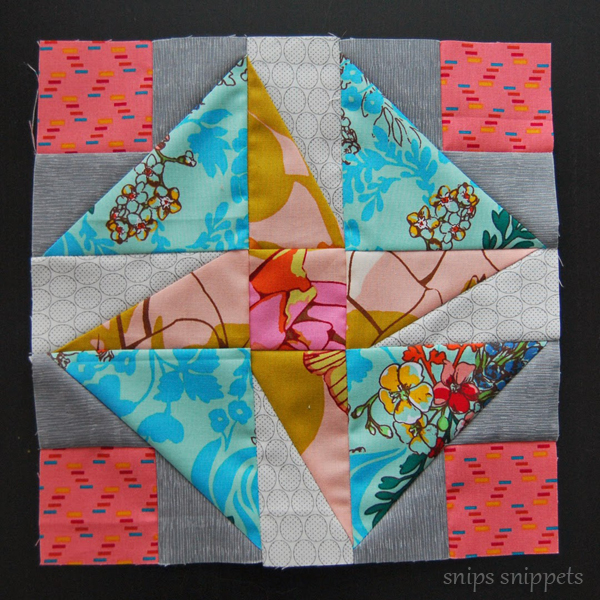
bordered dbl sq-in-a-sq (economy) block and kitty in the corner, block 1
i've been inspired to pull out the old gypsy wife lately. maybe it's because liz (mostly)finished her top (but decided to add a border to fit her bed), sarah's blocks are killing me on instagram (@sarahscraw), and megan is working on hers again. maybe it's because i really just like it and i'm mad at my other wips at the moment.

i've given up on the quilt along schedule. partly because it's over and partly because i like the idea of going at it section by section better. i was beginning to worry my colors wouldn't be spread out evenly enough over the quilt if i didn't see what went next to what. besides, getting one little section sewn would look like an actual quilt as opposed to the piles of blocks i've got.

however, although i completed all the blocks for section 1, i don't have all the strips ready for it! so i've hit another temporary snag and just kept making whatever blocks i liked for the next two sections. i do have lots of strips cut, but i've been cutting from the fabrics i'm using as i go. consequently, all the strips i have cut are the same fabrics in the blocks i was hoping to sew together. i need to cut other strips so i don't have identical fabrics in the blocks and strips for each section.

the bird block on the left is a bit of an improvisation on my part. first of all, i wanted to use that bird in a specific location in the quilt, so i had to switch two blocks around. i have two other animal blocks, the elephant and the goat. i wanted the animals spread out over the quilt but the bird was going to be next to the elephant, so i had to find a different block of a similar size so i could switch them. i found a bordered sq in a sq/econ block in a different section that i could trade, but the center was the wrong size for the bird so i just made up my own block altogether. maybe this block has been made before or maybe i invented a new one. i shall name it "bird in a cage" and leave future generations to guess at what it has to do with a bird like i wonder over "kitty in a corner", which doesn't even seem to have a corner for the kitty to be in.

so i made up my own block to feature the heather bailey bird from her up parasol collection. it was just going to be a multi bordered sq in a sq/econ block, but then, i used some scraps for the red-and-aqua eiffel tower second square border. i had just fussy cut an eiffel tower and had four hsts on hand, which i liked with the bird, so i used them.

unfortunately, they weren't all quite big enough. i did a stitch-and-flip to add some red triangles to the tips to ensure at least the corners were right.  the sides i could make up for in the seam allowance.

in the spots where the seam allowance was really lacking i simply sewed right next to the seam three or four times to strengthen the area. i'm fairly certain this will work. even though it's under 3/8" i don't see it unravelling with all that stitching over it.

then i had outer boarder troubles. originally, i used the icy blue boarder you see on the butterfly block (on instagram for anyone interested), but it seemed to make the block sort of fade out when i wanted it to have a really strong outer edge against the surrounding strips. also, the red corners looked weird and totally out of place. i took it off and put the red on instead. i like it much better now. my bird is well contained.

old maid's puzzle and perishing blocks
each of these blocks has a been a mini exercise in technique and fabric placement as i deal with bare-bones instructions in the pattern and think about each little piece and layer of the block, how it plays against or interacts with it's neighbors. it's like a lot of individual projects that will add up to one eventually.

i've been going a bit crazy with the lack of directions in the pattern but it's also forcing me to figure a lot of it out on my own, which makes for more memorable learning. thank goodness for rachel's angled class so i have some clues about triangles and how they interact! this was incredibly helpful when it came to the old maid's puzzle and the perishing block.

i'd been hung up by the perishing block for months. it was the next big block i was supposed to do for the quilt along (and maybe the reason i fell off the wagon) but i kept hearing how difficult it was. having done enough economy blocks now, i was ready to tackle it. (i was going to talk all about what i've learned about sq in sq/econ blocks, but i think i'll just make a separate post. that'll be easier. since i have many a sq in sq/econ block to go for this quilt, there will be lots of opportunities to talk about them coming up.) with the fabrics i selected,the perishing block is not my favorite but i like it well enough and am so glad to have it done! i didn't put a lot of thought into each fabric but i did pay attention to value when selecting them, which really helps the individual layers either blend or stand out. value-wise, i'm please with my results.

the old maid's puzzle i basically had to figure out all on my own with little help other than a diagram and inaccurate measurements in the pattern. i'll be writing a separate post on that process, too, in case anyone else needs some help. i really liked all the fabrics going into it but the results feel quite flat and dull to me. however, the quilt could use some quiet places so it will remain as is. there is another one of these blocks in the quilt so i have a second chance to jazz it up on round 2.

i knew this quilt would push my skills, and my oh my, has it ever. i now feel like i can take on anything with a straight line. (curves coming up soon!) i'm getting less upset when i make a mistake or something goes wrong because these just become opportunities to learn or to improve, to do something even better.

and when i have completed this lady, i will feel i can absolutely, with out a doubt, call myself a real quilter.

linking up with lee's wip wednesday at freshly pieced

Saturday, January 24, 2015

cutting edge

aren't all the itty bitty chained pieced bits of my "kitty in the corner" (my modernized name for "puss in the corner" block) just darling? it's like a mini bunting this way and may have inspired a project idea. but in the meantime i am once again full speed ahead on the gypsy wife quilt. i've been tackling lots of the intricate main blocks, one at a time, and doing so much cutting. which has inspired me to talk about my cutting tools, some of which are recent acquisitions.

most quilt teachers or books for beginners will tell you that you only need a few quilt rulers to get by. and this is very true. i did just fine with a 6"x24", 9.5"sq, and 12.5" sq ruler for my first several quilts. these are enough for squaring off fabric, cutting strips, trimming blocks. they're quite versatile. you can even successfully cut triangles with those rulers.

but over time i found myself thinking a few other sizes would be more manageable for different jobs. so whenever i had a coupon or rulers went on sale, i would pick up one that seemed handy. when discounted, they are only a few dollars each. given enough sales and enough time, i've amassed a good pile of rulers.

when it comes to square rulers, which are fantastic for trimming blocks precisely or fussy cutting certain sizes of fabric, i now have each graduated size, by the 1/2", from 2.5" to 6.5", minus the 3", which was out of stock at the last sale. (but two of the 4" because they both came with some sets i bought. i suppose i have a spare. one for upstairs and one for down?)


the 2.5"sq came with a mini cutting mat i bought for travel purposes. at the time i thought it was too ridiculously small to use but have since been proven wrong. even that tiny fella gets a turn at the mat periodically. like when i'm trimming up mini hsts.

my gypsy wife quilt, which features a great variety of block sizes, is the type of project that makes all these different rulers quite handy. i'm continually needing to either fussy cut or trim up blocks. so i find myself frequently reaching for those square rulers.

my rotary cutter is a gingher i got on sale from joann crafts. i love my gingher shears and snips, and i thought it looked really nice, so i picked this instead of an olfa when i started quilting. they routinely go on sale and so do the replacement blades. for my cutting surface i have a 36"x24" fiskars self-healing mat. i really like the soft green color (it's butter yellow on the other side). i find it to be very accurately marked and no longer use two rulers for squaring up or cutting strips. rather, i use the mat-and-ruler method.

my cutting area lies at the end of the table so i can work off the three edges easily, which is quite helpful when cutting as it allows me to move myself rather than the fabric or block at least half the time. however, the fabric inevitably has to be moved at some point. here enters the genius called "rotating cutting mat." i had heard of these wonders a time or two but didn't think they were for me. until i was elbow deep in gypsy's blocks and always having to shift everything. so i looked on amazon and found the olfa 17" rotating self-healing rotary cutting mat. there are smaller mats, too, but i had the space so i wanted as much rotating space as possible. i can see how it would be convenient to cut small blocks on a smaller mat, but i'm good with this one.

there is the black under-mat, which stays put, and the top green cutting surface rotates a full 360 degrees in either direction for cutting. its perfectly smooth and wonderfully flat.  just look at the following photos to see it move.

spinning to the right

and all the way back around again
i was a little skeptical of just how useful this might be but i can sing it's praises now that i've given it a go a few dozen times. i'm certain my trimming accuracy has increased and it definitely saves me time. i'm doing a ton of trimming for the gypsy wife as i am working on my accuracy with all the points involved.  each block is a mini project and i trim most every bit accordingly.

one nice thing i just discovered is that since the diagonal of this mat measure 24" across, i can still trim strips longer than 17" if i just put the fabric on the diagonal. very handy. otherwise i have to move the rotating mat off the big one. maybe someday i'll have a dedicated sewing room with both these mats in their own spaces.

as for my other rulers, i have two 6"x24", a 3.5"x24", and a 3"x18"rectangles. the two long ones are for squaring up fabric, making large cuts, and trimming quilts. the long skinny one is for when i am making skinny but long cuts and don't want to deal with the width of the wider one. like when i am cutting strips. and the short skinny one is for shorter strips or smaller cuts when i don't want all the length of the other two. this mostly goes by feel. if i find i have too much width or too much length for what i'm cutting i'll switch to another ruler. i store these on a recipe book stand.

the stand is also good for holding up quilting books or patterns i'm working from and it houses my quilting notebook, which is for keeping track of projects, working out maths, and sketching out ideas.

then there are the triangle rulers! you can definitely cut triangles without special rulers, but i've found it simpler to use them for cutting rather than trying to use the lines on the straight rulers. also, the fons and porter rulers have some of your math already worked out for you right on the ruler. i have been using the 60degree pyramid ruler for my indian blanket quilt and epp cutting. i liked it so much i picked up the flying geese ruler at the last sale. i've heard it highly recommended by others, too.

so that's the scoop on my cutting gear.
i used to despise cutting when i first began quilting. it was one of the most difficult parts for me. but over time, with practice, i've gotten better at it and actually enjoy it in doses now. having a variety of tools on hand to help makes it that much easier and more enjoyable for me.

happy cutting and sewing all!

***i should probably put some sort of disclaimer on here that no one asked or paid me to say any of this, that i purchased all these tools myself for my own use. i'm just sharing what i use and why i like it.

Tuesday, September 30, 2014

september gypsy wife quiltalong giveaway link party

GypsyWifeQAL


it's my turn to host the gypsy wife qal monthly giveaway! this month's winner will receive a $25 gift certificate from the fat quarter shop. free is always nice, but free fabric of one's own choosing is extra nice.


how are your gypsy wives coming along, anyway? mine is looking something like this:

 the pile of fabric i pulled to use for my quilt, taking up room on the couch in my sewing area . . .

and a much smaller pile of finished blocks, removed from the design wall to keep out of the light until i can get back to them. i had to put my gypsy lady away at the beginning of the summer because there was just not going to be time for her. i thought my month for the quilt along post was november and i'd have time to catch up, but here we are and i'm caught.

according to the schedule, the blocks for september are
Puss in the Corner (2)Square in a Square (7×3″),9
i was able to complete the 7 - 3" square in a square blocks, aka: economy blocks, which is much faster to write and currently more trendy.

here's my first tip for making these: follow the pattern cutting directions. i got through 4 squares before i realized i was cutting the center square at the finished size rather than at the size the pattern told me to cut. that was painful because it took me a long time, and now the smaller squares are useless because the pattern only calls for one of them and since i cut the smaller corner squares at the size the pattern called for, my center squares are extra tiny. i was wondering why so little of the center fabric was actually showing! the blocks look much better cut the way the pattern called for.

a few other tips i discovered along the way follow.

tip #1: don't use your default 1/4" seam guide foot since you are stitching on the drawn line rather than at a 1/4" out from anything. i noticed my guide foot was causing a little bunching as i sewed. just the regular old foot works best here. (this may only apply to me who can't sew without her training wheel foot on.)

tip #2: if you are using a print for the corners, you can determine which half of the print will show in the corner by placing that half on the inside of the square rather than along the edges. if you look you can see my drawn diagonal line that directs where i sew. this forms two triangles. the lower triangle on the bottom right is the portion of the print that will show up after all is cut and pressed in place. i wanted as much of the green vs the navy showing in my block so i put most of the unwanted navy in the upper corner along the edges so it would get trimmed.

 this is the above piece after it's been sewn, cut, and pressed. the triangle to the right is the bit cut off and the small square on the left is the piece for the other corner. (it's not helpful that i switched the block around when i photographed it the second time, but hopefully you follow along anyway.)

 now i've laid the last corner piece on with the corner i want showing facing in toward the center of the block. (wrong! actually, if you look, i've got it turned around. this is a sample of how not to do this.)

 as soon as i began sewing i noticed what i was doing. see how my upper right and lower left corners don't match like i had intended? time to unpick.

 take two: the triangle that is going to look like the piece i cut is now placed along the outer edge so we are lined up properly for matchy-matchy corners.

and now you see why sewing takes me so long. i only seem to learn by trial and error.

 tip #3: when trimming up your block, if you tilt it on an angle, sort of "on point", you can trim two sides without having to move your block or ruler. just zip up that lower right side and then back across the top.

 then just flip the ruler to the other side and you can trim the other two sides without moving the block at all. just make sure you are making the correct size block or none of this will matter at all. (3" finished, not cut!)

 tip #4: instead of drawing a pencil line, you can also just fold that triangle in half and finger press it to get a guide mark. the amount of lighting available as you sew will determine if this is actually helpful or not, so you'll have to try it first.

 tip #5: when cutting the seam allowance on the first two corners, you can gain yourself the tiniest bit of wiggle room by cutting the seam at a scant 1/4" rather than a true or generous 1/4".

wrong

if you put the 1/4" mark to the right of the seam, you'll be cutting it generous. don't do this. and let's just all pretend we don't see that my corner block shifted and isn't perfectly lined up with the other corner, okay? who needs accuracy, anyway?

correct
by placing the yellow cutting guide mark to the left of the seam, you've now got a scant 1/4" seam allowance, which means you have given yourself just a bit more fabric for when you sew the next two corners on. this seemed to help with my accuracy.

as for tips for the puss in the corner block, you're on your own. i haven't done it yet. also, anyone know where that name came from? i just don't get it but i'm sure there's a fascinating story behind it.

if you have any tips at all for either of these blocks, please share in the comments!

for participants who did complete your blocks for september, please join the link up to enter for the $25 fat quarter shop gift card giveaway.