Showing posts with label block. Show all posts

Wednesday, February 14, 2024

heart how-to


my "cute betsy liberty heart" blocks are underway.

while making this aqua blue heart, i snapped some crummy indoor, nighttime photos of the process so you can make one, too.

all seams a scant 1/4" and press well, or you will lose your points.

i have made two different size hearts so far. this one uses 2.5" strip widths and the previous pink one, due to a cutting mistake, uses 2.25" strips. for now, i'm undecided which size i want to use. i already have lots of betsy cut in 2.5" strips and i tend to use that size for my liberty projects. however, i like the smaller heart a little better. the diminutive size is cuter.

i think i'll try one more with a 2" strip and make up my mind then. the trial blocks can be worked into the backing or something.

*see below for measurement options & formula


for this heart block i used:
  • 1 - 2.5" square of heart fabric
  • 1 - 2.5" x 4.5" rectangle of heart fabric
  • 2 - 3.5" squares of background fabric


cut the 3.5" squares on the diagonal. these will be your setting points for the corners.


sew the 2.5" squares together, press open to the background fabric.
sew the 4.5" rectangle to the squares as shown, press open to the squares.


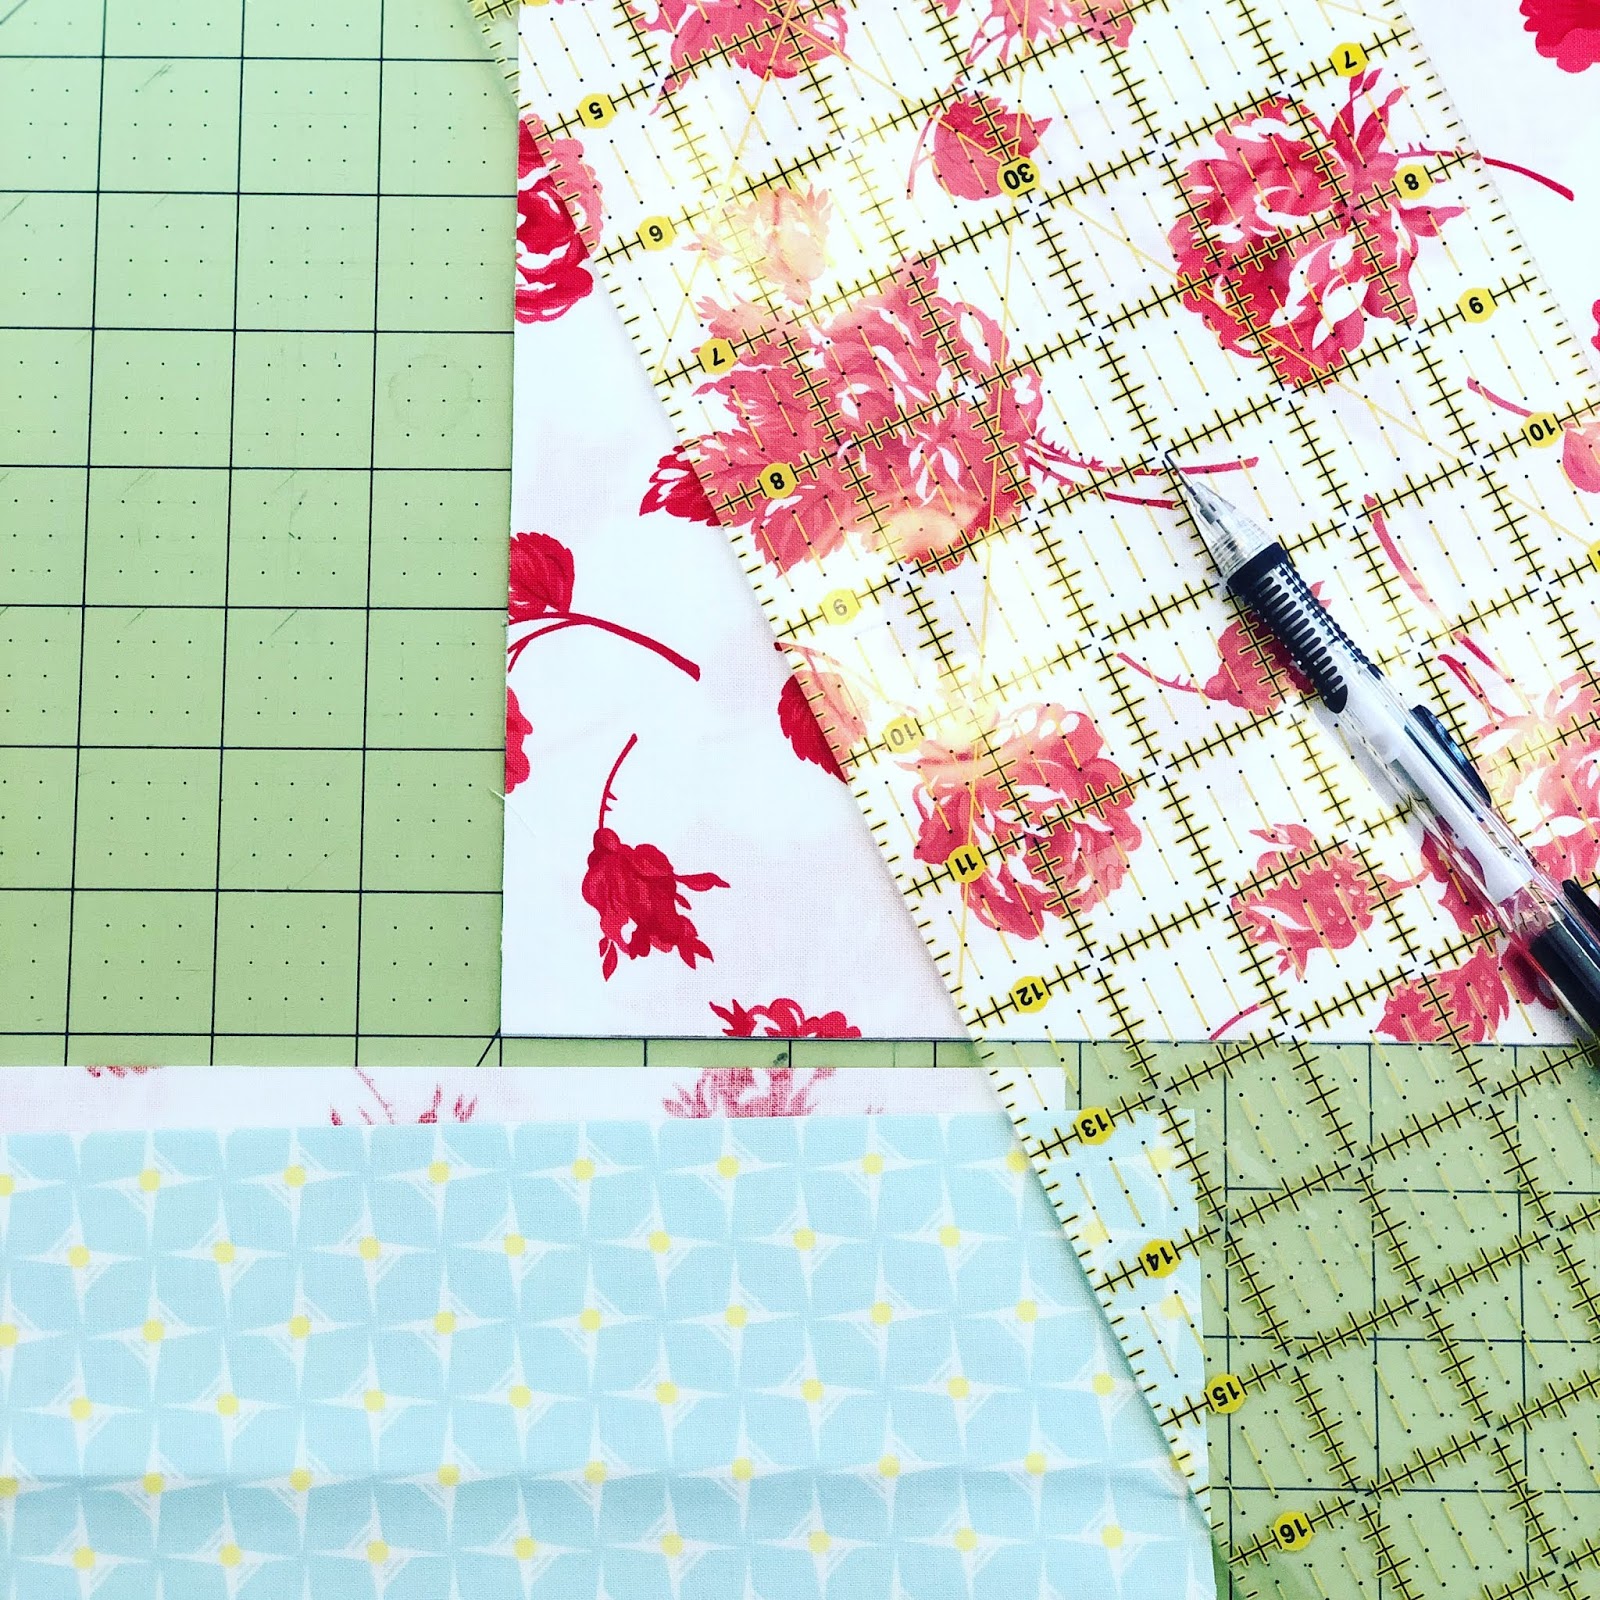
carefully fold a setting triangle in half along the long side (base/the diagonal cut). pinch it down just at the bottom, making a small crease mark. alternately, measure where the center of the triangle is and mark with your favorite marking tool.


line up the center mark you made with the seam between the squares.


flip triangle over on the squares piece, right sides together, maintaining alignment with the marks. if you're a pinner, pin pieces together.

you can sew the triangle on now, or you can align the opposite triangle to the other side, pin, and sew them both before pressing open.


to align the opposite triangle, i used the point to guide placement. line up the point with the center seam mark. this can be done along with the first triangle or after you've sewn the first one.


once the first two triangles are sewn on and pressed open, do the next two.


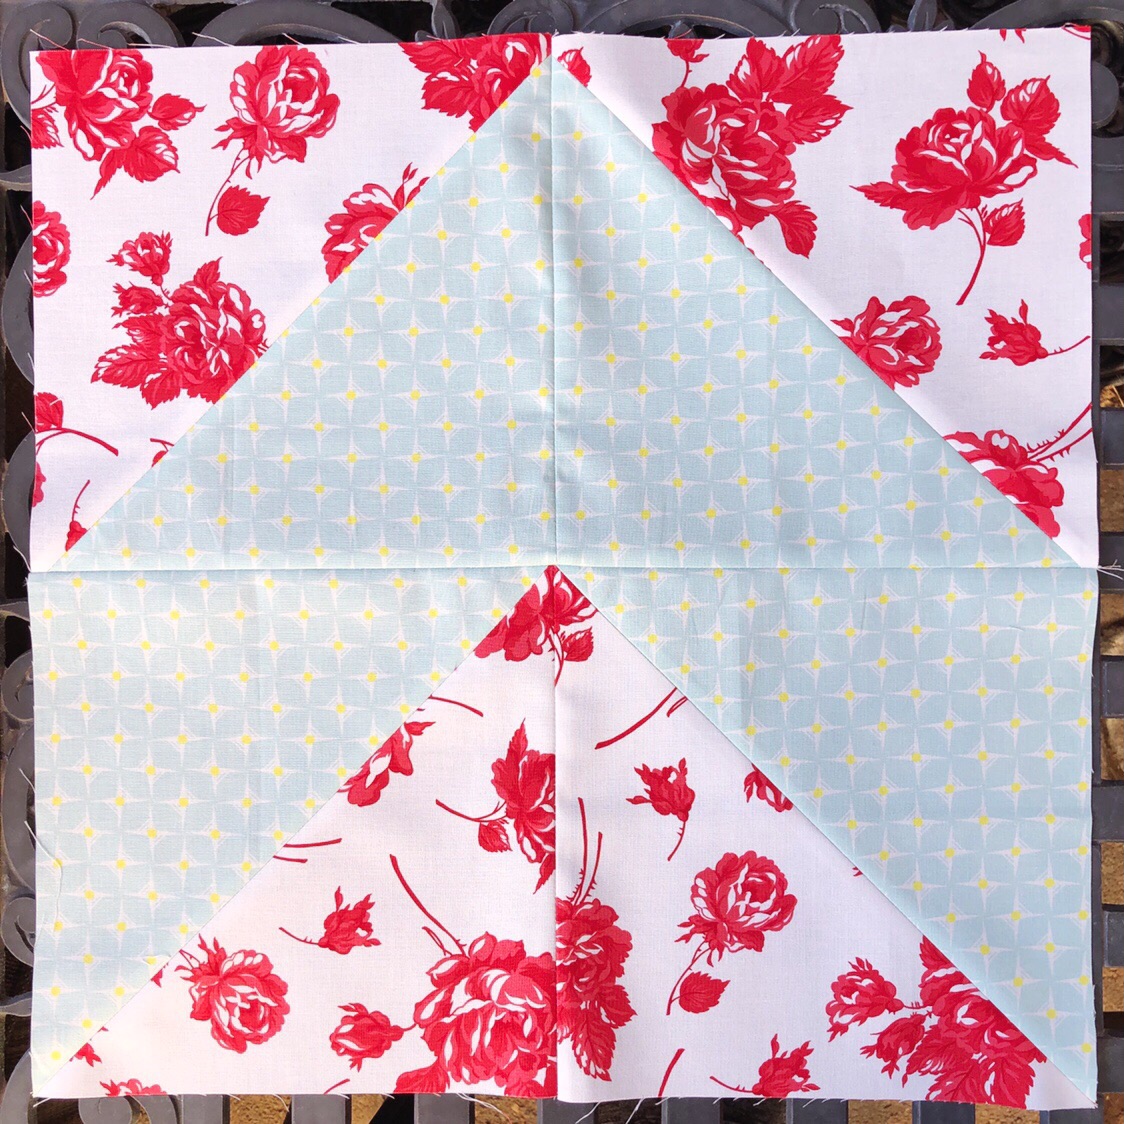
again, use the pinch mark or tips to align the pieces. sew & press open.


hello, cutey!

i'm undecided on how big the quilt will be or how many blocks i need. i want to use liberty as the backing, probably a full piece, so it will be on the smaller lap quilt size. for now, i'm going to make maybe one a day and see where it gets me.

i started with cutting 3 wof strips, one each:
  • 2.5" liberty tana lawn in betsy (heart fabric)
  • 2.5" low-volume background
  • 3.5" low-volume background
then i sub-cut the strips:
  • 2.5" squares & 2.5" x 4.5" rectangles of heart fabric, 1 per heart
  • 2.5" squares of background, 1 per heart
  • 3.5" squares of background, to be cut on the diagonal for corner setting points, 2 per block
*i will use the low-volume more than once, so i cut all the pieces for that right away. 
i'm not sure yet how many hearts of each fabrics i'll be making, so i actually only cut one set of the betsy fabric. i'll cut more as i need them, but having 2.5" lengths of betsy is not a problem for me at all. i use that size in lots of my projects, and scraps like these often inspire my next liberty project.

i based my block size on using 2.5" strips because i already have many betsy pieces in this size. if you want to make another size block, here's the formula for determining size:
  • the heart pieces will be your strip size cut into squares (ex 2.5" x 2.5" square) and rectangles that are twice as long as your square, minus 1/2" (ex 2.5" x 2 - .5" = 4.5")
  • the background setting triangles will be cut from squares 1" larger than your heart square size (ex: 2.5" heart square = 3.5" background square to cut on diagonal for setting triangles)
here are a few size options if you don't want to do the math:
  • 1.5" square for heart & background, 1.5" x 2.5" rectangle for heart, 2.5" background squares for setting triangles
  • 2" square for heart & background, 2" x 3.5" rectangle for heart, 3" background squares for setting triangles
  • 3" square for heart & background, 3" x 5.5" rectangle for heart, 4" background squares for setting triangles
as for fabric requirements, quilt size, and block numbers, you'll have to decide that for yourself, loves.

Monday, February 18, 2019

chevron blocks


chevrons are so, i don't know, five years ago, right? but they are kind of classic, too. especially in a formation where they aren't creating a solid zig-zag pattern across the quilt.

they are also an incredibly easy block make. this quilt top (that i finally got around to completing after making the first 2 blocks about 4 years ago) went really, really fast.


if you are an experienced quilter, here's the quick explanation of how to make a 16" chevron block:

1. cut 2 - 9" squares of each of 2 fabrics in your block (4 total)
2. make 4 hsts from the blocks and trim to 8.5"
3. arrange the hsts in a chevron formation and join together

it's so easy.

the above quilt top, which measures 64" x 80", is composed of 20 chevron blocks in a 4 column by 5 row grid.


fabric requirements:

20 fat or skinny quarters (makes two of each block, 10 different styles total)
or
40 fat or skinny quarters (makes one of each block, 20 unique blocks)
or
2 - 9" sqs each of 40 fabrics (makes one of each block, 20 unique blocks)
or
2 layer cakes (makes one of each block, 20 unique blocks. layer cakes are 10" squares, so you will either make larger blocks or trim each piece down to 9" to start.)

as i was making a set of blocks, i decided to photograph the process with my phone. the pictures are not pretty or of high, professional quality but if you need more detailed instructions and photos to guide you along the way, here you are:

cut 2 - 9" squares of both fabrics for the block: your chevron and your background
(i had already sewn the squares together when i decided to photograph the process, so ignore the seams for a bit.)

my two fabrics, each cut into 2 - 9" squares and made into pairs of 1 sq each fabric.

place the fabrics in pairs, one of each per pair. put them right sides together.

on the backside of one square, draw a diagonal line from one corner to the opposite corner with a pencil (or your choice of marking tool). i generally do this on the lighter fabric so it's easier to see.

using the pencil mark as your guide, sew a 1/4" seam on each side of the pencil mark, diagonally from corner to corner.


after i sew the seams, i like to give a quick press to the fabrics to smooth them out before cutting. there is usually a tiny bit of rippling no matter what foot or what speed i use, so i like to do the quick press. above, the top block has been pressed and the bottom one has not.

with a ruler lined up along the diagonal marking line, cut the squares in half diagonally between the set of seams.

you can see the seam is a scant 1/4" off the cut.

press the seam open to both sides.

with the hst blocks you get a lot of bulk where all the intersecting seams meet, which can make the quilting difficult, as well as produce the annoying little bulges felt in the quilt when it's finished. for this reason, i choose to press these seams open rather than to the side.

also, i like to use the "floppy book method" to help my seams lie flat.

as soon as i've opened the seams, i will lay an old phone book or a couple paperback quilting books on top of the block and let it stay for at least 30 seconds or so. i let it sit while i'm working on the next block or until i'm ready to trim them all.

when all four blocks are pressed, trim them to 8.5".

this is a step that helps with accuracy, particularity because we have slightly overcut the size of squares needed to produce the hst.

i use my 9.5" square ruler for trimming these blocks. any sq ruler 8.5" or larger would work. if you don't have any large sq rulers, you could also just measure using whichever ruler you use to make your large cuts (presumably 6" x 24" or some such), you'll just not be able to do it in the manner shown here.

place the sq ruler on top of the quilt block so that the diagonal line on the ruler is lined up with the diagonal seam of the block, and the corner opposite where you want to cut is near the 8.5" mark lines.

also check all the perimeter lines of the block to assure that you have fabric up to or past each of these lines. you might have to slide the block along the diagonal line a bit or make some other adjustments.

from where i'm standing, i'm going to make a cut along the top of the ruler, and also along the left side, past my hand. my cutting table is small enough that i can maneuver around it in this manner without being at an awkward angle for cuts. you can see that i have the bottom and right sides of the block aligned with the 8.5" lines and there is a little fabric poking out on the opposite two sides for me to trim off.

when you have made those two trims, either move the block around or flip the ruler around to the opposite corner. once again, line everything up and trim. my cutting space allows me to just move to the oppsosite side of the table to cut the right and bottom sides, but you may need to move the block under the ruler instead so that you can comfortably make the cuts.

or, you may need to adjust and turn the block each time you make the 4 different cuts. whatever your space requires.


when all 4 blocks are trimmed up, place them in a chevron configuration. if you look at it, this is actually two flying geese blocks with the fabrics opposite of each other.

the fabric you want to be your chevron should be on the inside forming the triangle (geese) on the top block and your background fabrics form the triangle (geese) on the lower block.


put your blocks right sides together and lined up on all edges, then sew a 1/4" seam on the right side.

for the first set of blocks, you will be sewing along the seam where the chevron fabrics are touching each other and the diagonal line moves away to the left. the next pairing will look exactly the opposite of this with the background fabrics touching instead.

i chain piece the blocks, meaning i just put the next block in and sew it without cutting the threads in between. if you have all your blocks precut and trimmed because you are working in batches, you could easily chain piece the whole top this way at once.

once the two component parts are sewn, press the seams open to both sides.

lay the block out again so you can see your chevron in the configuration you desire, then flip either the top down or the bottom up so that you have right sides of fabric facing each other.


line the two pieces up at the center seams and pin through the seam.

i'm not much of a pinner, as you can tell since i haven't pinned yet. but i do pin at this juncture to try to get my points just right.

sew the center seam together.

press open the center seam as well.

i didn't photograph it, but i do use the "floppy book method" after each pressing. also, after i have pressed open on the back, i flip the block over and press from the front, then lay the books on the block.


now you have a completed 16" chevron block.

(of course, when you have sewn it together but not with the other blocks, it measures 16.5". )

for the quilt i am making, i made 20 blocks, laid out in a 4 x 5 block grid.


there is a trick to getting your directional prints to match in a chevron block. you can see how to do that here. and when the quilt is complete, i'll talk more about my fabric choices and pairings.

directional prints in a chevron block


when i got back to making my chevron blocks (after 4 years of 2 blocks hanging on the design wall), i found 2 squares of that yellow stripe fabric already cut and hanging on the design wall with the 2 blocks i had already completed.

i pulled a fabric i wanted to pair with the stripe from the stack of fabrics i had selected for the project, and without thinking too much got to work making the hsts for the chevron block.

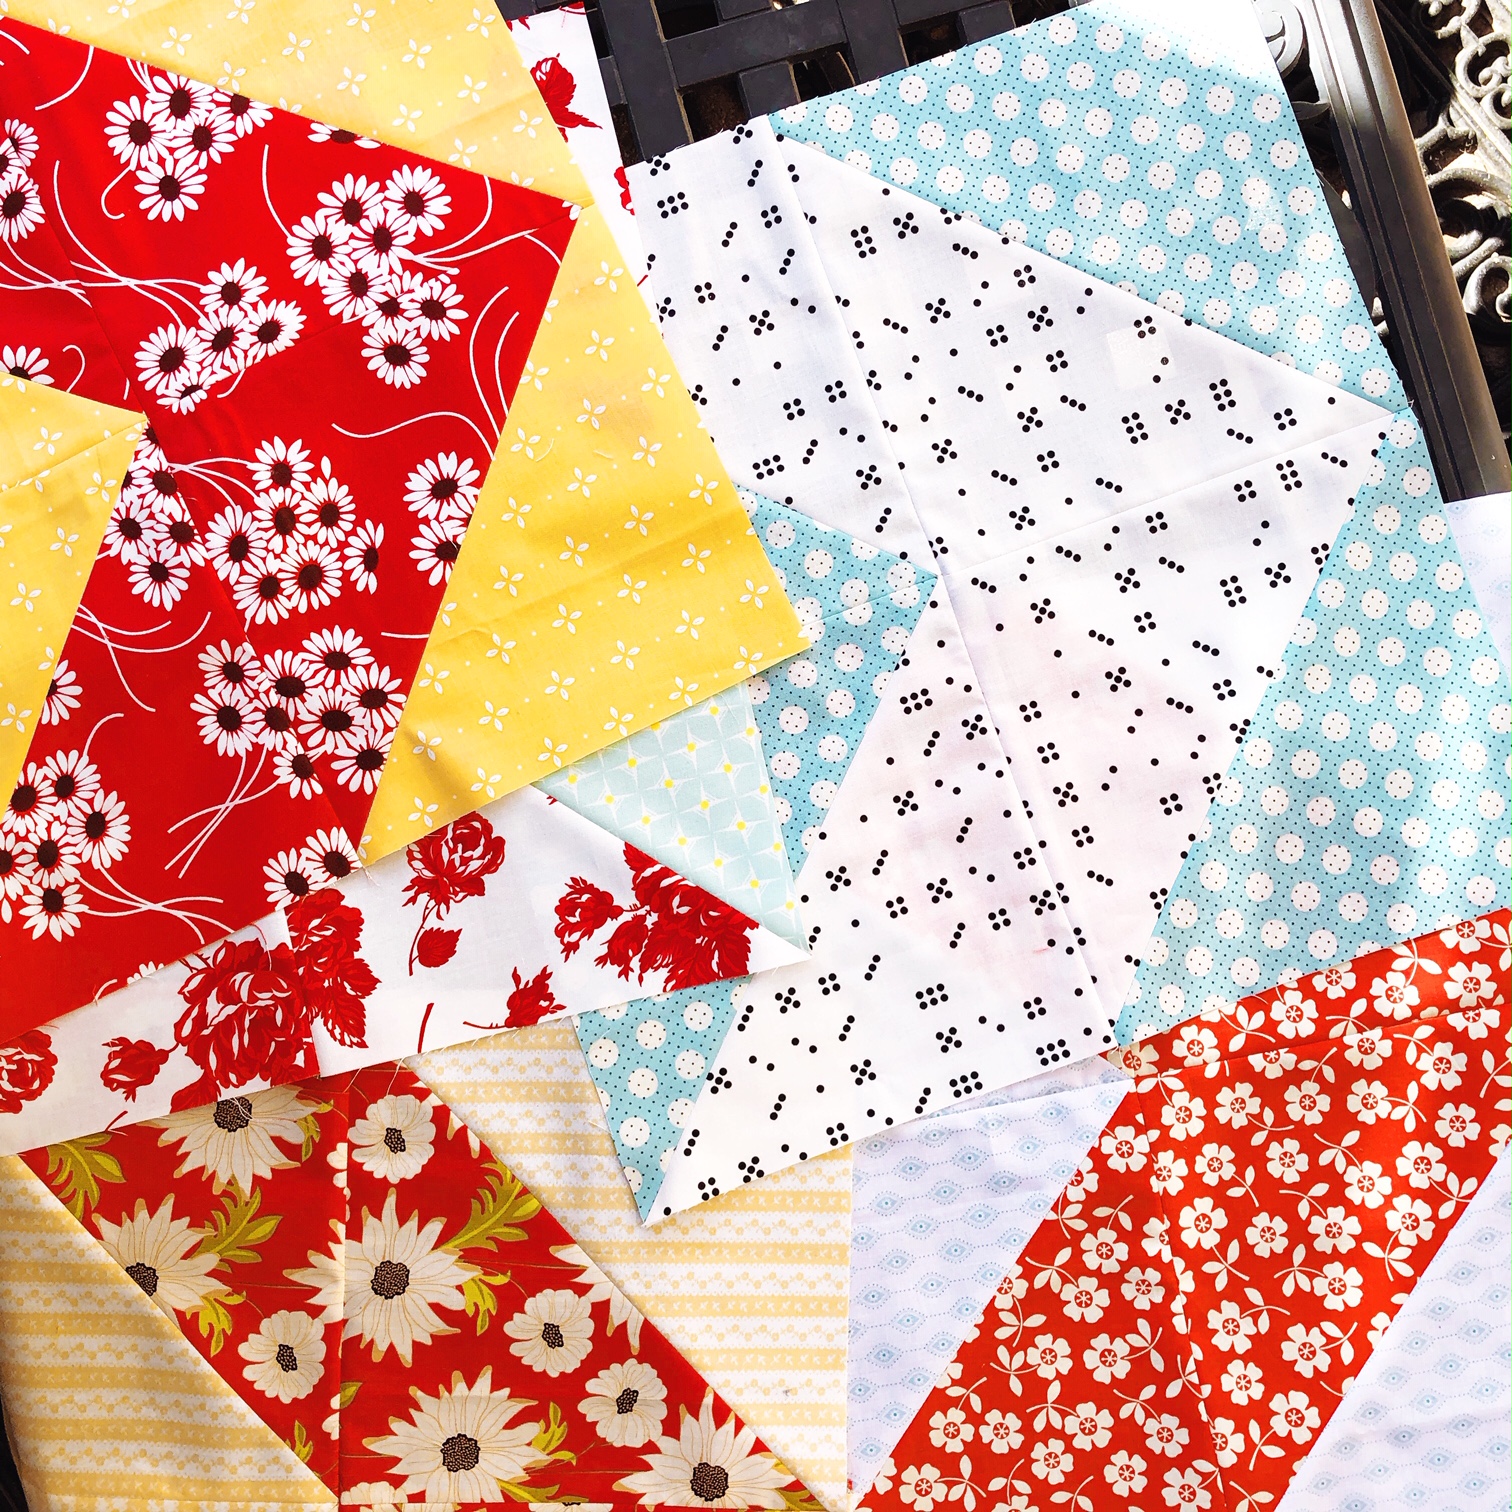
everything was going really well until i began to arrange the 4 hst blocks into the chevron formation and realized i hadn't taken the directionality of the stripe into consideration when making the hsts. ugh.
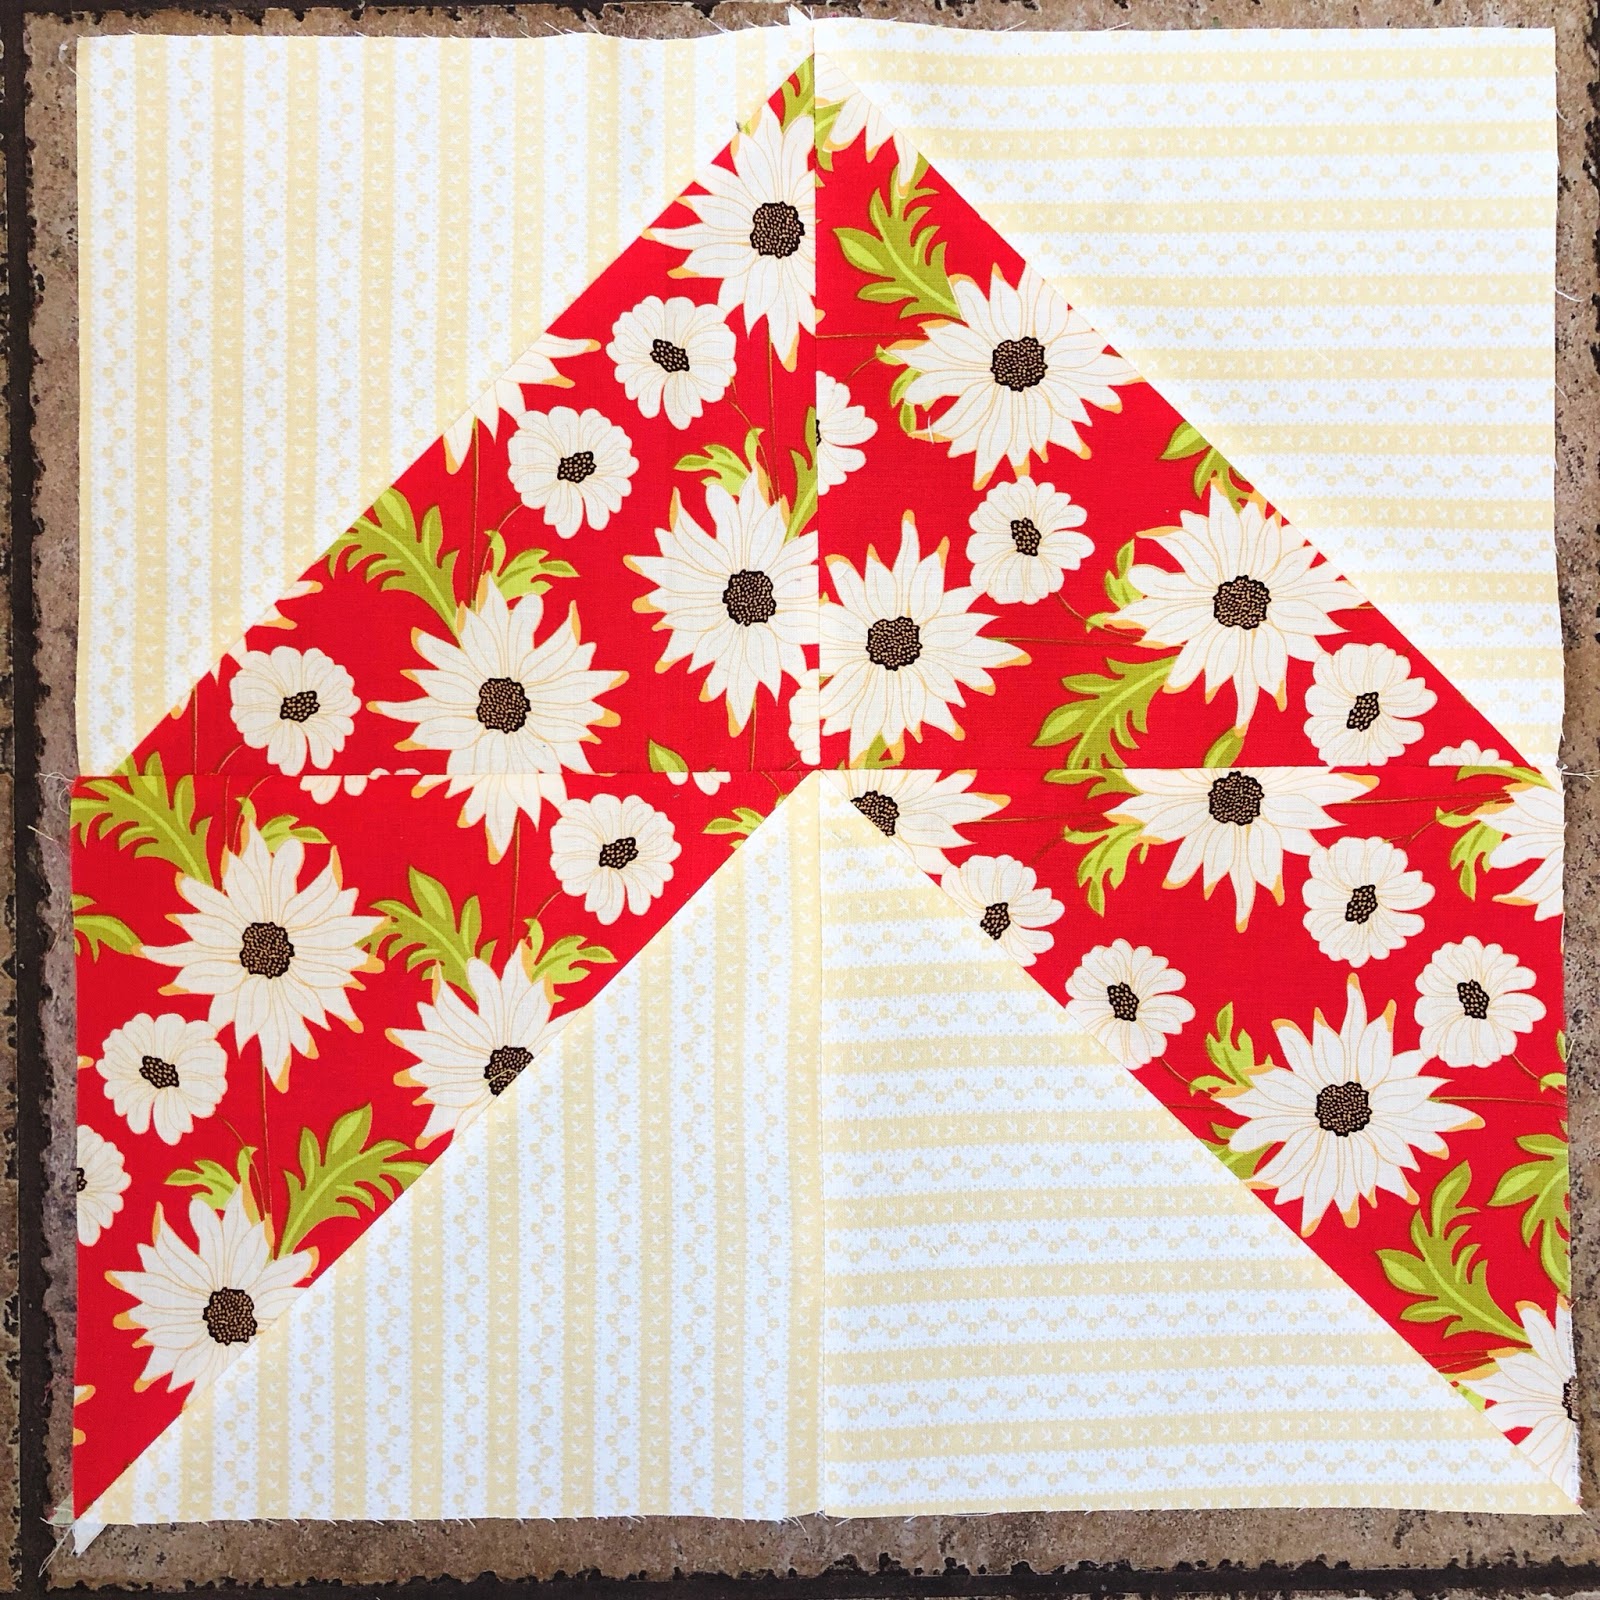
i searched and searched the mountains of fabric in my sewing room, certain i had more of that yellow stripe somewhere. but to no avail. there was no choice but to put the block together with the stripes going in different directions.


this especially perturbed me because the red daisy fabric is a favorite old print from sandi henderson's meadosweet line. it's been out of print for a while. fortunately, i am plenty stocked on it. but i didn't want to unpick the block and redo all those bias seams on the hsts. i hoped the stripe was pale and subtle enough that it wouldn't stand out and that it wouldn't bother me. however, the longer i looked at that block as i worked on the rest for the quilt, the more it did bother me. so i will be unpicking it and making a pinwheel block out of it to use on the back of the quilt instead. i found a different yellow stripe to pair with the red daisy print and made a new block for the quilt top.

and, by playing around a bit, i figured out how to get the directional prints all going in the right direction. it's very simple, really.


when you are marking the fabric with the diagonal line to form the hst pairs, simply draw the diagonal lines in opposite directions across the directional print on the pairs, as seen above.


this will give you exactly what you need. simple, right?


if you happen to have 2 directional prints, it's a little more complicated, but not much.

you still start by marking the two fabrics with opposing diagonal lines, like above.

then it sort of depends on which way you want your two directionals to run against each other. this will be slightly different with each set of fabrics. basically, it requires turning the print you aren't marking a quarter turn from where you have it placed in the first pairing.

i didn't photograph this as i never fully perfected it in my mind, but i found if i simply made one pair of the blocks first, then i could figure out what was needed for the second set by laying the pair together, right sides facing, and peeling back the corners along the diagonal line to see how the blocks were going to turn out.

(these aren't directional prints, but you can see what i mean about peeling the corners back to see what your block is going to look like.)

by comparing the already made blocks to the second set i was about to sew, i could see which way i needed to turn the fabrics to get the desired blocks. just play around with it and you'll see. you definitely still need to draw the lines in opposing directions on the first fabrics that you are marking. once you've drawn those, go from there.


i was SO very happy to get this block right! and the stripes even lined up nicely.

now the question is, does this work the same for other blocks that utilize 4 hsts, like the pinwheel? i should know as i just made a pinwheel quilt, too, but i really can't say. i'll let you know when i unpick that first daisy and yellow stripe block to make a pinwheel.

Wednesday, January 24, 2018

mastering geese for a swoon


so, i started something new a little while ago. no surprise there! when i get the urge or the itch, i just dive into something. this time i decided to join the IG #swoonalong. in celebration of her 10th year anniversary in the quilting business, camille rosskelly started a quilt along of her most popular pattern, swoon. i've had the pattern as part of her craftsy.com class i purchased a few years back, and it's been on my "to do" list for ages. it's on everyone's "to do" list because it's so awesome. when the swoonalong came up, i resisted for a little while before being sucked in.

i'm eyeball deep in projects, so i wanted a quick version of swoon. i decided to make a swoon variation of my stella grande quilt pattern: one giant swoon block with a top and bottom border. i'm using heather bailey's floral picnic bouquet in gold as my main fabric, sandi henderson's meadowdot in mint as the secondary fabric, and essex linen from robert kauffman as my background.

i decided if i'm going to make the ultimate quilt, one of the fabrics better be my ultimate favorite: meadowdot, of course. i picked the floral to compiliment it. and i've always wanted to try linen. it seemed a good time to do that, too.

i started cutting away on the floral. and did it wrong. the swoon pattern i have is for a 24"block, but i wanted a 60" block. so i had to do some math. and i did some wrong. then i decided after reading up on quilting with linen that i should use a 1/2" seam allowance rather than the standard 1/4". so i did some more math and re-cut my floral center square.


at this point i realized i was not going to have enough of the floral for the quilt, even before i made my cutting error. so i had to visit etsy and ebay to hunt down that out-of-print fabric i was committed to using in my quilt. lucky me, i found 3 yards of it, so i'm safely stocked again.

and then i ran out of essex linen in flax. i went to my new local shop and go more, but thought it seemed to look a little different than the piece i had picked up earlier in the week. after washing it was still a different color! i talked to the shop owener and found out it was the wrong one. stalled again. whew!

while i was waiting on fabrics, i was also following the #swoonalong progress on instagram. i noticed some of the pieces in the pattern that were originally composed of hsts (like the pattern i have) were being made with flying geese instead. that makes for less seams and a more composed look, so i decided to just figure that out, too.

basically, i've rewritten the entire pattern myself.

i'd love to share all of it here, but that would be giving away a copyrighted pattern. sorry. can't do it.

i had to experiment with the geese to figure out the technique and math for those, too. with some trial and error, i got it down. i had some extra squares of linen not yet used that i paired with some solid scraps,

  the upper left-hand corner of linen is a failed attempt at getting the corner the right size. i tried just cutting a triangle and sewing it on. it came out wrong. i don't even remember what size it was. i think i probably used the leftover piece cut off some of the other bits i'd already done.

i read up on making geese a little and decided to go with stitch-and-flip rather than trying to just sew a corner on.

the geese i need are 12.5" x 6.5" unfinished. i think what i used was a 7" square for the corners.


after stitching both a 1/2" and a 1/4" seam allowance (for reinforcement), i clipped the corners off, per the flip-and-stitch method.


 the linen doesn't behave exactly the same as cotton, so i found i needed to sew a scanter seam so it would reach where it needed to be to line up with the block.


in the end, i completely nailed my tip for my flying goose (singular). it's exactly perfect. which is what i'm going for with this quilt. i've found that when working with large scale patterns, all the little flaws are much more noticeable. since there aren't that many pieces for this quilt top, i think it's worth the time and effort to get them right.

i now have most of the geese units completed, so it's on to the corner units. only i've turned back to the other projects i had going. my grande swoon is in the wip pile for the moment. when i do get back to it, i'm ready for a fast finish and i've got the tricks to getting it right down pat.

if only i remember them . . .

Friday, March 4, 2016

old maid's puzzle block

the gypsy wife quilt calls for two old maid's puzzle blocks. it's a fun little block with lots of room for fabric play. there are two types of component pieces included in the block: a bow tie piece of hsts and squares, and a crazy triangle/hst mash up piece. both of my blocks use uniform fabrics for mirrored sections of the block, but you don't have to do that. you can use as many fabrics as you like!

for example:


here, sarah schraw uses completely different fabrics for each triangle and even some different backgrounds. (remember her beautiful gypsy wife?)


A photo posted by Sarah Schraw (@sarahschraw) on

another brilliant block by sarah. she's one of my favorites! i could look at her instagram feed for hours. maybe have.


or, instead of totally scrappy, to define this block in an already crazy, scrappy quilt, you can use just two or three fabrics for the whole block.

now how to make it.

 first, decide on your fabrics, and which you want to use where. i selected a low-volume stripe for my background, the red with white flowers for my bow ties, the yellow pinwheel fabric for my large triangles, the red ditsy floral for my "background" triangles in the "crazy" piece half, and a dot for the inner triangle in the "crazy" piece half (which i later changed to a blue and white dot for a bit more color).

here's a diagram from the pattern that i will use to explain fabric placement.

i'm calling the upper right and lower left component pieces "bowties." the upper left and lower right component pieces i'm calling "crazy hst" (for lack of a much better term). the crazy hst is composed of a large triangle and the crazy side, three background triangles and one inner triangle.

the bowtie component has two hsts and two squares. i used only two fabrics for this piece - background B (two squares and two hst halves each piece) and bowtie fabric A (two hst halves per piece).

the "crazy hst" has three fabrics - the large triangle fabric C, "background" fabric D (three triangles per piece), and the small, inner triangle fabric E.

quite frankly, although i've followed the pattern instructions for this block twice, i've never been sure exactly which fabrics ms. kingwell is referring to in the cutting directions. and i altered those cutting directions, anyway, so i'm going to give you my version of the block directions. it comes out looking and measuring the same, so pick your preferred method!

i do apologize for the photo lighting quality here. it was night and there was nothing i could do about it. i have to quilt when i can, and that doesn't always make for ideal lighting. thank goodness i'm not a sponsored professional, right?


  •  from the background fabric B for the bowties (my stripe), cut 2 - 3" squares, and 4 - 2.5" squares. (the top two are doubled up in the photo, so you can't see there are four.  actually, i forgot to cut them the first time around, but pretend with me.)
  • from bowtie fabric A (red w/ white flowers), cut 2 - 3" squares
  • from large hst half fabric C (yellow pinwheel), cut 1 - 5" square, halved diagonally
  • from crazy hst background fabric D (ditsy floral), cut 3 - 3" squares
  • from crazy hst inner triangle fabric E (blue dot), cut 1 - 3" square
note - all my squares are slightly overcut and will require trimming of individual component pieces so your block comes out correctly sized.

now, if you are going more scrappy than this with your fabric choices, you will have to work out how many more squares you are going to cut for your hst units and all. basically, for each different colored triangle you want to use, you will need one full square to cut it from. the pattern says to cut all the squares in half and set aside/discard/scrap one of the halves from each fabric. another option is you could make hsts from all of them and set the extra hst aside for the hst blocks that are in sections 4 & 5 of the quilt. your choice.


 take the 2 - 3" background fabric B squares and the 2 - 3" fabric A squares to make your 4 - 2.5" hst squares for the bowtie components. with your favorite marking device, make a diagonal line from one corner to the other on the wrong side of the lighter fabrics. (if you are using a directional print, like my stripes, make sure you have them facing the same direction when you mark them.)

 place your squares wrong sides together and sew a 1/4" seam on each side of the diagonal line.

 cut along your line, and press the hst units open.

 these are slightly oversized, so trim to 2.5" each.

 arrange your bowties, and sew together. again, if you are using a directional print, pay attention to where you place your fabrics so they run the same direction. i thought i was going to have stripes running in two directions until i flipped both my component pieces to exactly how they would appear in the final block.

once it's assembled and pressed, the bowtie components should measure 4.5" each.

now let's make the triangle half of the crazy hst components.

 take one of the 3" squares of fabric D background, and the one 3" squares of fabric E, and make two hst units, just like you did for the bowties. trim this to 2.5" after you press open.

take another of the 3" background fabric E squares, and cut in half across the diagonal, forming two triangles. lay out your half crazy hst component as it will appear in the component piece. the long edges of the triangles will be on top, looking like and arrow pointing down. the hst unit will be in between them with the background piece on the bottom.

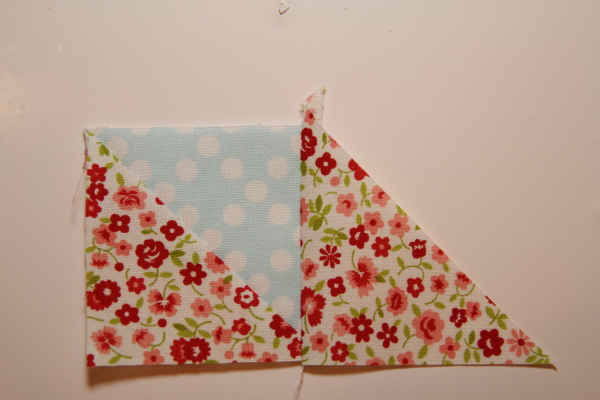
 take the triangle on the right of the hst unit, and fold it over so the right angles are lined up. this will look really big and wrong, but it's not. you'll have about 1/4" of the triangle hanging out past the square on each side, but if your edges are lined up and your right angles match, you'll be good. sew on with a scant 1/4" seam along the right side of the hst unit.

 press open. now they are starting to look more the same size!

 put your sewn pieces back in place so you can see where to go next.

 now fold the left side triangle down over the hst unit, again matching the right angles together, and aligning the edges of the square and triangle. sew with a 1/4" seam down the left side. press open when done.

 next, trim your triangle along the bottom/longest side. do this by lining your ruler up with the tip of that inner triangle 1/4" away from the edge. this will give your the proper spacing to keep your inner triangle edge. also, you can see i aligned the right edge of the piece with the 45degree diagonal mark on my ruler. this will ensure your new long edge is angled properly while still being distanced from the point at 1/4".

then line up one of the large triangles (fabric C, yellow) with your crazy triangles half, right sides together. if you're like me, the crazy side is probably slightly larger. so i just made sure my two long sides were aligned, and that there was approximately the same distance on each side of the points so that the triangle would be roughly centered on that crazy half. sew together with a 1/4" seam and press open.

once it's pressed open, you can trim the component down to it's 4.5" size. to get the best placement and to retain my triangle points, i made sure the diagonal seam line of the piece lined up with the diagonal marking line on my 4.5" cutting ruler (both yellow, so difficult to see here), and that the outer points of that small (blue) inner triangle were 1/4" away from the ruler's edge. if you have to choose, go with the out points so they don't get cut off.

now, arrange all four component pieces (4.5" sq, each) in the configuration shown in the pattern diagram, and sew together with a careful scant 1/4" seam. the final block measures 8.5" unfinished.

the pattern calls for two old maid's puzzle blocks, so make another one right away if you're feeling crazy. otherwise, you can wait until section 8 comes up.

linking up with crazy mom quilts