Friday, January 31, 2014

january's intention

 finished just in time for the next block to arrive in my inbox tomorrow morning, i have completed "intentions," my first block for the sugar block club 2014 bom series from amy at stitchery dickory dock.

being part of a bom series and making this block was a new experience for me in many ways. i've never done a traditional block before, mainly because they have been too complicated for my skill set. both the hourglass mini block and the 3-triangle mini blocks (official name?) were new to me. i surprised myself by working well with so many triangles.


because there is a low time commitment with only one block each month and because there are so many pieces/chances to throw off the size to each block, i focused on precision more than i normally do with this block. there were a few redo's for me, but not too many. in general i shocked myself with some pretty precise piecing. not perfect, mind you, but definitely personal progress.

i've never purposefully made blocks over-sized and then trimmed down, but i gave it a go this time and was converted. i did find one block that i either had to trim slightly off center or remake, and i let that go (notice the way the pink and blue point is slightly off in the upper left of the photo). however, when trimming up the mini blocks to assemble the larger one, i accidentally trimmed one 1/4" too small. arg. but i just whipped up another one.

also, when my hourglass block was a tad too small, even after repeat pressing, i just made another one (which is still slightly imperfect if you look at the bottom points). so i have a few spare parts now, but this doesn't bother me a bit. they'll just get worked into my backing when the time comes.

spare parts for the backing
with this series, each block is a surprise each month. i was a tiny uncomfortable with this at first because i wanted to know where the series was going when i made fabric selections. i wanted a color palette to start with but didn't know how many different fabrics might be required. however, i got over that and gave into the fun of working with continual surprises. despite wanting to break into my liberty fabrics, i knew they were too precious for a skill-building experience. instead, i picked over my stash to find some prints that have a sort of farmhouse and playful vintage feel to them. but i'm obviously also working in some modern prints with that comma circles print. i'm just going to take it month by month with the decision making.

all in all, this was a fun little project; a great exercise in skill building and comfort-zone busting. i look forward to the February block tomorrow.

Thursday, January 30, 2014

my machines

i now own four sewing machines. that's not quite as bad as it sounds.


the first machine is one my mom scrimped and saved to buy for me in high school. she gave it to me my junior year for christmas. she wanted to pass on her sewing skills, but that never happened. it's a basic model singer. i used it at the time to attempt a pillow or something like that and never even finished it. somehow it followed me to college and came in handy once for a puppeteering class i took as part of my degree in early childhood education. later on, heidi swapp taught me how to sew on my scrapbook pages with it. i made my first quilt on this machine, pieced and quilted, as well as a project or two. i did not want to give it up or have to upgrade. but she pulled to the right and i was always fighting her for accuracy. so now she's my paper sewing machine. i next upgraded to . . .

a brother project runway. i saved my own money this time and got little (pink) brother. my local quilt shop sold this machine and it came highly recommended by a quilter there. at $400, it was a moderate investment but way below the high-end machines. my accuracy definitely improved. i purchased in a few extra feet and an extension table to help with my quilting. i made another 5 or 6 quilt tops with little brother and quilted "out on a limb" with it. but i wanted to free motion and i could tell little brother wasn't hacking it anymore. the throat space, especially, was an issue. i'll be keeping little brother for anything my new machine can't do, like zigzag stitch and a few other bells and whistles. because i did once more upgrade for my 40th birthday to this . . .

juki tl2010q
this is my main lady now. we are piecing and quilting together, learning all about how to fmq (free motion quilt). you can read my impressions of her here and here. i also did a review of her for the sew mama sew machine link party here.

little brother (unplugged) now does a great job entertaining the baby while i sew. and will be saved for other projects not suitable for juki.
that should do me for machines.

what about the 4th one you, say?


i also inherited my grandma margaret's singer, still in it's beautiful wooden carrying case. she sits on a shelf in my bedroom, purely decorative and sentimental. it's a priceless heirloom, that turned out to be even more priceless than i first realized. read about it here.

Tuesday, January 28, 2014

how do you quilt a straight line on a juki?

when did this become the orange and navy quilt blog? ever since i started working on these 3 different boy quilts that each use some of the same fabrics, i guess. i do like the combo, but it's getting a bit old. i'm itching to work with something else, but am practicing a smidge of self-control by continuing to quilt "way out weston" (what i've named the baby boy simple strips quilt). actually, it's part laziness - i didn't want to change out the foot or thread for something else, either.
 
people who think they can't draw will describe themselves as "unable to draw a straight line," meaning they can't even do the most basic shape. what does it mean about a quilter that can't stitch a straight line - not able to quilt? it's such a basic shape and concept, with guidelines involved, even, that many a grown woman has been surprised at it's difficulty.
 
now i realize dear juki was purebred for fmq, which she is brilliant for, but i'm rather taken aback that even with her behemoth of a walking foot, i'm having issues with the basic straight line. i talked about this before when i was trying to get "twirly" together and got a few helpful responses such as, "go slow" or "lengthen your stitch." well, i tried that and everything else i could think of but am still seeking further input for how to straight line with juki.
 
i'll describe my method as best i can in hopes someone spots my mistakes.
 
  • i quilt full-throttle on the tortoise (juki's slow setting). that's pretty slow because slow and steady wins the race, even in quilting. but maybe i need to ease up further? like an inch a minute?
  • i have switched to a larger stitch size: 3, 3.5, or even 4. (no idea how this compares to other machines.)
  • i have the presser foot pressure gauge at it's lowest-pressure setting.
  • i barely guide the fabric through at all, mainly just lightly holding it up a few inches out from each side of the needle and foot so that it can freely feed through mostly on it's own. if i try to push or guide even slightly, i get ripples. if i let the machine completely feed itself, i get super tiny stitches and little to no movement.
  • i started in the middle of the quilt and switch directions each time i begin another row so that i'm not always pushing the top toward the same end of the quilt.
  • i pin baste about a fist's width apart in each direction. i do have rather large hands, so maybe i need to pin more closely? i average about 100 pins on a baby quilt, which seems like a lot.
 
really, it just seems that the quilt isn't feeding through at the same rate despite the walking foot. the top seems to be slightly pushed flat, causing it to spread out rather than go through with the rest of the sandwich or tuck up under the foot. i had the brilliant idea to try using my slider with the walking foot, thinking it would slip through more freely. after the quilt didn't move at all i made that missing synapse connection, realizing that the feed dogs can't reach the quilt when the slider's on. duh.
 
i'm at a loss what else to do other than keep trying and practicing. i tried to photograph the main issue i'm having.
 every so often, the top starts to pucker and fold over, like the above photo.

 if i simply stop and lift the presser foot up, it usually releases all on it's own without any smoothing from me. however, over the length of the quilt, the top is also pushed forward, which is creating ripples in the top.

getting my lines straight is another matter entirely. i was disappointed to find juki's walking foot does not accommodate a guide bar, so i have to find lines to work alongside myself. or mark the top with my hera marker - ugh. i do not want to spend the extra time doing that. this often means i end up outline quilting each of the seams. usually i line up with the foot's edge on either side or some other part of the apparatus, like the edge of the big white box, below.

staying straight is simply a matter of practice, i believe, and paying attention. still, the needle can wander pretty darn quickly. practice, practice, practice. i thought i was doing pretty good at following along until i took the quilt off and looked at it as a whole. practice, practice, practice. between trying to make sure the foot is staying in line properly and watching for puckers, it gets pretty intense. and every now and then i miss something, resulting in a tuck or two sewn into the quilt, or a wandering line (look closely at the photo below). i'm not hyperventilating over this like the last fmq disaster, but i do wish it looked better. i'm betting on practice to help me out, at least with accuracy.

i was wondering if my lines were as bad as i thought them and what good quilting done by an expert on a juki might look like, so i pulled down rachel's "lolly lolly" for some comparison, since it hasn't been washed yet. her lines do look straighter to the eye and there is a teeny tiny bit of ripple, more noticeable on the back. however, her quilting is a lot more dense than mine is so far, so i can't really say how it compares. i'm wondering if my ripples that exist now will turn into unavoidable puckers when i fill in some of the spaces between. i guess all i can do is move forward and find out.

WIP Wednesday at Freshly Pieced

Monday, January 27, 2014

color me happy

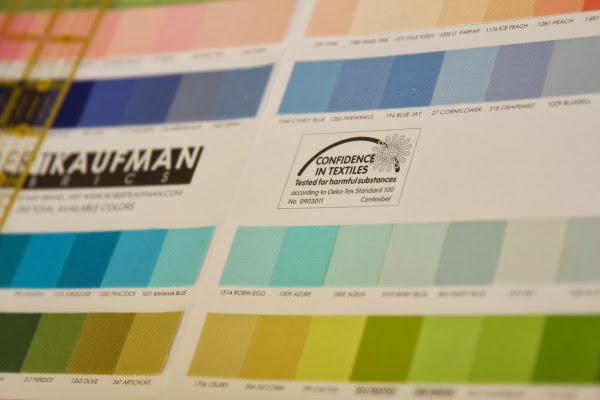
 the littler girls and i have been working on assembling my manipulative color card before color intensive course begins next week. when signing up for the course, i got a free (shipping only) kona 2012 color card that rachel has showed us how to turn into a card with detachable swatches.

i'll admit i loved this idea, but also thought it was going to be pretty tedious to cut up all those swatches and the velcro. however, with my little helper at my side, it turned into a fun mommy-daughter project that even allowed me to sneak in some homeschool lessons on counting/number sense and letter recognition for a little girl that is coming to these skills rather slowly.

 we've had some very lively conversations about color comparisons, favorites or preferences, and name choices. when looking at the swatch called "banana" we thought it was too soft, not bright enough, so we got out a banana to check.  surprisingly, it did match a paler section of the banana near the stem! i think "lemon" and "school bus" need some checking, too, but maybe i'm the one who'll be surprised.

in general, it's just been a lovely introductory activity to the color theory class. spending time handling and considering each individual swatch and thinking about the differences and placement has been quite pleasurable and instructive already.

this is probably my favorite section of the card: all those pinks, lighter blues, and fresh, new greens. colors to please the eye and gladden the heart of this girl.

if you haven't yet signed up for the course, there's still time and a few cards left.  class starts feb 3. join me?

sign me up

with cousin wendy true at the baby shower
i didn't even touch my january lovely finish pick. yes, "paris daydreams" is still languishing on the family room floor in a pile of other wips. some other baby quilts which were required at the last minute got in the way, like the one i got 90% finished for the baby shower. so to make things even more doable for myself in february, this simple strips quilt for baby weston, due mid-month, is my lovely finish pick for february.

A Lovely Year of Finishes

i have several wips going at the moment, but because my plate wasn't full enough or orderly enough or whatever enough, i have organized my quilting time to include a few new "to do's". this weekend after the baby shower, i took a quilting break for some blogland inspiration. and found two new quilt alongs that i want to join. yes, i still need to actually get started on sarah's barn door qal and finish penny patch, but here's why the others are different: they are block of the month quilt alongs that will use up my stash and will push me to skill build, one little bit at a time.


2014 Sugar Block Club
this one will produce one nice, large block a month. i love the idea of having just one block to try out a new skill with. it'll be a nice break from any other projects i have going to do just the one block. at least that's my thinking. I'm thinking of diving into my liberty stash for it, but am hesitant to commit my most precious pieces to skill building experimentation. maybe i'll give a practice block a go first. goodness, i have a harder time committing that liberty to a project than i did committing to my husband for eternity. (mormons don't just marry for time, it's for after death and the whole rest of eternity, too. he's stuck with me!)
 
GypsyWifeQAL

i completely hesitated to add myself to this group, but the truth is i already have the pattern and some fabrics in mind, so why not pace myself with a few bits a month? and i'm pushing myself to full disclosure and complete honesty on this space as a way to hold myself accountable, which is why i'm fessing up about this project. no closet hiding here.


i'm actually thinking of using my first fabric purchase stack for this gypsy lady. i was going to do a plus quilt with it, but i've stopped liking that idea so much and now think it'd be great for the "gypsy wife". i think it will need a few additions of red and more solid medium- or high-volume prints, but it's a good start. I'm still thinking of a huge section of meadowdot for the back. yum.

additionally, i have a lot of leftovers from my headband stash and i don't make headbands anymore. looks good to me!

to be honest, this pattern rather scares me, but i think it will be a good skill builder that isn't too complicated just yet. it's going to fill my need for more complex/less simple designs, that's for sure.

there is no pressure here to get either of these quilts done right away. they are just filler projects. have i justified myself enough?

Color Intensive Online Workshop

oh, yeah, and i'm also enrolled for color intensive with rachel at stitched in color. this is light on projects and heavy on theory/ideas, which appealed to me. it's actually going to help with my other projects, or so i tell myself.

it may seem like all i've done lately is rack up projects for myself, but this week i actually got most of that baby quilt done, finished another top, and made some good headway on my detachable color card. naturally, that meant i had to find more to do so my plate stays over-full rather than just getting on with my wips.

full disclosure, ladies. keeping it real and my insanity in the open.

happy, happy


did you know sandi henderson finally has her new site and blog up & running? this is happy, happy news for her biggest fan. and oh, so strange that i just found it. ever since she announced last january that she was switching blog platforms, i have been faithfully checking in monthly to see if it was up. i must have skipped december because although she's had her site running since last may, it wasn't posted to her old site until last month. i'd missed all those months of pretty posts! well, tonight, when i couldn't sleep, i was browsing and found the new portabellopixie and two fantastic announcements: she's got a new fabric line in the works (with some feedsack-inspired designs!) and she's pregnant. the strangest part was that a few months ago i googled every which way to see if her site was up but she just hadn't announced it. i think i even tried the web address she's actually using, to no avail. whatever. i'm just glad to have some fresh sandi back in my life.

so, if you're another sandi fan who's been wondering where she's been the last year, go see.

this makes me want to go stroke my meadowsweet collection and dream up something new. if only it weren't the middle of the night, i would!

meadowdot, anyone?

(yes, i'm a huge fabric geek and sleep deprived to boot. my apologies.)

Friday, January 24, 2014

some giggles


a sewing cousin sent this to me.  the "mitered corners" part really cracks me up. i'm not even sure who the guy in the photo is - maybe the one from the notebook, whatever his name is - ryan gosling? anyway, it's a good giggle for a quilter. enjoy!

ps - i know you are laughing at me not being able to name the guy. enjoy that, too!

Thursday, January 23, 2014

fabric selections and a word about ds

 all strips are cut for the newest simple strips baby quilt - boy version. the three on the right end are even sewn together. i like the effect the added navy blues, turquoises, and oranges are having. there is a lot more depth and play in this quilt now.

this quilt started with some leftover strips of riley blake's superstar collection. there were the paisleys, a few solids, some dots, those large stars. the paisleys had a definite cowboy vibe to me, so i opted to aim for a subtle western theme in this quilt meant for a baby named Weston, after his great grandfather, my husband's grandfather. but i wanted to keep it modern-ish and not too cutesy.

the colors in the original strips i started with from the line were faded navy, orange, yellow, deep tan, pale grey. but i wanted to add the turquoise/deep teal stars strip in because 1) it had stars and looked mod western, 2) i liked the dimension the color added, 3) it's a favorite print right now that i love to use whenever i can (from riley blake's sasparilla collection).

 however, nothing i had in my stash helped tie the color of the sasparilla star print in with the other strips. some more navy and orange was also desired for further overall contrast. i carefully selected a few quarter yards of some denyse schmidt fabrics i found at 40% off at jo ann crafts. (if youre here from the fabriholics anonymous, my explanation follows later.) the ds fabrics had just the right vintage vibe to blend well with the western theme of the quilt. and i found one with a navy blue field (background) and turquoise dots - my perfect blender to tie in the sasparilla stars! it's also going to be my backing for the project.

here's the deal with me and denyse - i realize that she is hugely popular, almost to a cult level, among quilters, but i never see her designs as an entire line and think "i have to have that!" usually, there are one or two prints that i like, but i don't get giddy over her the way i do about a few other designers (SH, JD, HB, AMH, AB). now i realize i just committed some sort of quilter/fabric lover sacrilege with that statement, but - and there is a but here - but whenever i approach her fabrics with a specific project in mind, i almost always find the perfect print or two which really bring that project together. apparently i just like her mixed in with everything else and not as one great whole. really, she's brilliant for that in my work. (my work? like i'm some sort of professional or real artist here? ha, ha, that's funny! i'm just a girl playing with fabric for kicks.)

even after finding the great ds prints, i sort of wanted to see if i could locate one really cool retro western novelty print to slip in the mix. thus, when i was at my local scrapbook and quilt store (double deadly temptation) for some project life supplies, i looked for a cowboy print. i did find one print in just the right colors from sasparilla, but it had girls in it, too. i got a fat quarter with the intention of fussy cutting a few horses or saddles out of it. after putting all the other strips up together, though, i don't think it has the right feel for the project, so it's stashed instead. i also located four more prints that had just the right feel and colors that would round out the quilt.

 above are all the fabrics i added in: the navy with turquoise dots is for strips and backing, the pile on the left is some other prints that added the right touches of color and a bit more of a modern but western feel, and the pile on the right is my ds prints.  the two fat quarters are the pieces i culled after consideration.

the whole time i was at the cutting counter, i kept thinking, "after my public fast declaration, i'm going to have to confess to this purchase, even though it's allowable. i have to be honest about this." ugh. i am really happy with these additions to the quilt, but also feeling the guilt of making some purchases. despite the fact that i gave myself permission to buy specifically for projects in progress, i really had hoped to go the whole six months, or at least a couple of months, before spending on fabric. if i'd quit starting something new and stick to my pile of wips maybe i'd do that! what i can say for myself is that these purchases were very intentional, not in excess, and i did not get sucked in to any "gotta have" item of the moment. this is certainly more responsible than my previous purchasing habits. it's a step in the right direction, for sure.

i'm finding that as huge as my stash is, because the majority of it was impulse buying before i had actually quilted much, it has several holes in it when it comes to color, variety of style, low-volumes, and blender fabrics. it's not very useful for the way i actually quilt or how my quilting is evolving. i have a whole lot of fabric, just not a whole lot of the "right" fabrics. for this reason, it's going to take me some time to work through the stash. this is teaching me about how to purchase in a mindful way.

i guess i could have either not made this last minute baby quilt or just made it up with what i had. however, as one fellow faster said, "i'm not going to make ugly quilts just to use up what i have." ditto. i quilt because i enjoy it and i want anything i make to be enjoyable to me. especially if i'm going to gift it. i'm not going to gift a quilt i don't like just to give away a quilt. i could buy something else instead. really, the aim of fasting was to find ways to use what i had (which i did with those leftover strips here) and stop impulse buying exciting new fabrics or sale items. perhaps what i'm really doing is more akin to "fabric dieting".

also, i've realized i really prefer to work with 1/4 or 1/2 yd cuts. they are so much more manageable when it comes to cutting than anything bigger. i despise trying to square off big cuts! however, i find working with smaller cuts has improved my accuracy and my attitude about cutting, too. thus, lately i usually only purchase 1/4 or 1/2 yards, unless it's for a backing or it's a versatile or favorite print i know i will be using a whole lot.

now it's time to go sew, sew, sew those strips together and get this baby done!

Wednesday, January 22, 2014

moving on

golly, friends, if i ever needed an ego stroke, i'd just come here and share some quilting woes. you ladies have responded quite beyond expectation to my fmq disaster. that is certainly not why i shared my troubles, but it was a rather unexpected and pleasant result.

i have come to terms with the quilt catastrophe, deciding to donate it when it's completed and make a replacement. as you can see above, after the fmq-induced meltdown and past unsavory experience with spray basting, we are moving forward on the quilt and my 5 yr old, d4, has her quilting job back. both of us are happy.

(by the way, don't all of you allow trikes in the house? especially pink ones? i'd never considered it before this house, but it's an advantage of tile floors and large central hallways. especially in the summer heat.)

after reading all the comments, there were a few things i thought i should make clear about my fmq woes:
  1. i did not like the way the dense quilting was changing the look of the quilt even before it got ugly. the replacement will be straightlined to maintain the look i wanted.
  2. i was happy with the wishbone quilting in the white strips and most of the other quilting in the patterned strips was acceptable, albeit not very good.
  3. the only part i was considering unpicking was the wandering wave/horrid diamonds in the pink strip. by no means was i going to unpick the whole quilt or even half of it.
  4. another reason i was distressed was that in addition to the lovely lottie da fabrics, i had used a few scraps of out-of-print fabrics that had sentimental value and connection to the recipient. also, you may have noticed i used some of my all-time favorite fabric (meadowdot in robin's egg/mint) in the quilt. i was sick over the waste of such precious prints. fortunately, i think i have enough scraps remaining to work into the replacement quilt.
alright, that's all i'm going to say about this until it's complete or i get the replacement done.

this is what i'm up to now:

yes, another newfo! i just got an invitation to a cousin-in-law's baby shower this weekend, so suddenly i need another baby quilt in a week. there is no fear of fmq disasters this time around. it will definitely be straightlined. goodness, my family needs to slow down on babies! i'm already behind by about 4 quilts just from the last 4 months and i can't get anything else done with all the baby quilts i keep "needing". there was another cousin that just had a baby last week but somehow i didn't get the shower invite, which was sad. but i was relieved to know i'd also missed the stress of trying to complete another pronto quilt.

this quilt is another simple strips quilt that started with my leftover jelly roll strips from riley blake's superstar that i used in s2's quilt, "bandwidth". it was feeling very flat on it's own, so i added three bits from my stash. this perked things up, but when all stash options, which are decidedly feminine and floral, ran out, it still needed something. hence a quick browse at some on sale fabrics while at jo ann for something entirely different. (this is completely legal under the terms of my personal clauses in my fabric fast, but it still feels disappointing that i made a purchase - even if it was only a few quarter yards.)

while i was quilting this afternoon, some other fun stuff was going on around the house:

 sister hair brushing time. that long strawberry blonde hair is irresistible to brush! (and, yes, the nice room is still wip central.)

the toddler played her new favorite game "cold feet" with me, covering mama's feet with some paper napkins to warm them up. lately, she gets out my scrap basket and says, "feet cold, feet coooold!" then proceeds to wrap her feet in scraps. today she decided mama's feet needed help.

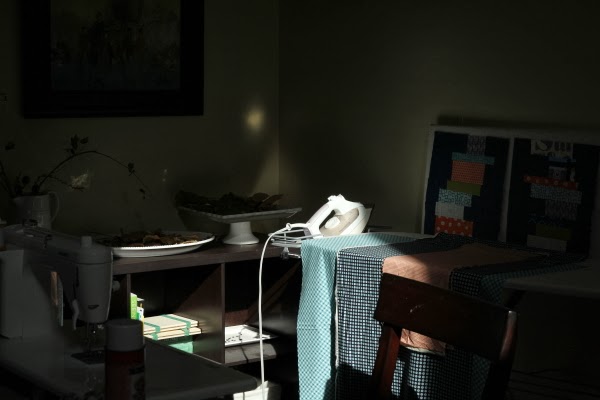
as the late afternoon sunlight moved across the dining sewing room, it highlighted my iron and lit up the yellow walls in the loveliest way. i tried catching the effect, to no avail.

 the extremes in exposure left me with either a well-exposed iron and dark room . . .

or well-exposed room and washed out iron. oh, well. i have the warm fuzzy image in my mind if not in pixels. at least these will remind me of the experience.

WIP Wednesday at Freshly Pieced My Quilt Infatuation

Monday, January 20, 2014

in a hurry = failed

 what do you do with a messed up quilt you were going to gift - donate it? that seems wrong somehow. if it's not good enough for me to gift, why would i donate it? that's just another form of gifting. but maybe if i pick my cause carefully, whoever receives a donated quilt will be a child who might not notice some really bad fmq. that's my thinking.

two weeks ago, i made a very pretty baby quilt top, that i was supposed to hand deliver while in florida last monday. i was sorely in love with the top, which was a very special quilt for a very special mother and baby (story later). those lottie da fabrics were simply scrumptious, absolutely dreamy to work with. do you ever have that experience - while cutting and sewing the fabrics you find yourself getting lost in the colors, cooing over the designs, smiling in a sappy way, thinking, "this is delicious!" it feels like eating dessert as you work . . . but it's fabric. yes, heather has done it again for me. lottie is that good! i was 100% happy with the top, which i completed by wednesday of the designated week i had for making it.

however, i completely ruined the top with some horrid fmq. and i do mean horrid. there is no one on the planet who can talk me out of that opinion. it still looked horrid the next day, although i admit not quite so completely, terribly horrid after a week away from it.

i was going to just straight-line the darling, but decided to do some wishbone quilting in the white strips. if i'd stopped there, i'd have been fine. alas, i did not stop there. somehow i reluctantly convinced myself there needed to be patterns in the colored strips, too. and that they should each be varied.

***disclaimer#1 - all the remaining photos are purposefully underexposed (dark) because i still haven't figured out how to get fmq to show up against white or patterns in a photograph.

***disclaimer#2 - i know that the photos don't show how really bad the quilting is. you're going to have to trust me. normally, i'm not that picky. i say leave it unless you absolutely can't live with the mess. this is one of those messes. truly, it's that bad! perhaps if it wasn't such a special quilt, i could have lived with it.

 my fmq skills consist of stipple, some if-y straight lining, and the wishbone. well, i was on a deadline and didn't want to practice first. couldn't, really. my over-confidence with my stippling went to my head and i decided it couldn't be that hard to just come up with some swirly, twirly, loopy designs as i went along. i didn't even bother to reference any of the 3 or 4 excellent books i own for ideas. nope. i just bulldozed ahead. the wishbones in the white sections went well enough. i'm getting pretty good with them. it was the improvised colored sections where i everything fell apart.

making well-curved, pretty loops and swirls is not as easy as i thought it would be. it's not just about doubling back on your stippling. and i ran out of ideas fast. the two spots where i knew i had made an irreversible mess were the pink strip below and the scrolls/swirls:


 on the pink, i started by just following the dots between the scroll bits, making a sort of zigzaggy pattern. this was okay until the pattern started shifting across the strip, which wasn't noticeable until i outlined it. about 2/3rds the way down, i flipped sides i was tracing, and tried to join up the two sections with going completely around three scrolls. this only resulted in some very poorly executed diamonds and one great big mess. this whole strip either needs to be unpicked or . . . i don't even know. there really isn't an option here. unpicking is required. painstaking unpicking for hours, i'm sure.

those scrolls/swirls in the other section above the pink are just plain ugly. they aren't even close to well shaped, consistent, or smooth. lumps everywhere, malformed points and curves. i'm sure even most men would notice. (men that don't quilt, of course. no offense to our stichin' brethren out there.)

so, here i am, with a failed quilt, humbled quilting self-confidence, hours of unpicking ahead of me, and most of my fabrics gone, while i'm fabric fasting, of course. dear liz got me out of the last conundrum. whilst i was crying across the oceans to her via email, she sent me this consolation, "Ps - of course you can get more lottie da. it's not new fabric, because it's like an insurance claim and merely replacing what you had :-)" my conscience has been soothed and replacements ordered. technically, this doesn't go against my personal clauses for the fast. but i was hoping to make it more than 20 days in before finding a "need" to purchase.

also, i had no quilt to deliver to my friend. being something of an idealist, i had it all worked out that it was simply perfect for me to take the completed quilt with me to florida and get pictures with lucy and the baby, too. letting go of that was hard. i was a bit of an emotional quilting wreck last saturday as i ran out of time before departure. liz and my mr helped me get over myself and put it all in perspective. i spent time with my kids instead of making corrections, left for my business vacation with a soothed conscience, and enjoyed it all despite the mess i'd created. turns out i couldn't meet up with lucy anyway, so now i can remake the quilt to perfection and mail it to her.

thank you, liz, for the shoulder to cry on and perfect blend of empathy and snap-out-of-it sound advice. quilting friends are the best! maybe when i get the replacement made i'll be able to guest post on your 10 super simple baby quilt series.

Saturday, January 11, 2014

"in hand" epp link party #4

this is my epp work for the month. pretty slim. but every time i pick up this project, i fall in love with it all over again and want to do nothing else. however, i have half a dozen or more wips that really need to get out of the way, so epp takes a backseat unless i can't work on anything else.

this sunday, i had a sick baby or two at home during church hours. so i listened to some talks (sermons) from my church's most recent general conference and worked at my epp. i got some form of churchin' done and almost two wheels, too. (there are two wheels because i had started each separately already. i keep more than one "on the go" box, thus the two different pieces.)

this time i approached my project a bit differently. usually, i lay out a wheel and then stitch it together. for a change up, i experimented with just selecting the next piece as i went along to see if it affects the look any. so far, it doesn't' feel any different.

what process do you use when putting together your pieces? do you layout first or make it up as you go?

and here's another question, posed by heidi of red letter quilts last month: how many stitches do you use per inch?

when i began epp this summer, i was stitching so close together that my whipstitching was resembling a satin stitch. a bit too much. there were times when i counted 60 stitches per side, which is 1.5" long. that's about 40 stitches per inch! at least i know those pieces aren't coming apart, right?

well, i've relaxed some since then. my average is more like 30 to 45 per side, or 20 to 30 stitches per inch. that's still a lot, from what i gather. maybe if i could let up some more, my project might go faster, right?

enough about me, let's look at what our party people are up to. here are some highlights from last month's link up:

karen at pieces of contentment shared her process for selecting the background colors for her stunning diamond stars project. i have quite enjoyed watching this lovely work come together.

heather at based on a true story shared her version of the ever-popular hexie flower pattern. she was also looking for some swap partners for her hexie swap.

ivani from arte em casa, all the way from brazil, linked up her tutorial for making a star ornament. there are so many pictures that even if you don't read portuguese, you can still follow along! her method is probably adaptable to a variety of epp shapes. if you get started now, you can have a tree full for next year. or lots of gifts made.