Saturday, March 23, 2013

soho, purl and makie

 the mr. and i took an 18th anniversary trip early this month to nyc. we've been there once before, nearly 15 years ago when i was 6 months pregnant with our first. we went on a whim for 2 nights with no real idea what we were doing. that was a fun trip and opened my eyes to why everyone loved new york so much, an affinity i could never fathom until i'd been there.

fast forward to this trip and we had lots and lots of ideas of what to do. one of my secret wishes was to visit purl soho in real life. i've ordered from them once or twice and dreamed of browsing through in person, but knew better than to suggest we spend any of our precious trip time in a fabric shop. especially since i didn't think we'd be anywhere close to it on our planned travels.

however, when the mr. said he wanted to check out soho's ironwork district and find lunch there, i saw my opportunity. "do you think maybe, if we happen by it, i could pop into this shop i've always wanted to see?" he actually said yes! when we exited the subway in soho, i googled purl and it was .3 miles away. after lunch (and a lot of reorienting ourselves with our phone maps) we managed to find purl.
as the name would indicate, it's primarily a knitting shop. however, they do have a selection of fabrics (wool felts, linens, liberty of london, organic and imported cottons, etc) that is nothing like what's available to me locally on the almost-west coast.
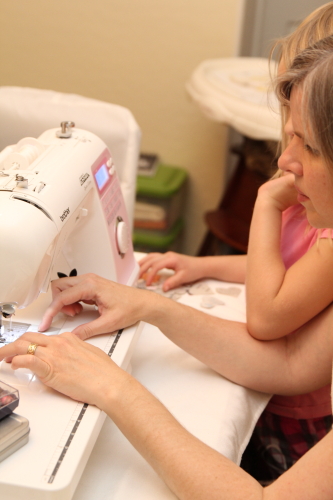
i am not, nor will i ever be, a knitter. but their cute little gal sitting at the counter by the door spinning yarn and their mouthwatering selection did sorely tempt me. even the mr. saw a sample or two that he deemed, "cute - very cute, actually," almost in a "why don't you make one of these?" way. he was such a good sport that he took the camera from me and unasked, photographed me in the shop.
oh, yes, i was walking around with that sappy smile on my face. these are totally candid shots he took. what a sweetheart! after taking a few snaps of me, he said he was going to check out the place next door. i was alone and free at last! no hubby hanging over my shoulder questioning what i might pick up or purchase. 

 i thought about how much daughter#1 would have loved these hand puppet kits, but at $18 a kit, i knew she could just as well make up her own original softie, probably even just by looking at the photos.
 box of shiny flosses and some lovely mixed-color mettzler threads unlike any i'd seen before.


there were even a few quilt samples on the wall. purl offers classes by the likes of heather ross and denyse schmidt. maybe next time we go (the mr. wants to make it an annual trip now) i can arrange for a class. that would be dreamy.

this basket of vintage-looking offerings caught my eye. i thought they must be finds from old linens. but when i turned one over, i thought, "of course!" liberty of london 1/2 yards. just gorgeous and soooo many choices. i selected only 3, due to the cost, then kept browsing. my picks: mirabelle f, poppy and daisy j, 
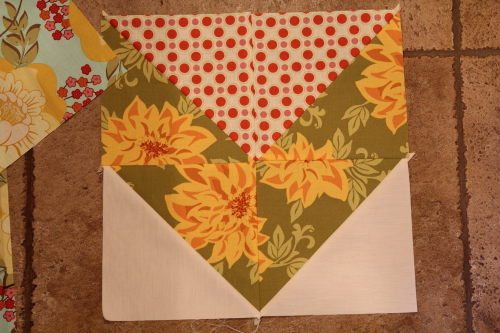
betsey a. i'd been inspired by some adorable softies i'd seen in another soho window while hunting down lunch and thought these might be perfect for softie bits.

 next i spied the scrap bags - another perfect softie find. i really loved that blue bag on the left, but decided on the reds because it had some neutrals in it that would make good softie faces or limbs. i was looking at that bag of oranges and yellows in the front when my mr. walked back in, completely surprising and flustering me. i'm not sure i meant to buy both scrap bags, but i was unnerved at seeing him again so soon. he'd been gone all of 5 minutes and i already had an armload of fabric. he was bored and i needed to get moving, so i made my way to the front to pay before he could object or look too closely at what i was holding. unfortunately, he also walked up to the register with me and heard the total. i had to remind him that i hadn't even hinted at wanting anything at tiffany's the day before and that i really would prefer fabric from soho. he got over it quickly enough.

a parting shot from purl: an adorable baby cardigan. sigh. oh, speaking of babies, the one other fabric purchase i made was a set of organic cotton 1/2yrds to make either a quilt or 4sq for the baby we're hoping to expect soon. i didn't photograph it yet: browns, ginghams, elephants, linens. baby but very soho.

the other shop i mentioned stumbling upon as we tried to get our bearings while searching for lunch was this tiny gem:
just an itty bitty storefront window display and a white door. but the dangling softies were what caught my eye. i am still a sucker for softies and these were as handmade charming as they come.
i was stopped dead in my tracks. the mr. was half a block ahead and turning the corner before he realized i wasn't keeping pace.
looking down below the softies, there were some lovely fresh flowers and a small but sophisticated selection of handmade baby items. the whole scene just oozed newborn softness and elegance.

 the bunny lady was my favorite. i think she might have liberty ears. see why i was inspired by those 1/2yds and scrap bags? i neither wanted to or needed to spend $85 for a softie when i could make my own souvenir from soho.

 the mr. backtracked to me and admired the 100% cotton fur booties while i drooled over the silver polka dotted bib. he offered to go inside but i knew that was pointless. i'd fall in love with some $100+ baby item and want it for our daughter. better just to dream from the window and photograph.

i stepped back to see the name of the boutique, then searched the front over a minute before finding this one small hint hanging from twine in the door window:
MAKIE. and nothing else but the address and website. oh, yes, a website. so now you can browse and drool, too. without hopping a plane to soho or even leaving your home screen. enjoy!

Friday, March 22, 2013

wip and a garden's back paths

 it's not wip wednesday, but i didn't complete anything new before wednesday, so wip comes on friday this week. on thursday, after getting a few morning necessities done with the kids, i bundled myself off to sew at ETC's open lab. in the four hours i was there, i managed to complete my back for "garden path," which is what i think i will call this one since it's so garden-y and looks like paths and directions in the design. "romance in the garden" is a bit too long.

anywho, the back is done now. taking almost 4 hours to complete was a bit irksome for such a simple-looking item, but there was a lot, a lot, a lot of pressing involved with those huge pieces of fabric and then some tricky cutting to get them squared. for some reason, the strawberry piece was super wrinkled (and is still rather, even after all the pressing).

originally, i planned on using the same 3 sashing strips from the front when piecing the two large aqua floral sections together, but then i realized one of the strips was the same as one of the large blocks (the strawberry). looking at the limited amount of choices i happened to have with me in the project box, i picked the snowflake print as a sashing instead.

my next improv came when i realized the strip of daisy fabric was 1/4" shorter than the quilt front, not leaving any room for shifting or slight shrinking when quilting the darn thing. maybe it would have been okay, but since the top has no outer border with the design carrying right up to the edge, i really needed the extra few inches. i did not want to have to shorten either the top or bottom if the back did come out smaller after quilting. so i decided to add three more strips of sashing in to lengthen the daisy panel.

once again, my choices were limited to what i had on hand. and i was running out of patience, wanting to be done. i just rummaged through the cut strips i already had. i used two of the prints from the vertical sashings: snowflake and butterfly. fortunately, the butterfly strip was cut on the correct horizontal orientation. unfortunately, it was going to be slightly short. so i pieced on a few inches to be safe. again, unfortunately, i added the piece to the wrong side. i put it on the right, where it is more obvious rather than on the left, where it would have been either swallowed up in the binding or virtually invisible. oh, well. another lesson learned, i guess.
i had a few bits of the large rose floral from the front that i wanted to incorporate. they were not as wide as the other sashings were, but i didn't care. i had to piece again and am pretty pleased with how closely i made the print match up (see above). i got it almost exactly dead on the very first time with only a little sloppy guess work!

in general, this quilt has been very fun to work on. and looking at the top right now, i have some ideas brewing for a similar but altered design of my own. those big 1/2 triangle chevrons were pretty easy to do. i happen to have a large stash of fabric that needs to be worked through, too.

wip report since last month's
completed: none

in progress:
"garden paths" - back completed
"limb" - finished more binding while in UT with my siblings last month, waiting on last 1/4 section of binding
"taite" - untouched, waiting on re-sandwiching
"twirl" - untouched, waiting on top to be fixed
baby quilt - untouched, needs binding completed

internet purchases: painful to admit, but i did buy some stuff!
quilted castle - some jennifer paganelli for upcoming class next month; stocked up on what's left of my favorite meadowsweet before it's gone; some EOB clearance of it's a hoot, ecole, odyssea, wonderland; and broke down and purchased sale stock of northcote range, jelly and backing.
fabric.com - some clearance jennifer paganelli (for that class) and amy butler i couldn't resist.

trips to the store:
purl soho while i was in NYC two weeks ago
one visit to ETC, just for open lab. no purchases!

Wednesday, February 20, 2013

wip and some sunspots

funny that this photo has sunspots on the quilt because it has been raining all day long. i must have got the few moments of sun coming through the window. my big accomplishment this week is getting the top done on my chevron quilt. but still no name. maybe "romance in the garden" because that is the name of the event my mr. and i went to after the class and it is very floral, after all. hmm. i'll think on it. it's so summery and picnic-y looking with the butterflies, daisies, sunflowers, and strawberries.

man, this was a mess coming together! despite the fact that i had the whole thing laid out on the floor, i kept sewing the wrong sashing and panels in the incorrect places. i had to unpick sections no less than 5 times. it was awful. but i just plowed through and now it is waiting for sandwiching. yay! it really was amazingly fast, completed in one weekend, under 10 hours.

the fabrics continue to make me smile giddily whenever i look at it.

weeks report:

completed: none

in process:
new top from shabby seams class started and finished
"limb" -  another 1/4 section of binding finished during park & art time tuesday
"taite" - waiting on quilting
doll quilts - waiting on quilting
"twirl/spinning out of control" - waiting for top to be unpicked and fixed (and an official name)
6 and 1/2 dozen baby quilt - needs binding tacked down

trips to the store: one, for shabby seams class. only purchased 1/2 yard of snow fabric because i forgot mine at home. dang! i own a whole bolt of that stuff for a reason.

in the que: a whole lotta stuffes

3 ways to use heart strings

a better look at our valentine heart strings decor:


i first saw this idea at "under the sycamore" from ashleyann campbell. she got it from dottie angel's tutorial. isn't internet sharing lovely?!

i modified it a bit by using a large heart punch (and a few smalls thrown in for variety). i did this to simplify the process so the kids could participate. also, i didn't back any of the book paper with patterned paper, i just did them separately. my kids really loved the designs so they did a lot more patterned paper than i had originally planned. what, kids change my idea? never!

i had a lot of fun placing the hearts over certain bits of text to highlight it or using the decorative chapter heading flourishes.


i showed the kiddos how to line up the hearts and conserve paper by punching upside down so they could see what they were doing. it kept them entertained for a good stretch. each one of them got to punch and pick out their own paper to their little heart's content. their string lengths reflected their enthusiasm for the project.

hint: when punching through book paper i found it easier to punch through 2 or 3 sheets at a time. it gave more body to the paper and was less likely to malfunction. that was a good find since it also sped up the process.

the little ones got to participate by putting the hearts in place while i ran the presser foot at a medium speed.

it was a fun co-activity. you get to be close while doing this, too. be prepared to snuggle and have some breathing going down your neck or in your ear while tandem stringing.


i also made some strings to hang from the dining room chandelier.
i secured them with a bit of pink striped washi tape.

my strings looked lovely and festive hanging over our candy centerpieces at my annual valentine's sweetheart dinner i throw for the kids each year.

i was so involved with preparations this year that i didn't get around to fixing myself up for the dinner, but i did put on one of my sunday hostess aprons, which helped my appearance while serving up pasta.

another use for these heart strings - i made several feet (forgot to measure how many) for part of my sister's bridal shower present. the shower theme was to bring props for romantic dates for the newlyweds. i figure these can help her set the mood over a dinner or in the bedroom or where ever. all she'll have to do is cut to desired length and hang. presto - instant romance. i wrapped the garland around a piece of chipboard for packaging to gift it. i think i'll store the ones we made this year this way also. it's a project i'll want to do again next year, but having some already made will allow me to get even more hung.

Sunday, February 17, 2013

shabby seams class

ETC has this great class series taught by jenny packard that's called shabby seams. it's a 6 hour class taught on one saturday, covering a simple-to-do quilt with a vintage vibe and usually some raw, shabby seams, of course. i took it for the first time in december as a pre-holiday break for myself. it went so well and i liked the concept so much (despite coming down with the flu that day and not finishing) that i signed up for the class this month, too.
like last time, i decided i wanted the quilt to be larger than the pattern made, so i sat down to do some math and figure out where to put in the extra length and width. i keep a notebook where i sketch out and doodle about all the quilts i work on (above, left). it's the perfect place to do my calculations. i tried out two different ideas: adding in sashing between the large blocks/panels or adding another chevron to the length and width. adding the chevrons complicated it too much, so i went with sashings. since i wanted to add in 9" to the width but didn't want that thick a sashing, i opted to use 3 - 3" strips instead. then i also added in 3" sashings between the horizontal rows for an additional 12" of length. my 48x60 quilt would now be 57x72. much better.
 
 for this quilt, i did something totally original: i shopped from my stash for fabric! i pulled two different groups of fabrics to choose from and went with a mix of sandi henderson loveliness (above). it's a draw between her and heather bailey for my favorite designs, definitely. they were the first designer fabrics i bought when i started my sewing journey and i am still totally in love with them both.

last time i took the class, i found it key to get the pattern before class and do as much cutting as possible at home. unfortunately, this time i was unable to do that, so i spent a lot of class time cutting. ugh. but i am getting better at it, so i shouldn't complain too much. i know if i'd done the cutting first, i would have completed the top that day. it really was simple.
my squares all laid out, ready to go


one thing that really appealed to me about the quilt jenny chose this time was that it used half-square triangles, a completely new and daunting skill for me, one that'd i'd been interested in learning. i have read countless times how touchy/stretchy they can be due to the bias cut. jenny showed us a technique that made them so much easier to work with than i expected.
 
the chevrons were made from the triangles being turned and paired up. since i needed two of each pairing, jenny showed us to simply put the two squares, right sides together, and draw a line diagonally from corner to corner.
it's really hard to see, but i then sewed 1/4" from each side of the line and cut down the line when i was through. press open and voila! two sets of blocks with perfect half-sq triangles.
 
when putting the rows together and creating the chevrons, i didn't pin at the intersections like i should have because even pinning doesn't seem to make it work for me. totally hit or miss. but then i got the ugly points above (see the not-matching point of paisley fabric on the left?) and decided to give pinning another try. Linda, an expert quilter, gave me a few pointers on getting the pinning right and i tried again.
 
what do you know, it worked!
 
much prettier.
 
i thought i didn't care so much about not matching my points. but seeing them matched made me so much happier.
 
cutting all my sashing strips took a long time, partially due to cutting the wrong width twice (argh!) and also wanting my butterflies to be directionally correct in the two different orrientations. so i wasn't able to finish the top before i had to leave. i had a hot valentine's date with my mr. and there just wasn't any time. i rushed at the end and started making mistakes (can you tell what i did?) and that's when i just stopped. but i'm loving what i have so far. and now the baby has a new colorful playmat on the dining room floor.

one thing i like about classes where we all work with the same pattern is seeing everyone else's fabric choices and how they play out with the design to create such different and distinctive quilts.  here's a look at other students' work:

Lydia was the first to get her chevrons laid out. her black one gave such a nice pop to her colors. so much good contrast going on here.

sue had these pretty, soft pastel vintage fabrics - very gentle

linda, the expert, who made 12 quilts while here visiting from canada for the winter months, liked my idea of adding sashing and asked to use my calculations to get more fabric. yikes! that was intimidating. it's one thing to mess up myself but if i had added wrong and threw her off, that was entirely different. fortunately, i was right and we both were okay. she decided to make sure all her fabrics were directionally matched in her chevrons and had quite a puzzle to figure out once she started piecing.

amy was the first one done with her large panel and even got her quilt sandwiched by the end of class. lucky girl.
 
thanks jenny for the class! and thanks sandi, for the wonderful prettiness to work with. it makes me so happy just looking at it.

Wednesday, February 13, 2013

wip and some improv

in order to have some practice free-motion stipple quilting before i tackle "taite" i used some leftover jelly strips (2.5" x width of fabric/42") to improv piece a doll quilt. but the strips i had turned out to be more than enough for one doll quilt and i ended up with two tops instead. score! i have been documenting the process of putting these together and will share what i did later. for now, these are the two tops pictured above. and interestingly, when i climbed on a chair to snap these shots, i think i got some inspiration for a new quilt design looking at them from a fresh perspective.

report for the week:
completed - none

started -
doll quilts
gathered fabrics for a class i'm taking saturday

in progress -
"limb" - another 1/4 stretch of binding bound while at the park on tuesday
"taite" - trimmed off excess hanging pieces on backing, got back ok'ed by daughter #2, still needs to be repinned
"6 & half dozen" baby quilt - still needs to be bound
"spinning out of control" - nada; waiting for top to be fixed, backing to be pieced, etc

purchases - NO new product, but . . .
two quilt classes: shabby seams this weekend, beginner chevron quilt in april (half sq triangles, here i come!) this should actually help me dig into my stash which is why i'm doing it

trips to the store - one to sign up for the classes. i was already on that side of town after a pediatric visit with the baby. taking her in there without a stroller was pretty wild! but we survived.

in the que - blah, blah, blah about 20 projects

between several family birthdays (the mr.'s 40th coming up!), a wedding, spring break, our anniversary and whatnot, i'm about to go into hyperdrive life mode. there will be very little sewing past the class this saturday. i hope to get back to this stuff come mid-march. until then, squeezing in what i can and living my life!

Thursday, February 7, 2013

overdue wips

i've done more work than i've posted this winter. can't seem to both sew and blog about it. the sewing part definitely comes first. so here's my update on works in progress.

under construction:
i sewed the binding on "out on a limb" in the fall then didn't get around to working on the hand binding part until this week. our lovely desert winter weather is here again and i'm taking the little girls to the park while the older four go to art on tuesday mornings. i sat and sewed for over an hour while they explored nature. bliss.

but even without the binding completed this quilt has been on my family room couch and in use for months. it's been holding up just fine. i kind of liked the shabby look of all the strings on it. however, i am also giddy to see the binding neatened up as it gets completed, too. love this quilt and can't stop looking at it as i marvel that it's all my design, 100%!

my 6 and 1/2 dozen baby quilt is in the same condition as "limb" - binding machine sewn on one side but not tacked down on the other. still in use for the baby. she cuddles it sometimes, which warms my heart so much.

"taite" is sandwiched, but needs some repinning at the least, maybe an adjustment/fabric change to one section of the back. i'm not feeling it the way it is. but with it so close to completion i can let it rest for a while while i ruminate.

i've been making these easy and cute heart string garlands with the kids to decorate for valentine's this week. more on that later.

i don't even remember what else i post for stats on wip wednesdays!

completed: none

in the wings: my unnamed shabby class spinner quilt, all that other stuff i wanted to make and bought for ages ago

trips to the store: only one this whole month and that was to ETC just to work in open lab. didn't buy or even look at fabric. (but i did get a few scrapbook supplies for PL2013).

think that does me. i'm re-emerging from the scrapbook world i was lost in all january. trying to fit in some of both in my life because i really do like both so very much.

quilting vs. scrapbooking

i spent a lot of time over Christmas break working on "taite." it's been on my dining room floor awaiting sandwiching ever since. good thing i haven't had any fancy parties planned lately. (like for the last 10 years.) despite the fact that i had it blocked off, just about every niece or nephew that came over to our house in the last month decided to stand on it anyway. and my littlest lady was beginning to think it was her personal playmat. she wouldn't stay off it. but i left it there because i didn't want to have to press all those darn seams again and so i would be motivated to get it done. that just wasn't happening, however. partly because i got really into this:
project life 2013! i did a very basic version of project life last year and am stepping it up this year by using the studio calico project life monthly subscription kit combined with the "seafoam" core kit from becky higgins. love it! this is such a great approach to scrapbooking/recording your life. can't recommend it enough. heck, it even looks a bit like a quilt with all those pockets, squares, and grids. but i've been absorbed in getting this album going and finishing off the two from last year (family and baby's first year). and that got me scrapbooking other stuff, too. so i've been spending my hobby time with paper rather than fabric. this was thoroughly enjoyable for me and so much quicker than quilting. i was ready to just chuck all the fabric because sewing is so time consuming. but then i look at all those projects i am itching to complete , as well as the huge stash i've invested heavily in, and my heart melts. besides, we really are enjoying wrapping up in the few quilts we have this winter and i look forward to everyone having their own.

however, that quilt top was getting dirty. so i made plans to get it off the floor. the only way that was going to happen was going to the store to quilt in open lab time without any distractions. which is what i did today. i also had high hopes of reworking that new quilt top and maybe getting it backed and/or sandwiched, too. that didn't happen but i did get the back completed on "taite", pressed the whole top again, and sandwiched the darn thing. getting sooooo close!
there were only a handful of ladies there today so i spread out over half the classroom. i had my tops laid out relaxing on two tables, my backing on the floor, and my gear all over another table. (partially pictured above). it was awesome.
me in the middle of the mess, looking a mess. i was there from 10:30 to 5:30. really, i should have got more done, but i was having technical difficulties. my machine was going all funky on tension and the bobbin stitching. several times i had to get help from the friendly ETC staff who know the machine i have well, since they sell it in the store. yikes! it was getting frustrating having to change needles and rethread stuff and unpick constantly. i definitely need to service my machine, but since i had set the day aside i did NOT want to give up and go home. i just kept pleading with it to last the day out. which it did, thank goodness!

i was feeling pretty giddy by the time that back was done and taped to the tables. my backing was not squared off, with several different lengths of fabric on the ends but i thought it would be best to just square up after quilting. i might have been wrong about this. despite spending a lot of time carefully smoothing out fabric and the batting, and after taking an hour to pin the darling,
it was all wrinkly on the bottom. this makes for ucky quilting. not good. i was soooo disappointed and a bit discouraged. this is starting to be standard operating procedure for me whenever i do a project, though:a few steps forward and a major problem stepping me back. just when i think i'm gettin' going, i come to a detour or screeching halt.

my word, just look at all those pins!  almost 200. i can't even describe how painstaking and tedious that was. now it all has to come out. someone play the violin for me, please. well, on the brighter side, i am that much closer to getting it done. i love how it feels to have a quilt sandwiched because you can finally see the almost finished version of the product. so exciting! even if i have to do that part all over again.
this is an aerial shot of the backing. all that white stuff on the left is the batting. my daughter picked that loud and luscious yellow paisley as her main fabric. i included the green floral strip to bring out the cool colors from the top but i'm not sure it's balanced well enough by the pink primrose tile on the opposite side.
i like to echo elements from the front on my pieced backings so i used the white sashing strips and leftover mini squares. but i'm thinking that green may be too strong. well, since i have to unpin it and do over anyway, it may give me a chance to do something else instead.
 
the mini squares show up nicely against the green and pink strips but kind of blend right in to the busy yellow piece.

i now feel like i can give myself permission to make a small doll quilt with some leftovers from "limb" so i have a practice piece for stippling because i am still mostly decided to stipple this but want some experience with it first. this quilt has been almost two years in the making. i do think i will be able to pull it off by daughter #2's birthday this year. she will be so excited.