

i have always loved a pieced backing on a quilt. it's one more place to have a little fun with fabric and even an opportunity to play with a more modern, large-scale, improv-pieced scheme than i would normally go for on a quilt top. if you have a beloved fabric you want to feature in a large panel, the back is the perfect place to do so. unless i'm making a baby quilt, i always make a pieced backing. even on my very first quilt, i made a pieced backing. i didn't know much about quilting at all, but i knew i liked pieced backings. so my first backing, for "at last" was a four panel piece which echoed the block pattern used on the front. i remember carefully selecting the four fabrics so the colors and shapes best represented my ideas for the front. it just might be the best part of that quilt. it's definitely one thing i did right when i was struggling with so many aspects of launching a first quilt.

"taite" uses large panels of fabrics from the front interspersed with leftover chain-pieced block strips wherever seams were needed in the panels. my daughter chose the main panel and i chose the two side fabrics. the fabric selections also reflect the pattern i used on the front. this was another backing i carefully designed with the design elements of the front in mind, and also to use up leftover pieces.
not all of my tops are so carefully laid out and designed. there are also those that are improvised and less structured.

a pieced backing can make a great home for leftover or bungled blocks or yardage that were originally for the top. when i made "twirly" i accidentally cut the large fabric panels too short, so they went on the back. because they were oddly sized, i joined them with leftover border blocks in the seam. i also had a few extra blocks and more leftover border strips that went into the back, too. the rest was made up of excess fabrics not used in the blocks. since i usually buy generously for the fabric requirements, i always have leftovers to play with on a backing. in fact, this is one reason i over buy.
knowing i can use pieces on the back makes it less stressful when something doesn't work out or gets miscut. i'll just use it to make the back more interesting. this makes the "what do i do with this now?!" problem solved and i grieve mistakes less, too.
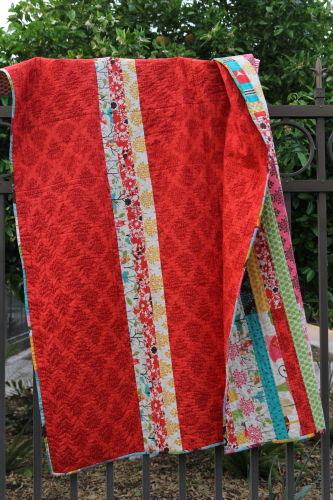
sure, you can always make a backing inexpensively out of a plain muslin or you can sew one or two seams in the same fabric to make one great big piece. but i like to have fun with the back. also, i don't like to pattern match and mismatched patterns bother me. so even if i do use large pieces of fabric for the back, i will put at least a small strip of something in between the panels. my all-time favorite backing is on my "out on a limb" quilt. it's just three 2.5" wide strips sewn together and placed in between two large vertical fabric panels of the same fabric, but i really, really love this one - as much as the front, maybe more. a pieced backing doesn't have to be complicated at all to be effective.
some other quilters that come to mind when i think of pieced backings are elizabeth hartman of oh, frannson! (especially in her book the practical guide to patchwork), kelly of my quilt infatuation, and rachel hauser of stitched in color (like here and here).
in my experience, a pieced backing can be either a planned design to compliment the front or a place to use up leftovers from the front. or maybe sometimes something in between. as i got ready to make my backing for my latest quilt, "dreaming easy" i decided to document the process in case anyone was interested in trying their hand at a pieced backing but didn't really know where to start.


now i have two large panels and i'll just need to make a strip to put between them in order to use up those charm squares. the top was composed of blocks that included hsts and i could have made some out of the charm squares to echo the design on the front, but i chose a simpler route.


that ends the tour of piecing a backing splish splash stash style. i hope you found it informative, interesting, or at least entertaining. or maybe you just like looking at the pretty fabrics. that's alright by me.
linking up with kelly at my quilt infatuation's needle and thread thursday.
Informative and inspiring! Love your faric choices.
ReplyDelete