Tuesday, April 30, 2019

moving up upgrades


i've been rearranging and organizing in my sewing room. it's still a complete hodge podge of a space, with a lot of mismatched furnishings, but it's getting cleaner and more functional.

by the look of the two shelves nearly full and the stack on the floor i still have to refold and shelve, i'd say heather bailey wins around here. soooo many good prints in these collections! it just makes me happy to sit with them, admire the colors and patterns, and dream.


in the in-process photo above you can see that i also made a place for a full design wall behind my machine. of course it's already full with wips, but i'm really happy it's there and not falling off of something else anymore.

what brought on the big rearrange and resulting cleanse (because i actually have been culling!), was a few more bookcases becoming available from other rooms in the house. there used to be 6 assorted white bookcases in my master bedroom, which we recently remodeled. we put a few in here a while ago, and after installing more built-ins in other parts of the house, there were 2 more available for the sewing room. only i didn't have the wall or floorspace for them.


i decided to look up instead! after measuring, i found out the shelves were exactly tall enough to stack to the ceiling as long as we gave them a few inches away from the wall to clear the moldings. i got my sons and an almost-son to help me out - they heaved and i directed.


it was a bit scary, but it worked! and i'm pretty chuffed about having fabric to the ceiling. i've been able to get almost everything out of boxes and on a shelf. yes, i have to climb a ladder to access what's at the top, but i don't mind that a bit. it's much better to have everything out and visible.

i've come across all sorts of things since i began shuffling the room around. for instance, this stack of fabric and some already cut pieces that i clearly had a plan for. but i can't remember what it was going to be! darn it.

i should always, always make notes for myself!

i was just going to throw everything up on a shelf, but that wasn't working too well, so i began folding things so they fit nicely. it's taking time, but i like this much better. i'm also sorting and culling as i go, and rediscovering lost items. i've come to the conclusion that a large fabric hoard is a lot of work and was a bad idea. but i'm doing my best to work with it and find a new home or a plan for everything. i've already given a suitcase full to a pair of little girls who were thrilled to get their own stash, and i have several more boxes of items i'm donating to the local guild.

i just remind myself that all this purchasing at least taught me some things. it was an expensive lesson but no use beating myself up about that now. i love mari kondo's thought that everything we've acquired has a purpose, and sometimes that purpose was to fulfill a need at the time or to teach us something. we don't necessarily have to use it as it was intended for it to have been useful to us, and now we can let it go.

moving forward from here.
and up.
up to the ceiling!

Thursday, April 4, 2019

Backing


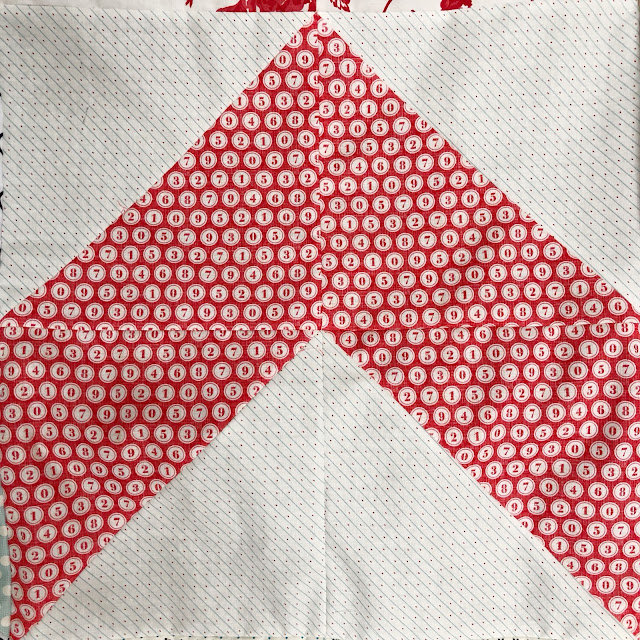
Back in February, just before I went to Quiltcon (what?! Yes, I did!) I got the backing made for Maude’s Chevron Peaks quilt. I used some prints I really like as well as some blocks that didn’t make the cut for the front of the quilt. One of them I accidentally made when I miscounted the number I had finished, so it was extra. One I made and decided it wasn’t going to work on the front. And the pinwheel block is what I made after I unpicked a block that had its directional prints going in the wrong directions for a chevron (but they were the right directions for a pinwheel).

They make a nice focal point on the back and a center strip between two matching side panels of the same two prints in opposite colors.

I even managed to get some of the salvages to show on one of the Daisy Bouquet prints from Denyse Scmidt’s Katie Jumprope collection. I do love when I can get a selvage to show on a backing.

I also really enjoy making a backing that is almost a second quilt top of its own. It’s like making a simplified quilt that I normally wouldn’t make on its own but that I like as a second face just fine. And the challenge of working in leftover pieces from the front can be really fun. Honestly, by the time I am ready to sandwich the quilt I don’t usually feel like taking the time to piece a backing, but I am always glad I did. Sometimes they are even may favorite part of the quilt!

Saturday, February 23, 2019

thread minding

keeping thread spools and the matching bobbins together is a concern for me. a few years ago i was excited to find out you could buy a type of pin to lock the two together while not in use.

unfortunately for me, the type i got (clover, i think) didn't fit my aurifil threads, which are the type i use most. i could get the bobbin to stay on the pin, but the pin didn't fit into the aurifil spool. i went ahead and used the ones i had by just placing them in the spools. they could get knocked off easily, but it sort of worked.


this weekend i was putting away fabric and noticed this funny little plastic contraption taped to on online order i received a while back. i wasn't sure what it was at first, then a lightbulb went off in my head and i tried it with my threads.


and hey presto, we have a fit. they hold together so well you can lift both by the end of the pin.

i found more on amazon (here) in a 40 pack. you can get more, but i found that amount to be sufficient. i don't know exactly what brand they are or what they're called as it was hard to identify that on amazon, there seemed to be several that looked the same but had different names, but the link will get you there. or search "bobbin thread holder clip". apparently you an also get them with some little clips that go around the bobbin to stop it from unwinding, but i didn't get those. i'm just really happy to have clips that work with my aurifils!

Tuesday, February 19, 2019

some groovy quilting


this old friend (also here) finally got quilted last night, and it only took a few hours. why didn't i do this before now? life, i guess.

since i've been working my way through finishing wips this year, i knew i would be getting around to this sooner or later. i just hadn't gotten there quite yet.


yesterday afternoon i sat down to have some "quilt time" with my younger girls. (this is when they all get out a quilt to lay on and i read aloud to them.) i decided to match my quilt i was snuggling under to the book cover i was reading from. our current read is the borrowers by mary norton, an old childhood favorite. i'm not sure how many times i read through the adventures of arrietty, pod, and homily as a child, but it was many, many times.

the cover reminded me of the colors in "groovy summer love letters", which has been waiting, basted, in the "to be quilted" pile for over a year. after reading under it, i decided i might as well put it under the fmq foot and get it done.


i chose the pretty peachy-pink aurifil #2415 to quilt it with in modern loops.

modern loops and i are still getting acquainted. it's a very easy, repetetive pattern to do. i just don't do it consistently the same.

i'm still deciding if i like the loops skinny or rounded, and how far apart to put them. and how high or low to do the crossover part. there are a surprising number of ways to vary this pattern.


i was extra careful on the quilting done on the light, bone-colored solid portions of the quilt. they show up a lot and are quite noticeable. 

the last time i did this pattern, i didn't have the rows intermingle with each other like i did this time, so that took a bit of getting used to. i wasn't prepared for how much the spacing of the very first set of loops i did would affect all the rows that came after.

i didn't even realize as i made that first row that i was varying my spacing that much. but i did. some are really widely spread and others were squished together so close it was hard to get the next set of loops inbetween them. after a few rows i began to adjust that by either making just a tiny loop when the spacing was too narrow or doing two loops in a row to fill in a too-large space.

this is definitely a very organically quilted quilt! it has lots of personality in the quilting.


my biggest goof came when i didn't start a row off in the right direction and the two rows didn't overlap the way they were supposed too.  oops.

i accommodated this by making a unique set of swirls between the two rows. i'm calling it a special design feature and leaving it at that.


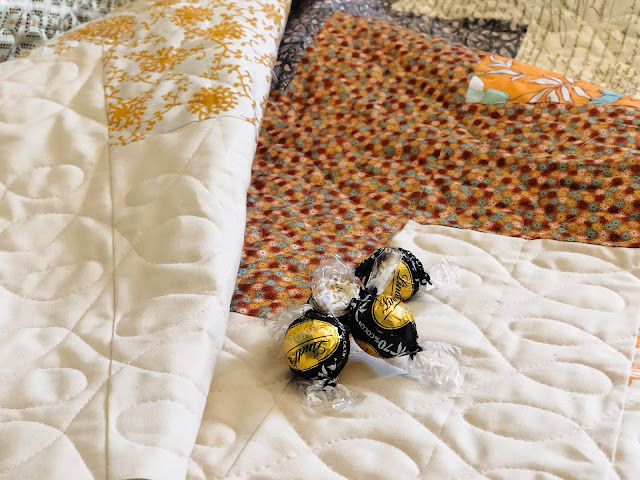
i had a few chocolate truffles along the way to help out, as well as first the soundtrack to "into the woods" playing, and then some jane austen on audible. lately, i really enjoy listening to stories as i work. and listening to a musical soundtrack is rather like listening to a story with the added benefit of being able to sing along. by the end of the evening i was done with the whole quilt, which isn't small.

i'm looking forward to revisiting this quilting pattern again very soon as i think i will use it on "maude's chevron peaks" next. as soon as i have it's backing made and get it basted, of course.

even though it's taken me a few years to get this plus quilt done, it was actually a very quick and easy make. i'll try to get the method/pattern for it posted sometime soon-ish. i actually have another one planned for a special fabric pull, so that shouldn't be too hard to get done.

maybe.

and maybe this time i'll get it done quick as a wink like it can be done.

Monday, February 18, 2019

chevron blocks


chevrons are so, i don't know, five years ago, right? but they are kind of classic, too. especially in a formation where they aren't creating a solid zig-zag pattern across the quilt.

they are also an incredibly easy block make. this quilt top (that i finally got around to completing after making the first 2 blocks about 4 years ago) went really, really fast.


if you are an experienced quilter, here's the quick explanation of how to make a 16" chevron block:

1. cut 2 - 9" squares of each of 2 fabrics in your block (4 total)
2. make 4 hsts from the blocks and trim to 8.5"
3. arrange the hsts in a chevron formation and join together

it's so easy.

the above quilt top, which measures 64" x 80", is composed of 20 chevron blocks in a 4 column by 5 row grid.


fabric requirements:

20 fat or skinny quarters (makes two of each block, 10 different styles total)
or
40 fat or skinny quarters (makes one of each block, 20 unique blocks)
or
2 - 9" sqs each of 40 fabrics (makes one of each block, 20 unique blocks)
or
2 layer cakes (makes one of each block, 20 unique blocks. layer cakes are 10" squares, so you will either make larger blocks or trim each piece down to 9" to start.)

as i was making a set of blocks, i decided to photograph the process with my phone. the pictures are not pretty or of high, professional quality but if you need more detailed instructions and photos to guide you along the way, here you are:

cut 2 - 9" squares of both fabrics for the block: your chevron and your background
(i had already sewn the squares together when i decided to photograph the process, so ignore the seams for a bit.)

my two fabrics, each cut into 2 - 9" squares and made into pairs of 1 sq each fabric.

place the fabrics in pairs, one of each per pair. put them right sides together.

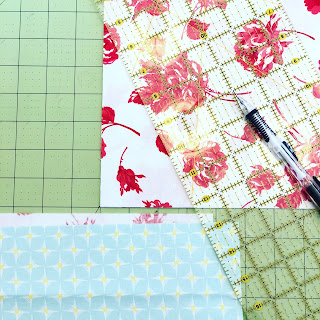
on the backside of one square, draw a diagonal line from one corner to the opposite corner with a pencil (or your choice of marking tool). i generally do this on the lighter fabric so it's easier to see.

using the pencil mark as your guide, sew a 1/4" seam on each side of the pencil mark, diagonally from corner to corner.


after i sew the seams, i like to give a quick press to the fabrics to smooth them out before cutting. there is usually a tiny bit of rippling no matter what foot or what speed i use, so i like to do the quick press. above, the top block has been pressed and the bottom one has not.

with a ruler lined up along the diagonal marking line, cut the squares in half diagonally between the set of seams.

you can see the seam is a scant 1/4" off the cut.

press the seam open to both sides.

with the hst blocks you get a lot of bulk where all the intersecting seams meet, which can make the quilting difficult, as well as produce the annoying little bulges felt in the quilt when it's finished. for this reason, i choose to press these seams open rather than to the side.

also, i like to use the "floppy book method" to help my seams lie flat.

as soon as i've opened the seams, i will lay an old phone book or a couple paperback quilting books on top of the block and let it stay for at least 30 seconds or so. i let it sit while i'm working on the next block or until i'm ready to trim them all.

when all four blocks are pressed, trim them to 8.5".

this is a step that helps with accuracy, particularity because we have slightly overcut the size of squares needed to produce the hst.

i use my 9.5" square ruler for trimming these blocks. any sq ruler 8.5" or larger would work. if you don't have any large sq rulers, you could also just measure using whichever ruler you use to make your large cuts (presumably 6" x 24" or some such), you'll just not be able to do it in the manner shown here.

place the sq ruler on top of the quilt block so that the diagonal line on the ruler is lined up with the diagonal seam of the block, and the corner opposite where you want to cut is near the 8.5" mark lines.

also check all the perimeter lines of the block to assure that you have fabric up to or past each of these lines. you might have to slide the block along the diagonal line a bit or make some other adjustments.

from where i'm standing, i'm going to make a cut along the top of the ruler, and also along the left side, past my hand. my cutting table is small enough that i can maneuver around it in this manner without being at an awkward angle for cuts. you can see that i have the bottom and right sides of the block aligned with the 8.5" lines and there is a little fabric poking out on the opposite two sides for me to trim off.

when you have made those two trims, either move the block around or flip the ruler around to the opposite corner. once again, line everything up and trim. my cutting space allows me to just move to the oppsosite side of the table to cut the right and bottom sides, but you may need to move the block under the ruler instead so that you can comfortably make the cuts.

or, you may need to adjust and turn the block each time you make the 4 different cuts. whatever your space requires.


when all 4 blocks are trimmed up, place them in a chevron configuration. if you look at it, this is actually two flying geese blocks with the fabrics opposite of each other.

the fabric you want to be your chevron should be on the inside forming the triangle (geese) on the top block and your background fabrics form the triangle (geese) on the lower block.


put your blocks right sides together and lined up on all edges, then sew a 1/4" seam on the right side.

for the first set of blocks, you will be sewing along the seam where the chevron fabrics are touching each other and the diagonal line moves away to the left. the next pairing will look exactly the opposite of this with the background fabrics touching instead.

i chain piece the blocks, meaning i just put the next block in and sew it without cutting the threads in between. if you have all your blocks precut and trimmed because you are working in batches, you could easily chain piece the whole top this way at once.

once the two component parts are sewn, press the seams open to both sides.

lay the block out again so you can see your chevron in the configuration you desire, then flip either the top down or the bottom up so that you have right sides of fabric facing each other.


line the two pieces up at the center seams and pin through the seam.

i'm not much of a pinner, as you can tell since i haven't pinned yet. but i do pin at this juncture to try to get my points just right.

sew the center seam together.

press open the center seam as well.

i didn't photograph it, but i do use the "floppy book method" after each pressing. also, after i have pressed open on the back, i flip the block over and press from the front, then lay the books on the block.


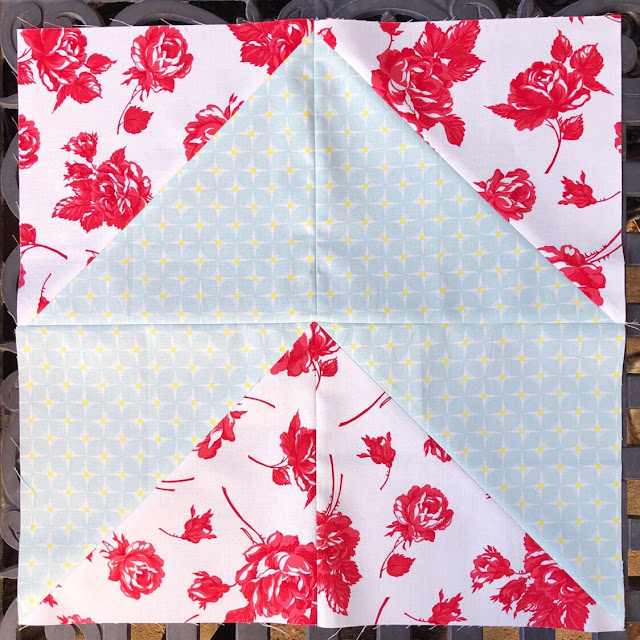
now you have a completed 16" chevron block.

(of course, when you have sewn it together but not with the other blocks, it measures 16.5". )

for the quilt i am making, i made 20 blocks, laid out in a 4 x 5 block grid.


there is a trick to getting your directional prints to match in a chevron block. you can see how to do that here. and when the quilt is complete, i'll talk more about my fabric choices and pairings.

directional prints in a chevron block


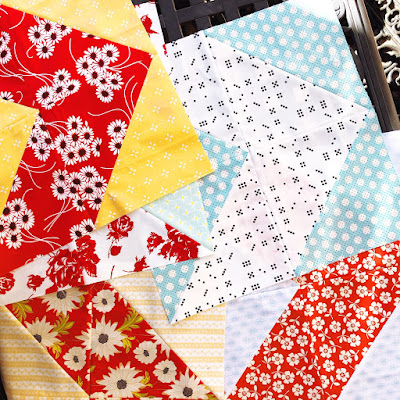
when i got back to making my chevron blocks (after 4 years of 2 blocks hanging on the design wall), i found 2 squares of that yellow stripe fabric already cut and hanging on the design wall with the 2 blocks i had already completed.

i pulled a fabric i wanted to pair with the stripe from the stack of fabrics i had selected for the project, and without thinking too much got to work making the hsts for the chevron block.

everything was going really well until i began to arrange the 4 hst blocks into the chevron formation and realized i hadn't taken the directionality of the stripe into consideration when making the hsts. ugh.

i searched and searched the mountains of fabric in my sewing room, certain i had more of that yellow stripe somewhere. but to no avail. there was no choice but to put the block together with the stripes going in different directions.


this especially perturbed me because the red daisy fabric is a favorite old print from sandi henderson's meadosweet line. it's been out of print for a while. fortunately, i am plenty stocked on it. but i didn't want to unpick the block and redo all those bias seams on the hsts. i hoped the stripe was pale and subtle enough that it wouldn't stand out and that it wouldn't bother me. however, the longer i looked at that block as i worked on the rest for the quilt, the more it did bother me. so i will be unpicking it and making a pinwheel block out of it to use on the back of the quilt instead. i found a different yellow stripe to pair with the red daisy print and made a new block for the quilt top.

and, by playing around a bit, i figured out how to get the directional prints all going in the right direction. it's very simple, really.


when you are marking the fabric with the diagonal line to form the hst pairs, simply draw the diagonal lines in opposite directions across the directional print on the pairs, as seen above.


this will give you exactly what you need. simple, right?


if you happen to have 2 directional prints, it's a little more complicated, but not much.

you still start by marking the two fabrics with opposing diagonal lines, like above.

then it sort of depends on which way you want your two directionals to run against each other. this will be slightly different with each set of fabrics. basically, it requires turning the print you aren't marking a quarter turn from where you have it placed in the first pairing.

i didn't photograph this as i never fully perfected it in my mind, but i found if i simply made one pair of the blocks first, then i could figure out what was needed for the second set by laying the pair together, right sides facing, and peeling back the corners along the diagonal line to see how the blocks were going to turn out.

(these aren't directional prints, but you can see what i mean about peeling the corners back to see what your block is going to look like.)

by comparing the already made blocks to the second set i was about to sew, i could see which way i needed to turn the fabrics to get the desired blocks. just play around with it and you'll see. you definitely still need to draw the lines in opposing directions on the first fabrics that you are marking. once you've drawn those, go from there.


i was SO very happy to get this block right! and the stripes even lined up nicely.

now the question is, does this work the same for other blocks that utilize 4 hsts, like the pinwheel? i should know as i just made a pinwheel quilt, too, but i really can't say. i'll let you know when i unpick that first daisy and yellow stripe block to make a pinwheel.