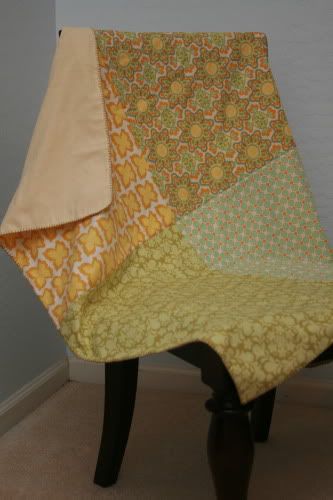
lest anyone think all i ever sew is blankets and the occasional quilt, which has been true lately, i'm sharing my weekend sewing with heather ross.
last night while the girls were in the shower, i was browsing, looking at the baby bloomers pattern heather just featured on martha stewart's show and seeking something small and simple to sample out.
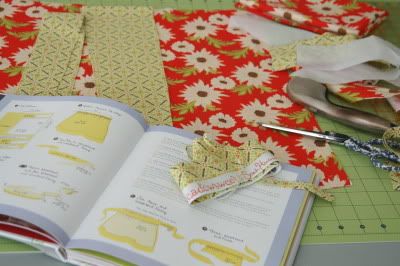
i'm using some sandi henderson original meadowsweet to try out the hostess apron. got it all cut last night during splish, splash, stash time. maybe i'll get it sewn tonight.
happy weekend and happy sewing!
Saturday, March 5, 2011
4sq blanket no. 6
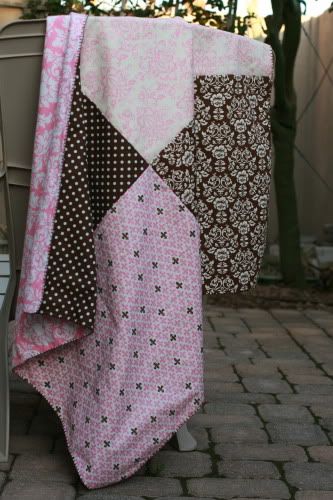
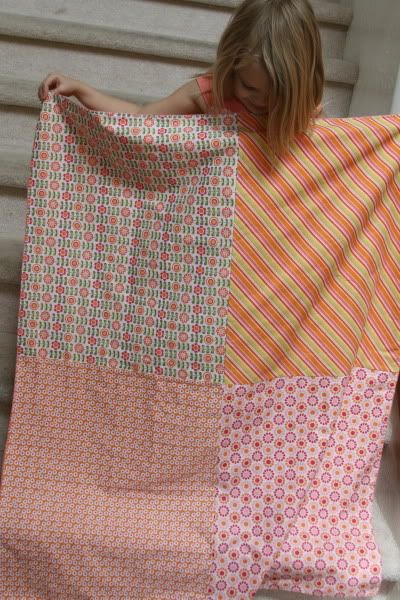
just four days after completing no. 5 and one hour before the baby shower, i got heidi ryan's baby blanket finished. phew! that was some self-imposed pressure. even though i had dinner to get on before i left for the shower, i took a few moments to photograph the results. i tried shooting outside, but the light was getting low and i'm not too happy with the way the colors show.
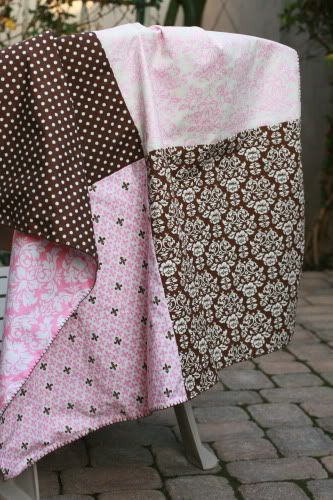
i loved these fabrics! i thought they were all from the same robert kauffman collection, but there was some freespirit in there, too. really bad lighting, dang! they are such pretty cotton-candy pinks and dark chocolate browns. this time there was actually a coordinating flannel in the same collection the pink came from.
the only thing i'm a tiny bit worried about, which i didn't notice til i got them home and started sewing, but the flannel is not two-sided. the two-sided flannels cling to the cotton front and there's no need to tie or quilt the pieces together normally. i'm not sure how this will bear out. they seemed alright when handling the blanket. hope it works!
i tried a new styling set-up for shooting the blanket. which do you like better? if i hadn't been so pressed for time, i would have grabbed a nice inside dining chair rather than the crummy looking plastic adirondack on the patio (which looks decent from the front, but not good here.)
this blanket was a bit more wonky in parts than others, mostly because i was rushed making it. i think it was partly cursed since i was trying to shoot the process for the tutorial, too. you always make mistakes when you're trying to show someone else what to do. however, it looks well, if not perfect, overall and i got tons of compliments at the shower. the nice fabrics really carry it and hide the imperfections and handmade charm.
i read somewhere this week, maybe in material obsession?, that mistakes and imperfections personalize a project. nice thought, wonderful philosophy! i think i'll add it to my sewing mantras. scrapbooker ali edwards taught me "it is okay." and i've decided on my own "wonky is nice." all part of the fun, no?
i loved these fabrics! i thought they were all from the same robert kauffman collection, but there was some freespirit in there, too. really bad lighting, dang! they are such pretty cotton-candy pinks and dark chocolate browns. this time there was actually a coordinating flannel in the same collection the pink came from.
the only thing i'm a tiny bit worried about, which i didn't notice til i got them home and started sewing, but the flannel is not two-sided. the two-sided flannels cling to the cotton front and there's no need to tie or quilt the pieces together normally. i'm not sure how this will bear out. they seemed alright when handling the blanket. hope it works!
i tried a new styling set-up for shooting the blanket. which do you like better? if i hadn't been so pressed for time, i would have grabbed a nice inside dining chair rather than the crummy looking plastic adirondack on the patio (which looks decent from the front, but not good here.)
this blanket was a bit more wonky in parts than others, mostly because i was rushed making it. i think it was partly cursed since i was trying to shoot the process for the tutorial, too. you always make mistakes when you're trying to show someone else what to do. however, it looks well, if not perfect, overall and i got tons of compliments at the shower. the nice fabrics really carry it and hide the imperfections and handmade charm.
i read somewhere this week, maybe in material obsession?, that mistakes and imperfections personalize a project. nice thought, wonderful philosophy! i think i'll add it to my sewing mantras. scrapbooker ali edwards taught me "it is okay." and i've decided on my own "wonky is nice." all part of the fun, no?
Thursday, March 3, 2011
new sewing books
my book stash is far larger than my fabric stash since it's a much older obsession. beautifully photographed craft and sewing books with fantastic projects get me every time. i just got these in the mail:
wonderful! a taste of the modern quilting movement grounded in tradition. i'm definitely going to use it to help me pick out my fabrics for my upcoming quilt class. i've never really liked the snowball block before, but i did like elizabeth's. fabric selection makes such a difference in a quilt! see it here.
i've heard of these australian ladies and was interested in reading about their theory. some really wild quilting going on here! maybe not completely my style, but very interesting and lots i can adapt. i believe there is always something to learn from other crafters, even if your tastes and styles are hugely different. take what they can teach you and make it fit your own preferences. see them here and here.
seems like every designer and blog writer out there is publishing books these days. i've now ordered these tasty bites:
scheduled to ship late april, this is a pre-order. i ordered it here. you can read more about it on the author, jennifer paganelli's blog, sis boom.
classic children's clothing. see it here. i saw some pictures of the project's inside on amazon. looks lovely! i'll let you know when it comes.
i've been waiting for this one from oliver + s! more classic kids' clothing and accessories patterns. so much to love. you can't click on it above (that came with the image i copied), see it here.
this one looks eclectic and funky. see it here. i checked out her blog and it's fun stuff.
this one looks like a really great one for kids, with lots of instruction to help them get started. i have one who loves to sew, but she needs help with technique. i love that she tackles sewing all on her own and often, but i would like to see her work on improved stitching for more durability and skills such as sewing on the wrong side and turning the project inside out. this looks like it's going to help! see it here. at b&n, you can look inside.
there are few simple things that delight me more than a box full of books in the mail!
a word about my ordering. i am a loyal barnes & noble customer. i've had fantastic service from them for several years running now. their selection is basically unlimited. on-line prices are really good and you get free shipping for orders over $25, which is just one or two of these books. returns are a snap - just take the book and your order form into your local store. i have never ordered from amazon before, but seems to me that all these books are priced well at b&n, except the sewn with love, which is only 10% off. girls' world was even slightly cheaper with them. just so you know!
wonderful! a taste of the modern quilting movement grounded in tradition. i'm definitely going to use it to help me pick out my fabrics for my upcoming quilt class. i've never really liked the snowball block before, but i did like elizabeth's. fabric selection makes such a difference in a quilt! see it here.
i've heard of these australian ladies and was interested in reading about their theory. some really wild quilting going on here! maybe not completely my style, but very interesting and lots i can adapt. i believe there is always something to learn from other crafters, even if your tastes and styles are hugely different. take what they can teach you and make it fit your own preferences. see them here and here.
seems like every designer and blog writer out there is publishing books these days. i've now ordered these tasty bites:
scheduled to ship late april, this is a pre-order. i ordered it here. you can read more about it on the author, jennifer paganelli's blog, sis boom.
classic children's clothing. see it here. i saw some pictures of the project's inside on amazon. looks lovely! i'll let you know when it comes.
i've been waiting for this one from oliver + s! more classic kids' clothing and accessories patterns. so much to love. you can't click on it above (that came with the image i copied), see it here.
this one looks eclectic and funky. see it here. i checked out her blog and it's fun stuff.
this one looks like a really great one for kids, with lots of instruction to help them get started. i have one who loves to sew, but she needs help with technique. i love that she tackles sewing all on her own and often, but i would like to see her work on improved stitching for more durability and skills such as sewing on the wrong side and turning the project inside out. this looks like it's going to help! see it here. at b&n, you can look inside.
there are few simple things that delight me more than a box full of books in the mail!
a word about my ordering. i am a loyal barnes & noble customer. i've had fantastic service from them for several years running now. their selection is basically unlimited. on-line prices are really good and you get free shipping for orders over $25, which is just one or two of these books. returns are a snap - just take the book and your order form into your local store. i have never ordered from amazon before, but seems to me that all these books are priced well at b&n, except the sewn with love, which is only 10% off. girls' world was even slightly cheaper with them. just so you know!
Wednesday, March 2, 2011
our obsessions
my husband has gone just about as crazy about this:
that's having our kids play soccer and coaching them
as i have gone about this:
that's having our kids play soccer and coaching them
as i have gone about this:
which is quilting . . .
. . . and of course all things fabric and sewing.
i've just signed up for quilting 101 at scrapbooks, etc again for the month of april. four monday mornings, 10:30am to 1:30 pm, and you have a complete quilt. it's accessible to absolute beginners. louise is a wonderful teacher. anyone local want to join me?
as for soccer, my husband has just signed on (and this time agreed to coach) our oldest son for our fourth straight season in a row. he's killing me! we've done one child in soccer, one season a year for several years now. last fall began the craziness with three children in soccer. well, it was only for two months, so it was alright. then his brother talked him in to signing up two of the little ones for winter and he added the oldest two, also. one of them had to drop that season because of scheduling conflicts, so he told her she could play again with her old team in the spring. and, what the heck, so could her brother. winter and spring were in two different leagues, so they've overlapped for a few weeks. and now he just agreed to coach for league no. 2's spring season. did you follow all that? dizzy? imagine how i feel trying to keep up with practices and games. the mr. tells me he just loves watching our kids play and spending time with them as he coaches them.
fair enough. i'll just quilt & sew while he's busy on the soccer field. maybe sooner or later we'll both come to our senses.
4 sq blanket no. 2
my second 4sq blanket was for my cousin michelle's first baby, emma. michelle is 15 years younger than i am. i remember her well as a little 3 year old girl who gave up her bedroom so i could live with her family my freshman year of college. now she's a mommy. crazy how life does that, isn't it?
me, 3 of my seesters, and michelle at her baby shower. i come from a family of tall women, me the exception. (ugh about the lighting there that day! forgot my big flash and had to make do with the on-camera one. i love pretty lighting, but i also say "better a picture than no picture at all.")
i did a big no-no and took the blanket to the shower unfinished. i'd decided to go to the shower last minute and was only able to get it sewn together, not edged, though. michelle didn't mind, but i made a vow never to do that again. i got tons of compliments on the blanket anyway. some of my aunt's friends said how well i'd matched up the center seams and wasn't that hard to do? i had no idea what they were talking about. it was a total fluke i'd gotten the seams correct.
my aunt lynn was working on this cute crib quilt for her first granddaughter. she'd just gotten a long arm quilting machine. i think we're going to be spending more time together soon.
i finished up the blanket within the week and delivered it to michelle. i really love these fabrics. i better get some more to keep for myself.
soft baby pink flannel for the back, green floss for the blanket stitch. i still didn't know anything about squaring fabrics and i had some unevenness when i got to the closing seam of this blanket. but i was able to tuck it in and blanket stitch over it in a way that you can't really tell. it reminded me that if you make a mistake, just figure out a way around it. seems like you almost always can.
and as a sweet side note, the other day i was talking to michelle at a family party. when i asked about emma, her husband whipped out his cell phone to show me a current picture. there was a cute baby girl, grinning ear to ear, coincidentally wrapped up in the blanket i made for her. warmed my heart to see that.
me, 3 of my seesters, and michelle at her baby shower. i come from a family of tall women, me the exception. (ugh about the lighting there that day! forgot my big flash and had to make do with the on-camera one. i love pretty lighting, but i also say "better a picture than no picture at all.")
i did a big no-no and took the blanket to the shower unfinished. i'd decided to go to the shower last minute and was only able to get it sewn together, not edged, though. michelle didn't mind, but i made a vow never to do that again. i got tons of compliments on the blanket anyway. some of my aunt's friends said how well i'd matched up the center seams and wasn't that hard to do? i had no idea what they were talking about. it was a total fluke i'd gotten the seams correct.
my aunt lynn was working on this cute crib quilt for her first granddaughter. she'd just gotten a long arm quilting machine. i think we're going to be spending more time together soon.
i finished up the blanket within the week and delivered it to michelle. i really love these fabrics. i better get some more to keep for myself.
soft baby pink flannel for the back, green floss for the blanket stitch. i still didn't know anything about squaring fabrics and i had some unevenness when i got to the closing seam of this blanket. but i was able to tuck it in and blanket stitch over it in a way that you can't really tell. it reminded me that if you make a mistake, just figure out a way around it. seems like you almost always can.
and as a sweet side note, the other day i was talking to michelle at a family party. when i asked about emma, her husband whipped out his cell phone to show me a current picture. there was a cute baby girl, grinning ear to ear, coincidentally wrapped up in the blanket i made for her. warmed my heart to see that.
Tuesday, March 1, 2011
4sq tutorial, part two
once your fabrics are nicely pressed, you have two options for cutting. if you own a cutting mat, rotary cutter, and quilting rulers and are comfortable squaring off fabric this way, then square each fat quarter piece to approximately 18" x 21", or whatever similar size you can get out of your fat quarter.
if you don't have these cutting tools or don't know how to use them to square fabric, you can simply get some large paper (or tape some together) and use a ruler to draw yourself a pattern piece of a square that measures 18" x 21". pin your pattern piece to your squared fat quarter and carefully cut out the square. you won't get it as precise as using the rulers and rotary cutter, but it will be good enough for this blanket. remember, small imperfections are part of handmade's charm.
now you are ready to sew!
lay out your four squares in an arrangement that is pleasing to you. then pick the top left hand quarter and lay it face down on the top right hand quarter.
you want the "right" side of each fabric touching the other one. pin them together along the left side where they will be sewn together, if you are not comfortable sewing unpinned pieces. once you have them pinned together, flip them over so the bottom piece is now on the top.
if you don't have these cutting tools or don't know how to use them to square fabric, you can simply get some large paper (or tape some together) and use a ruler to draw yourself a pattern piece of a square that measures 18" x 21". pin your pattern piece to your squared fat quarter and carefully cut out the square. you won't get it as precise as using the rulers and rotary cutter, but it will be good enough for this blanket. remember, small imperfections are part of handmade's charm.
now you are ready to sew!
lay out your four squares in an arrangement that is pleasing to you. then pick the top left hand quarter and lay it face down on the top right hand quarter.
you want the "right" side of each fabric touching the other one. pin them together along the left side where they will be sewn together, if you are not comfortable sewing unpinned pieces. once you have them pinned together, flip them over so the bottom piece is now on the top.
sew the two pieces together along the right side of the fabric, using a 1/4" seam allowance.
when your seam is complete, lay the fabric down on your ironing board, darker material on top, seam away from you. heat up the seam by pressing along it for about 5 seconds in each spot, moving down the seam until all of it has been heated. heating the fabric like this makes it easier to manipulate.
once you've heated the seam, open it up and press it flat. use your iron's nose to push the fabrics apart, giving you as much available area out of your fabric as possible. before i knew to press as fully open as i could get my seam, i used to think that nice little lip hid the seams wonderfully. turns out you're supposed to get it as open as possible. go for it - no fat lips. (there is a good reason for this, i just don't remember what it was. but i'm not being a stickler about an arbitrary rule.)
if you look closely, this seam has the fat lip and isn't fully open.
see how i can still pull it a bit further open?
use that nose to gently nudge it all the way open.
when your top two pieces are sewn together and pressed, do the bottom two panels. again, flip the bottom left panel over onto the right panel, right sides of fabric facing together.
pin and flip panels again. sew along the right seam with a 1/4" seam allowance. press the seam open.
next, lay out the top panel and the bottom panel. flip the bottom panel on top of the top panel. line up your seams as follows:
you want the seams you already made on the two panels to line up right next to each other so you have a nice meeting of the seams in the center of your blanket top. here i've shown them a bit offset so you can see what i'm talking about. the bottom piece (brown) of the fabric placed on top is butted up right against the top piece (brown) of the panel laying on the bottom.
wow, all the bottoms & tops are rather confusing. hope you got that. it's really not that complicated, i'm just trying to be very clear, which may actually confuse you!
if you were to pick up the materials, this is what i looks like from the side. get that line created when you sewed your panels together to match up. that's all i'm saying.
now pin those seams together and then pin up and down the side to the ends. your top is one seam away from finished. sew the panels together with a 1/4" seam allowance.
at this point, if your pieces are not the same size as each other while it's still folded in half (which could happen for a great number of reasons) then go ahead and trim off any excess that might be on any side.
then open up the blanket top and press your seam open.
getting your backing on is next!
Monday, February 28, 2011
5th 4sq completed
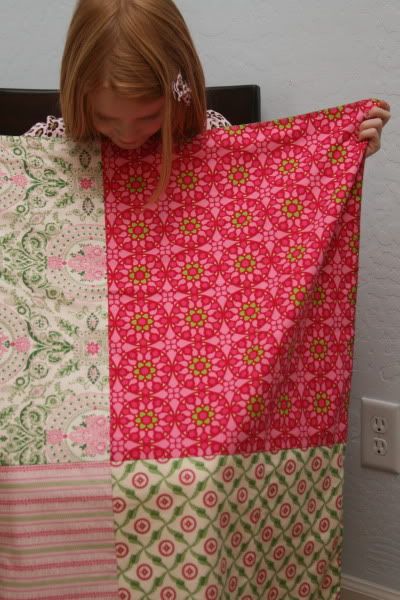
no. 5 was my first blanket made for a non-family member. i think it's my favorite so far. i adore those meadowsweet 2 fabrics by sandi henderson that i used. looking at them while doing the handstitching on the edges was such a pleasure. in a way, i'm a bit sad to pass it on. it makes me think i better stock up on some more meadowsweet.
i forgot to turn the corner so you can see the back. i used a soft yellow that may or may not have been in the fabrics' palette, but it coordinated well. i wanted to use the dark celery color in the prints to edge the blanket, but couldn't find a perfect match in floss. so i settled for another dark khaki kind of green that complimented the print.
a better look at it laid out flat. i'm still working on how to best display these for photos. and working on my product-type shots period. people i'm comfortable with. my stuff photography needs work.
a close up of the dreamy meadowsweet 2 prints and colors. very nice! and my seam matching is pretty dang good, too. if i do say so myself.
assistants for blog updates
tonight while trying to post and work on parts of this blog, i have not just one, but two visitors sharing the chair with me. mommy first, blogger and sewer second. i find it amusing to take some self timer photos of the situation. it captures the chaos of the moment pretty well, i think.
one already behind me
inviting the other onlooker in
now i have one in my lap to type around
the more the merrier? not getting much accomplished on the blog front, but it's fun trying. i'm adding a glossary of sewing terms page, rearranging the 4 sq blanket page, and working on the next part of the tutorial. all with lots of help from these ladies!
one already behind me
inviting the other onlooker in
now i have one in my lap to type around
the more the merrier? not getting much accomplished on the blog front, but it's fun trying. i'm adding a glossary of sewing terms page, rearranging the 4 sq blanket page, and working on the next part of the tutorial. all with lots of help from these ladies!
4sq blanket no. 1
my first personal attempt at a 4 square blanket was for my niece, liberty. with her adorable name, i knew she'd probably be getting her fair share of red, white, and blue items over her lifetime, so i chose these bold & sassy riley blake fabrics i had in my stash. i didn't know a thing about squaring fabrics or seam allowances or any of that stuff. i didn't even have a pattern. i just gave it my best guess and everything worked out well.
the orange flannel i got for the back was not an exact match, but it was close enough. i chose pink floss for the blanket stitch. i have to laugh at my stitching in spots - i didn't exactly get the size of the stitches consistent. but that's okay.
all wrapped and ready to gift. i like to roll the blanket up in a way that all four fabrics are showing.
when my kids saw the blanket, they said, "that's not a liberty blanket. it's not the right colors!" fortunately, my s-i-l disagreed and loves the blanket. her orange loving best friend is totally jealous, too.
the orange flannel i got for the back was not an exact match, but it was close enough. i chose pink floss for the blanket stitch. i have to laugh at my stitching in spots - i didn't exactly get the size of the stitches consistent. but that's okay.
all wrapped and ready to gift. i like to roll the blanket up in a way that all four fabrics are showing.
when my kids saw the blanket, they said, "that's not a liberty blanket. it's not the right colors!" fortunately, my s-i-l disagreed and loves the blanket. her orange loving best friend is totally jealous, too.
4sq blanket tutorial, part one
as i'm starting my sixth 4sq blanket, i'll be photographing the process and sharing the "how to" with you. it'll come in bits and pieces as i work on the blanket, but since it must be completed by thursday night, it shouldn't take too long. i'll be writing for the complete beginner, with lots of details that i hope will answer any questions you might have. if something is not clear, please let me know!
first, we'll start with supplies.
you'll need 4 coordinating fat quarters of 100% cotton material for the front
one yard of coordinating cotton flannel for the back
thread
two skeins of embroidery floss for the blanket stitching around the edges. (there are two different colors of floss here only because i was debating which to use. any thoughts?)
if your fabric source doesn't sell fat quarters, you can get 1/2 a yard and cut it in half across the width. you'll then have two fat quarters. normally, when you purchase fabric off the bolt, a 1/4 yard would be cut skinny along the length, from selvage to selvage, measuring 9" by wof (width of fabric), which is commonly 45" or so. but a fat quarter is 1/2 a yard cut in half across the wof so it measures 18" by 1/2 wof. you get the same area, just arranged differently.
on the left is a fat quarter, on the right is a traditionally cut 1/4 yard. you can see a fat quarter is half the length, twice the width. it's short and fat, hence the "fat" quarter.
everyone understand what a fat quarter is now and how to make one if you can't buy it cut that way? good.
step number two once your supplies are assembled will be to prepare the fabric.
at this point, the debate to "wash or not wash" comes in. there's lots of people on both sides of the fence. i've even done both with this blanket. i prefer working with unwashed materials. the theory is that prewashing preshrinks the fabric, saving possible problems later. unwashed fabric is easier to work with. the blankets i've made all used premium fabrics, so there wasn't a problem with shrinkage after washing. totally up to your personal preference. i like quilter carrie nelson's compromise. when she presses all fabric before using, she makes sure to steam them. this causes fabrics that will shrink to shrink some before you start without having to wash them. that's what i do.
so if you have all materials ready, steam press your fabrics, then square them off with your rotary cutter or make a paper pattern and cut them out. i'll explain how to do that next! go get your stuff and press it, then see me back here.
first, we'll start with supplies.
you'll need 4 coordinating fat quarters of 100% cotton material for the front
one yard of coordinating cotton flannel for the back
thread
two skeins of embroidery floss for the blanket stitching around the edges. (there are two different colors of floss here only because i was debating which to use. any thoughts?)
if your fabric source doesn't sell fat quarters, you can get 1/2 a yard and cut it in half across the width. you'll then have two fat quarters. normally, when you purchase fabric off the bolt, a 1/4 yard would be cut skinny along the length, from selvage to selvage, measuring 9" by wof (width of fabric), which is commonly 45" or so. but a fat quarter is 1/2 a yard cut in half across the wof so it measures 18" by 1/2 wof. you get the same area, just arranged differently.
on the left is a fat quarter, on the right is a traditionally cut 1/4 yard. you can see a fat quarter is half the length, twice the width. it's short and fat, hence the "fat" quarter.
everyone understand what a fat quarter is now and how to make one if you can't buy it cut that way? good.
step number two once your supplies are assembled will be to prepare the fabric.
at this point, the debate to "wash or not wash" comes in. there's lots of people on both sides of the fence. i've even done both with this blanket. i prefer working with unwashed materials. the theory is that prewashing preshrinks the fabric, saving possible problems later. unwashed fabric is easier to work with. the blankets i've made all used premium fabrics, so there wasn't a problem with shrinkage after washing. totally up to your personal preference. i like quilter carrie nelson's compromise. when she presses all fabric before using, she makes sure to steam them. this causes fabrics that will shrink to shrink some before you start without having to wash them. that's what i do.
so if you have all materials ready, steam press your fabrics, then square them off with your rotary cutter or make a paper pattern and cut them out. i'll explain how to do that next! go get your stuff and press it, then see me back here.
Friday, February 25, 2011
mommies multi-task
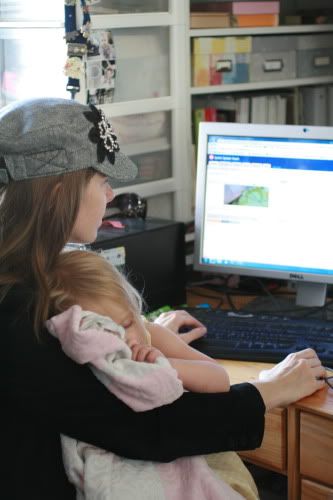
a few years ago i started doing my online writing without caps because i was often on the computer answering emails while trying to nurse a baby. it just simplified life a bit for me. the habit stuck and still comes in useful, especially when i'm required to do some holding and typing simultaneously.
there's nothing like being a mom. it comes first in my book. but sometimes it's nice to be able to do small mommy tasks at the same time i'm doing something i wanted to do for me. i'm always up for a cuddle with a sweet little warm body while i type a blog post. for a while i've brought reading with me while i sit by the tub and the kids bathe. now of course, my sewing table is right there and i sew while they get clean. being a hobby photographer and a mom goes together perfectly, too. what more beautiful, motivating subjects could you find than your own kids?
moms are pretty good at multi-tasking, even when it's not combining fun with work. but there are always the times when we have to stop our tasks and focus on the children, even if it's just for a snuggle when they're sleepy or when they need a story. i don't want them to think i'm not available when they need me or that they are less important than what i'm doing. sewing is not compatible with baby holding. that's when i have to put their needs first and put the stitching down. reminding myself how fast my motherhood years have already flown by and how short are those left helps me shift my focus back to them.
i just read a quote from the famous english preacher and hymn writer, john newton, author of amazing grace. he was constantly interrupted by parishioners needing his assistance. he said something to the effect that "when i hear that knock on my door, i know God is going to teach me something." i'm as guilty as anyone of ignoring my kids at times or getting grumpy and frustrated when they interrupt my creative flow. i'm trying hard to teach myself not to be.
designer heather ross just posted a funny description of her dog's reaction when time slips away from her and he feels neglected. she's pregnant with her first baby. i wonder how she'll cope with mommy multi-tasking? we all have to find our way to a balance that's right for us. congratulations and good luck to heather. i'm sure she'll be brilliant with mommy multi-tasking just like she is with all her other creative pursuits. can't wait to see her new children's book!
there's nothing like being a mom. it comes first in my book. but sometimes it's nice to be able to do small mommy tasks at the same time i'm doing something i wanted to do for me. i'm always up for a cuddle with a sweet little warm body while i type a blog post. for a while i've brought reading with me while i sit by the tub and the kids bathe. now of course, my sewing table is right there and i sew while they get clean. being a hobby photographer and a mom goes together perfectly, too. what more beautiful, motivating subjects could you find than your own kids?
moms are pretty good at multi-tasking, even when it's not combining fun with work. but there are always the times when we have to stop our tasks and focus on the children, even if it's just for a snuggle when they're sleepy or when they need a story. i don't want them to think i'm not available when they need me or that they are less important than what i'm doing. sewing is not compatible with baby holding. that's when i have to put their needs first and put the stitching down. reminding myself how fast my motherhood years have already flown by and how short are those left helps me shift my focus back to them.
i just read a quote from the famous english preacher and hymn writer, john newton, author of amazing grace. he was constantly interrupted by parishioners needing his assistance. he said something to the effect that "when i hear that knock on my door, i know God is going to teach me something." i'm as guilty as anyone of ignoring my kids at times or getting grumpy and frustrated when they interrupt my creative flow. i'm trying hard to teach myself not to be.
designer heather ross just posted a funny description of her dog's reaction when time slips away from her and he feels neglected. she's pregnant with her first baby. i wonder how she'll cope with mommy multi-tasking? we all have to find our way to a balance that's right for us. congratulations and good luck to heather. i'm sure she'll be brilliant with mommy multi-tasking just like she is with all her other creative pursuits. can't wait to see her new children's book!
Subscribe to:
Posts (Atom)